How to find Google account Client ID and Client Secret key?
Follow below mentioned steps to get your Google Client ID and Secret Key:
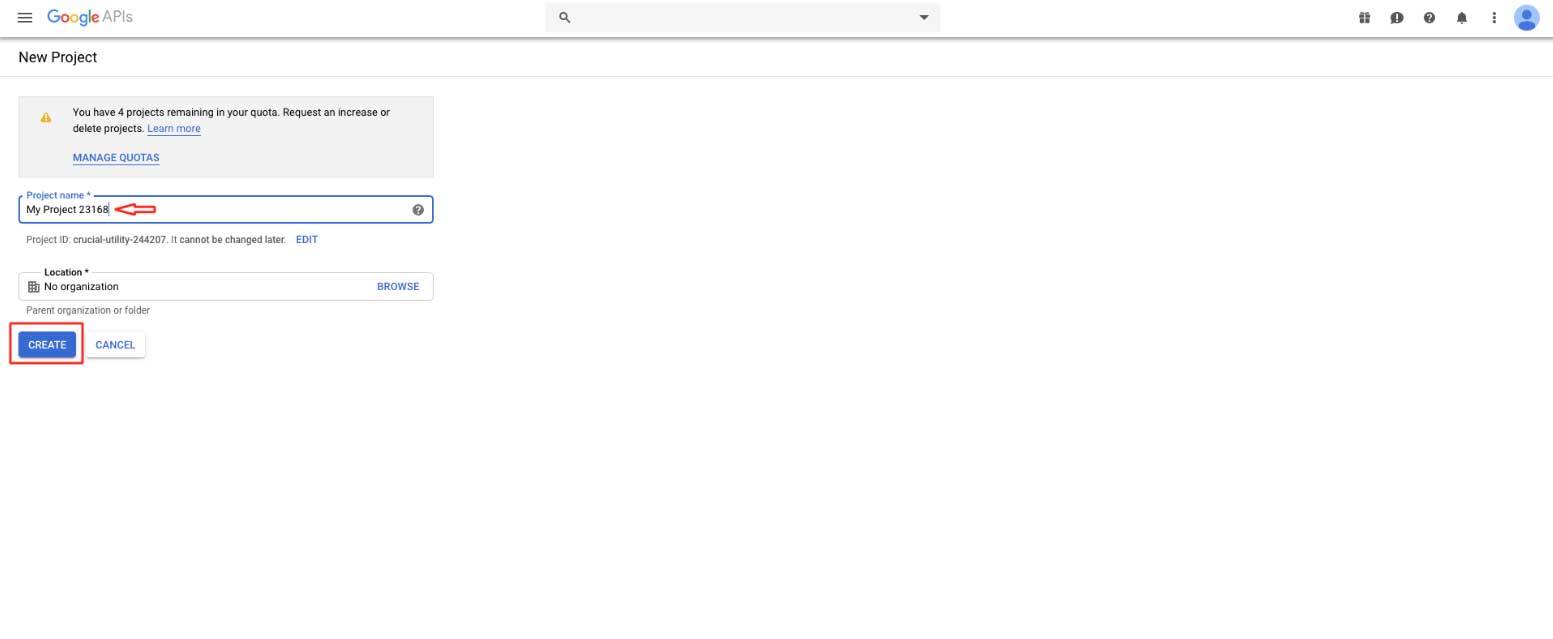
Step 1 : Go to Google Developer portal
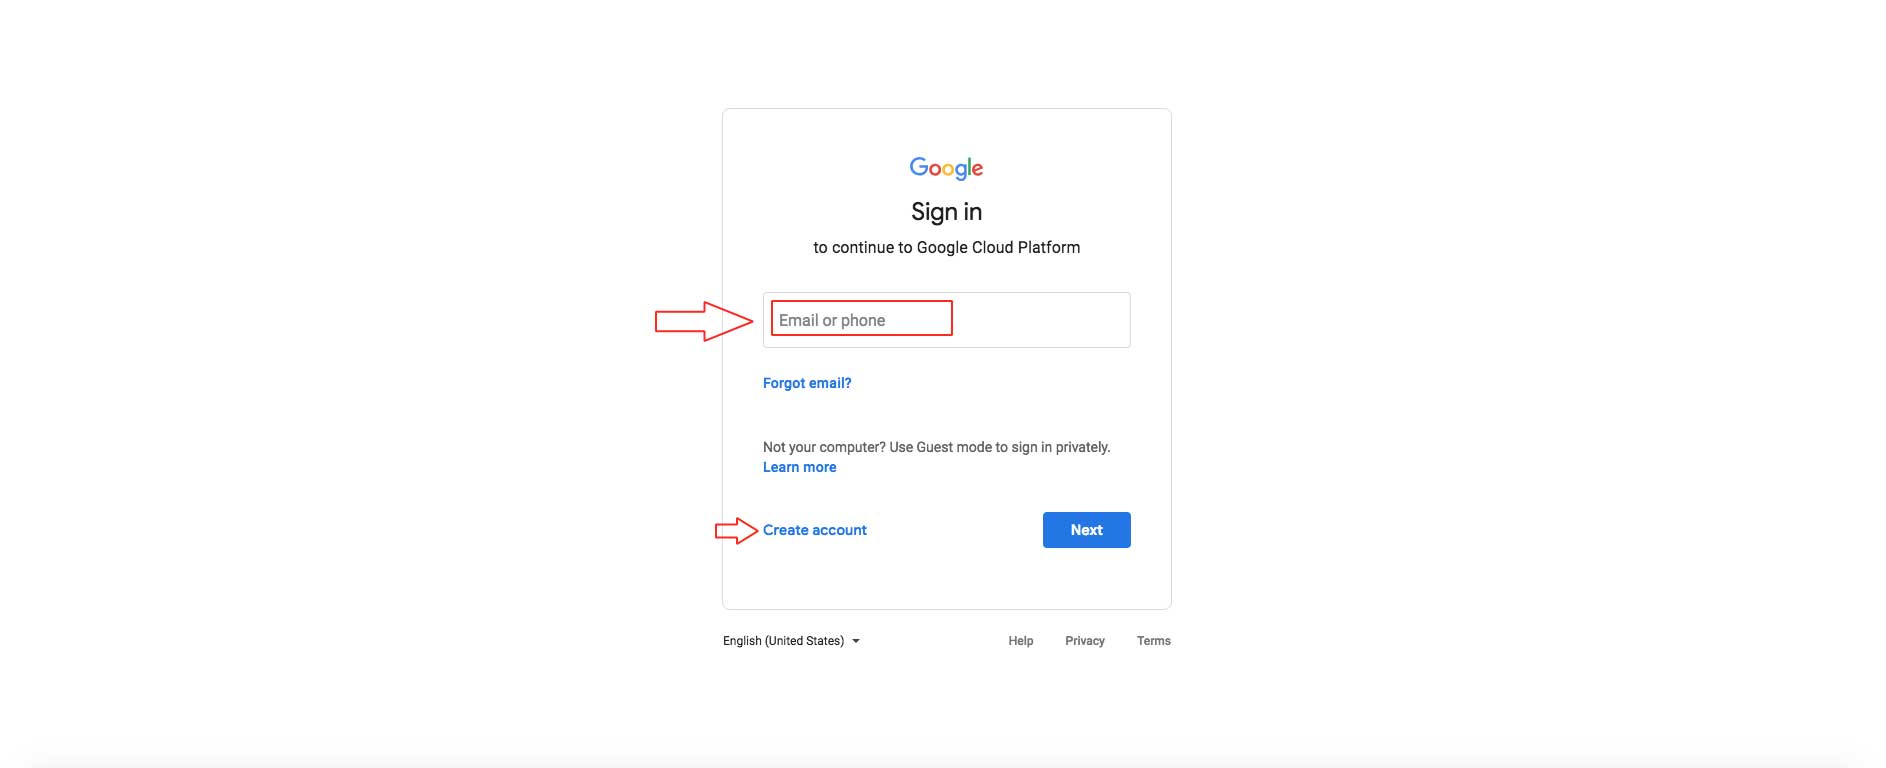
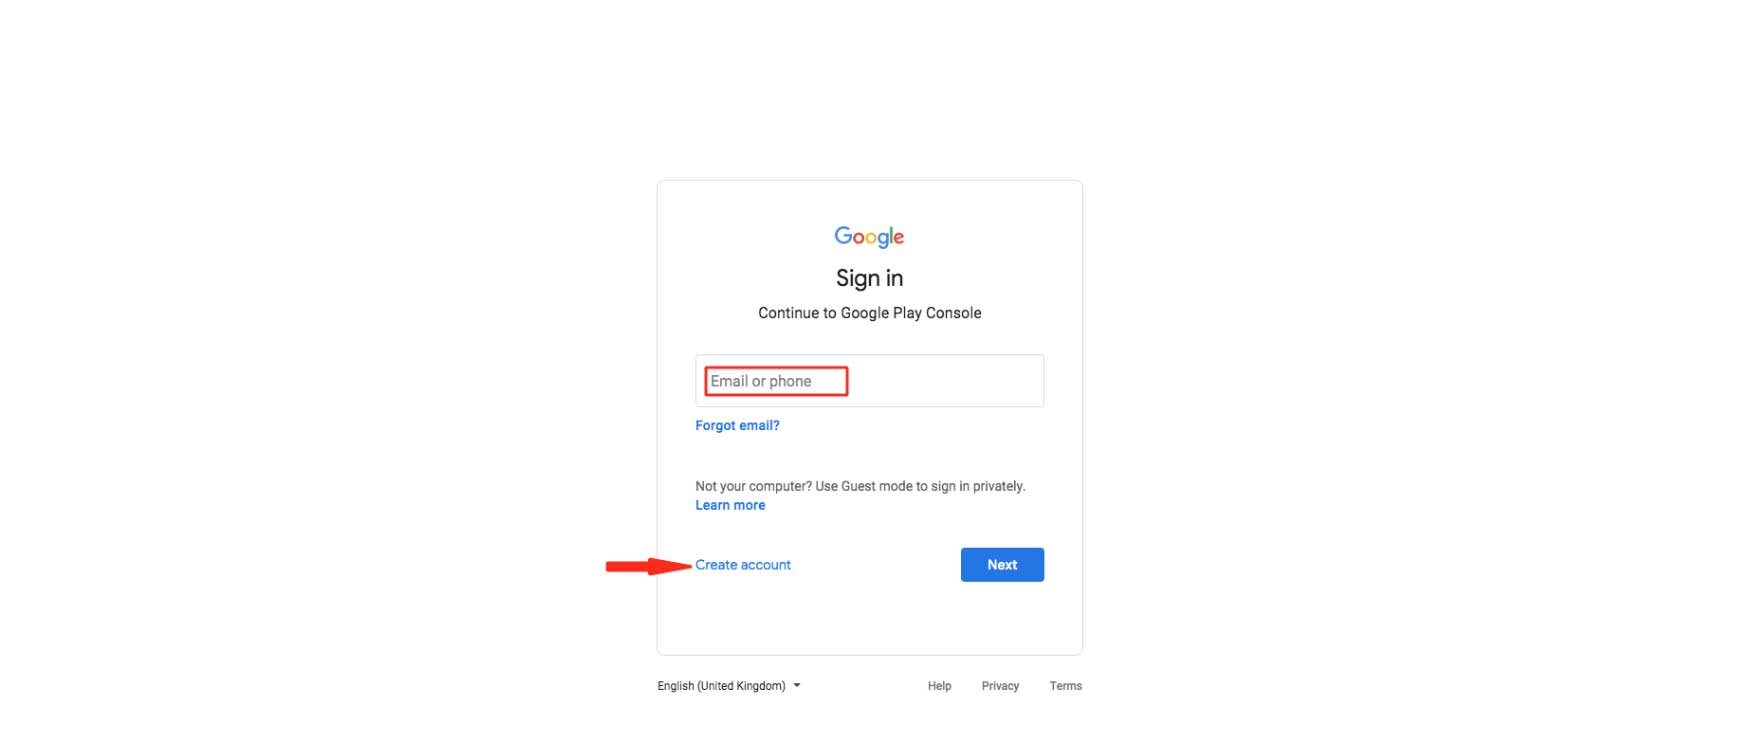
Step 2 : If you have a Google account, login, else Create an Account
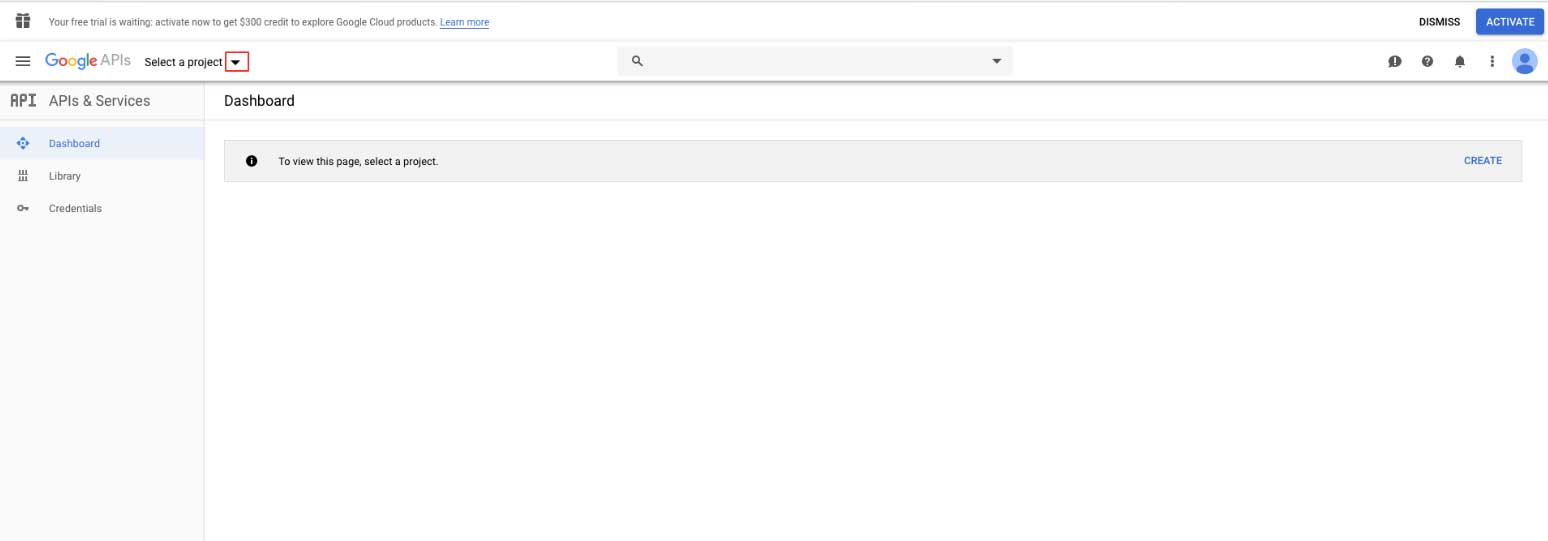
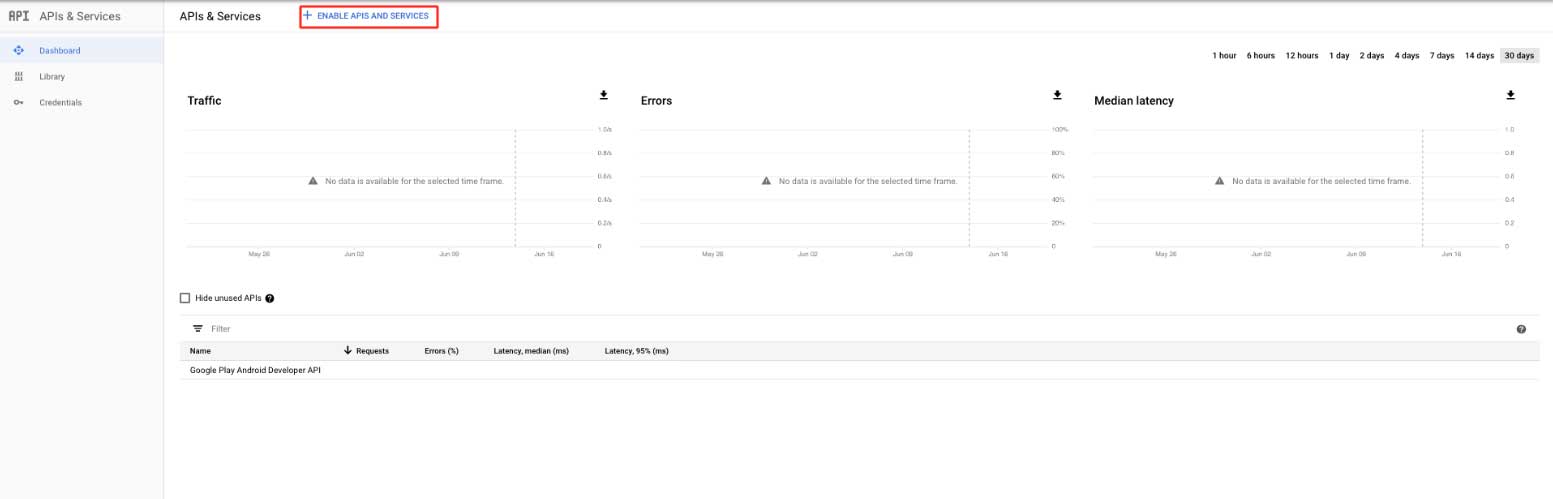
 Step 6 : Click on the Navigation menu, select APIs & Services, then click on ENABLE APIs & SERVICES.
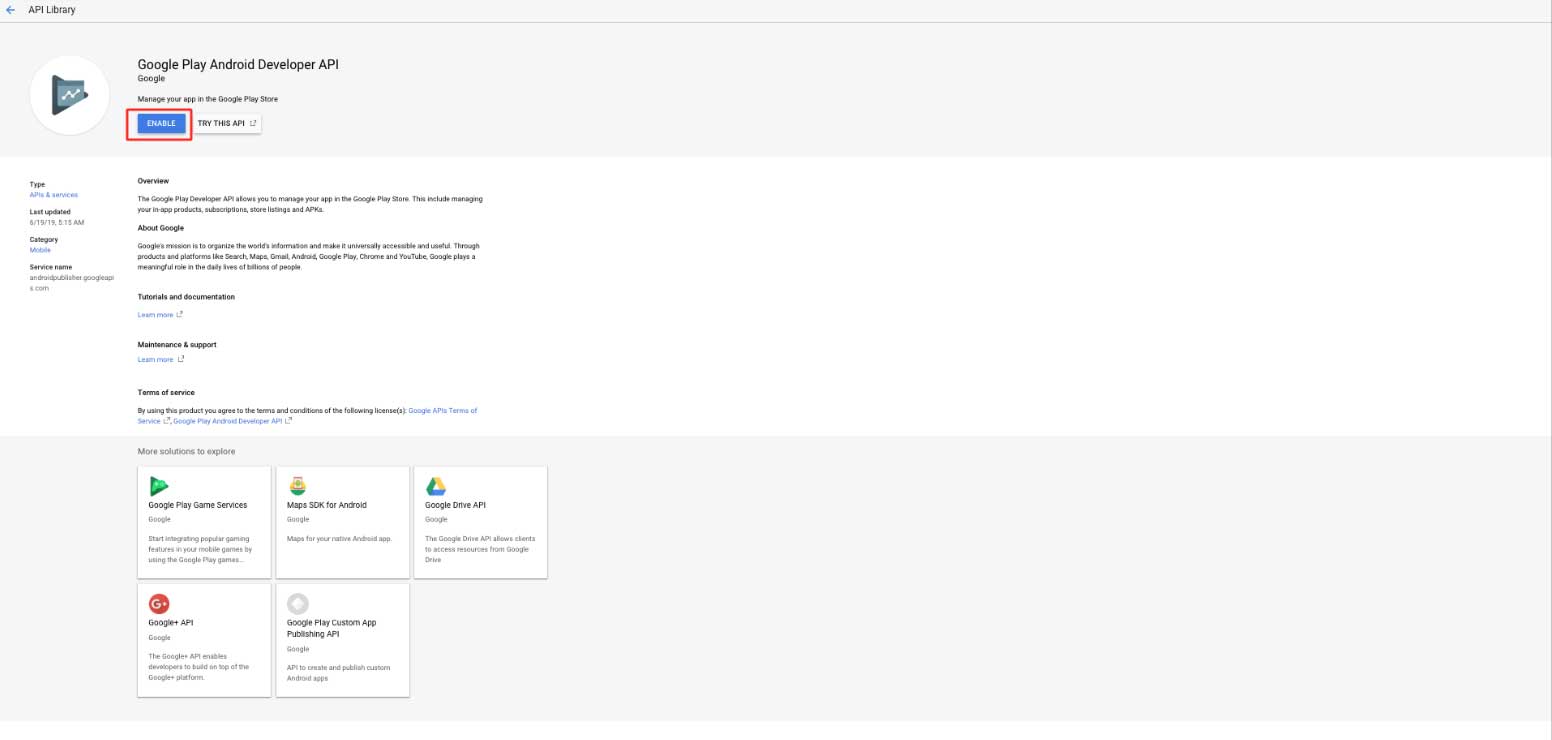
 Step 7 : Search for Google Play Android Developer API in the search box or scroll down to the Mobile section to find the Google Play Android Developer API card.
Step 8 : Click on Google Play Android Developer API
 Step 9 : Click on Enable to activate the key
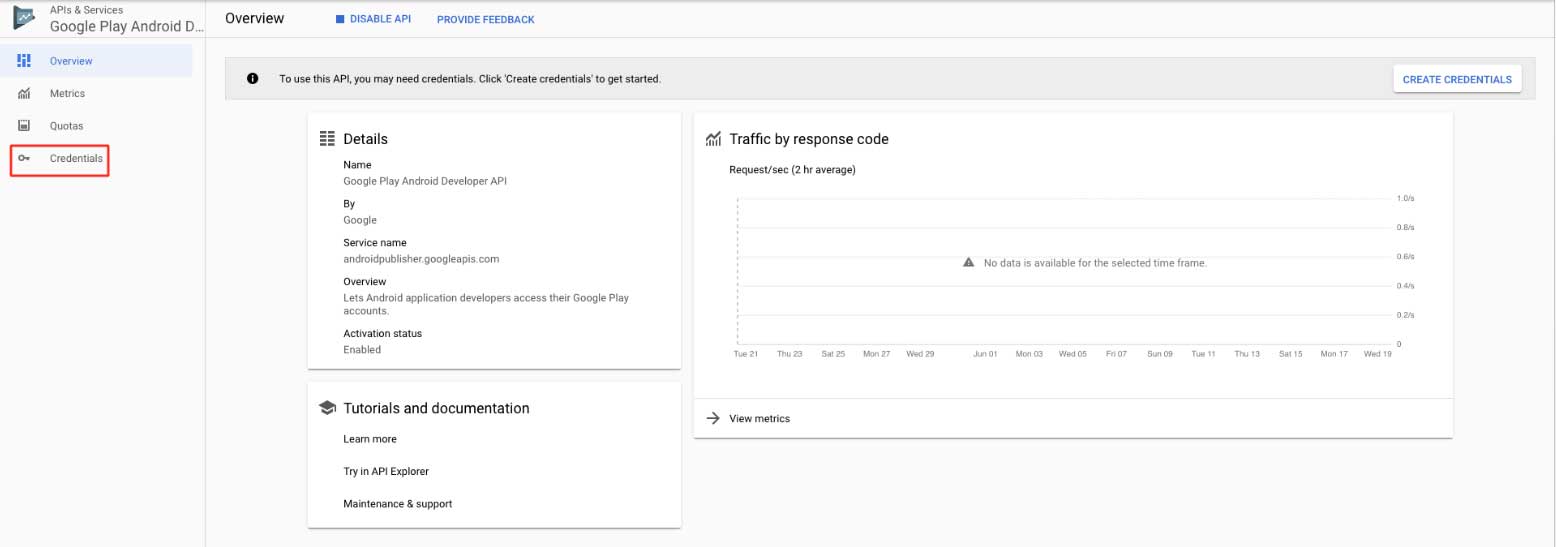
Step 10: Click on Credentials in the side menu.
Step 11 : Click on CREATE CREDENTIALS.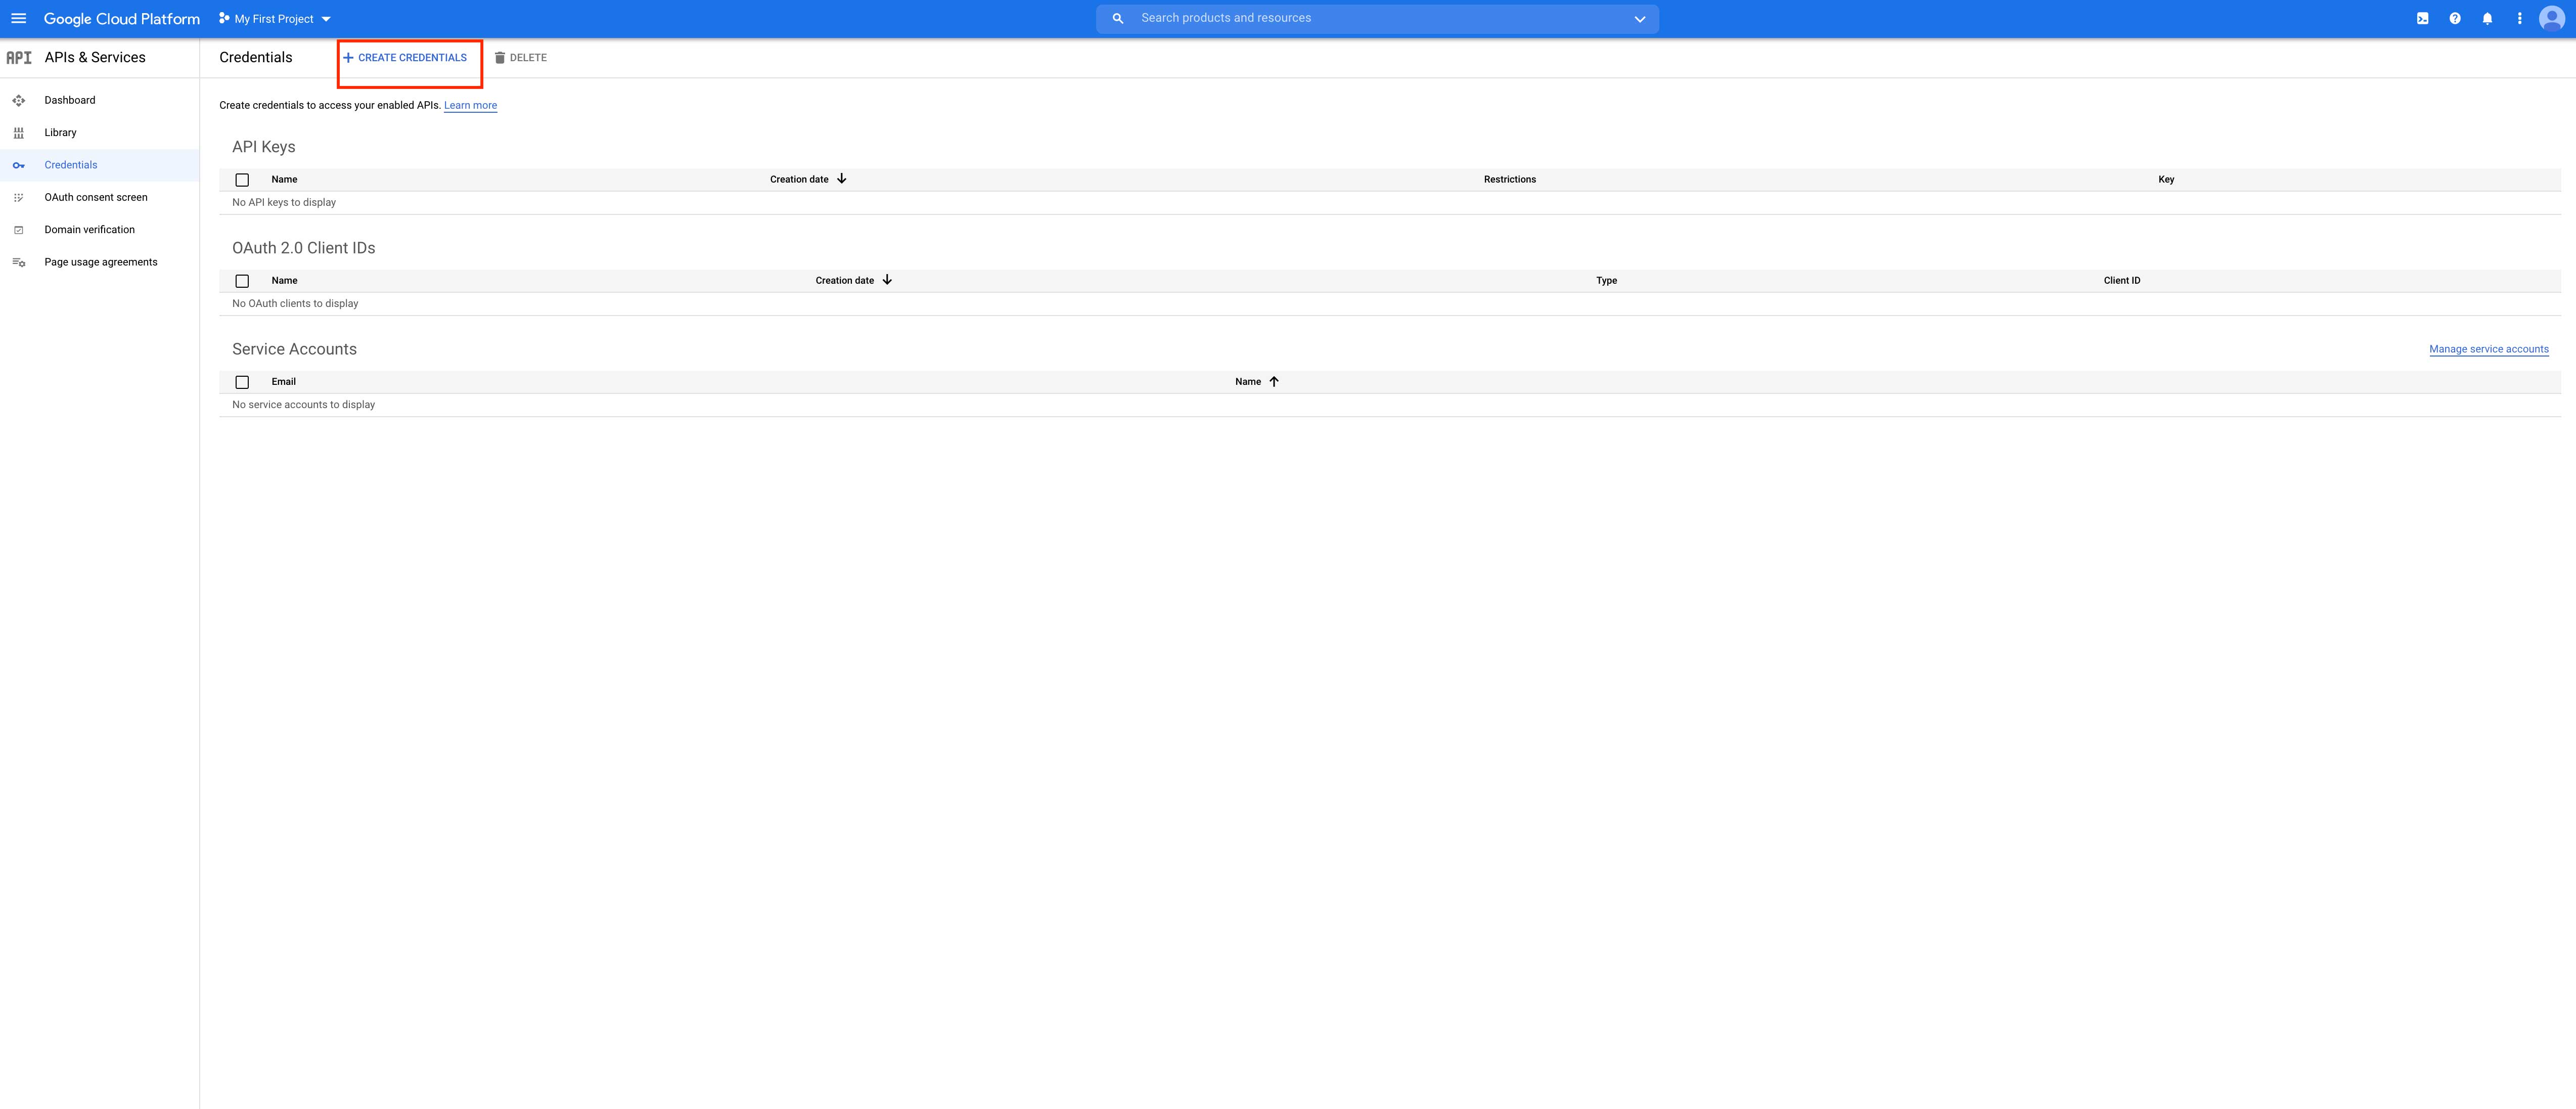
Step 12 : Click on OAuth client ID 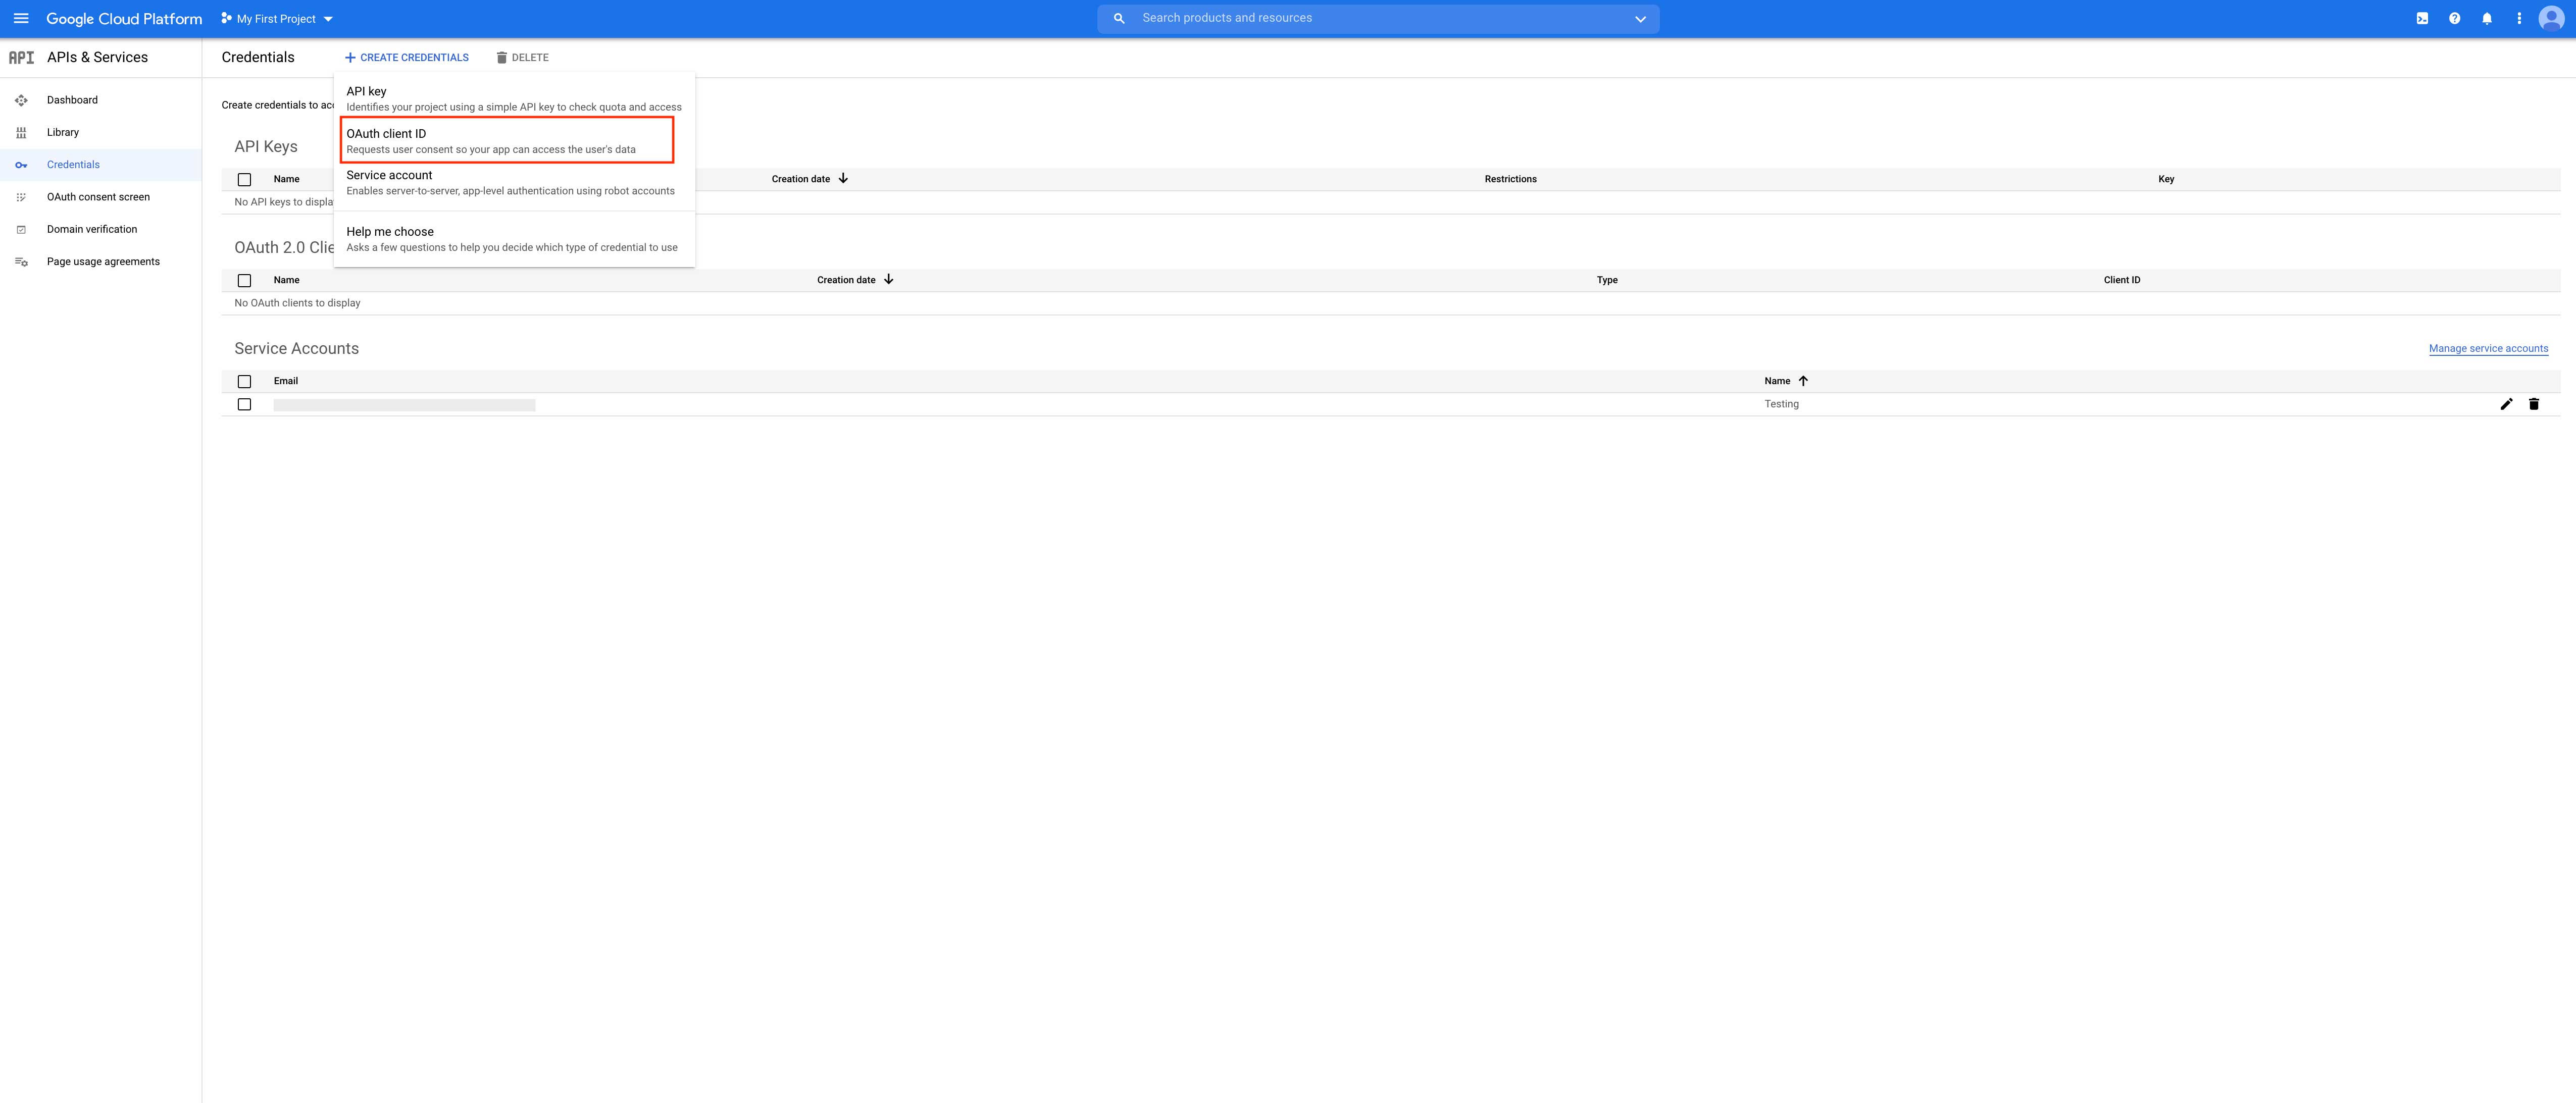
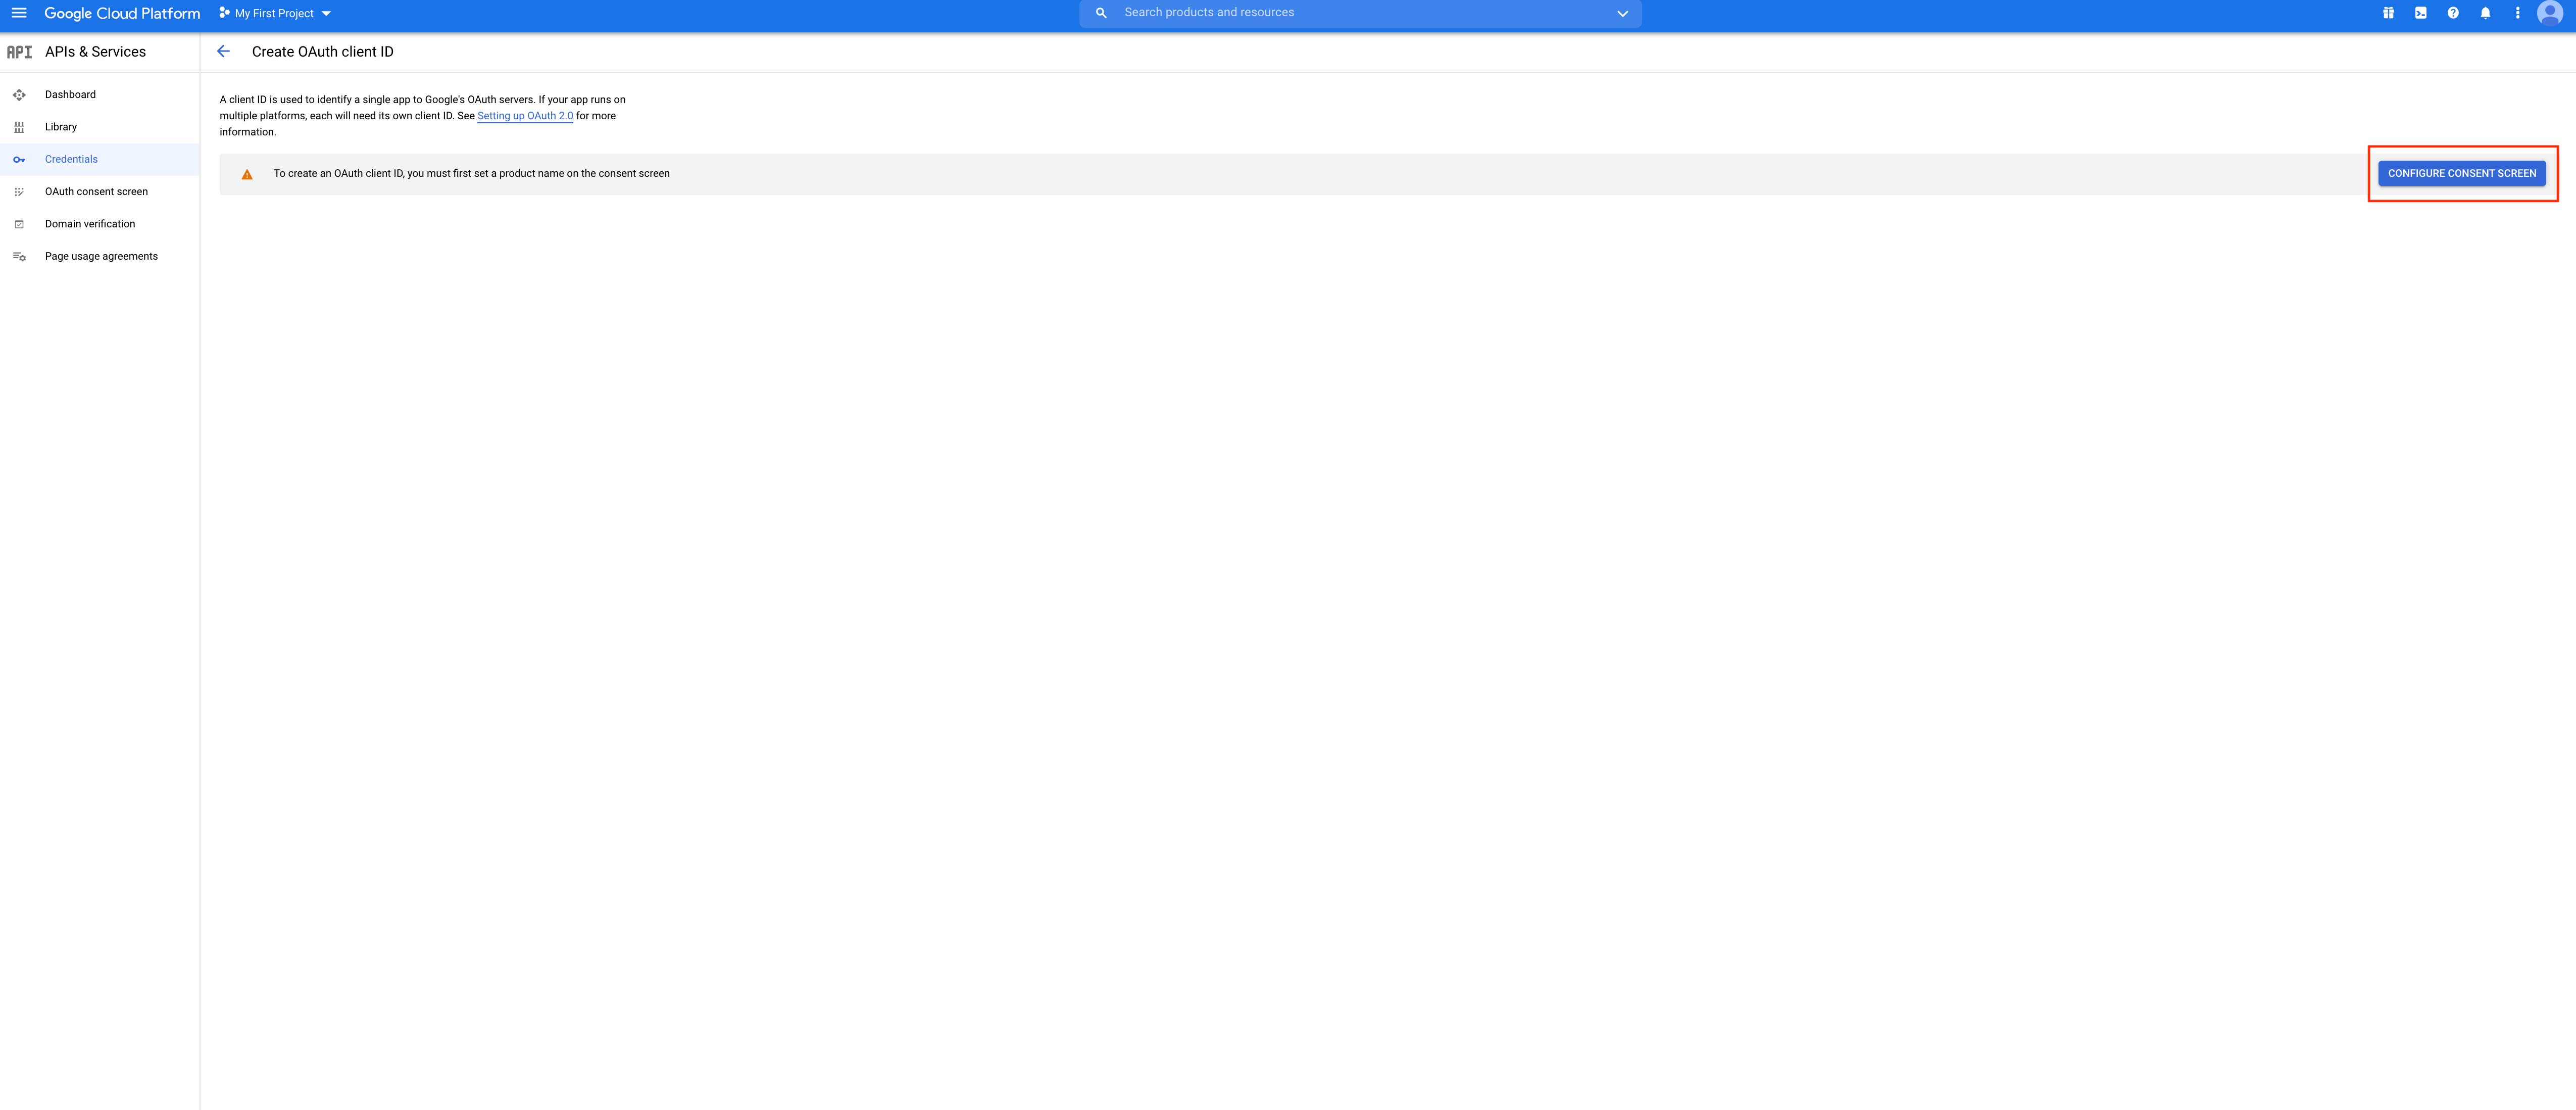
Step 13 : Click on the CONFIGURE CONSENT SCREEN button.
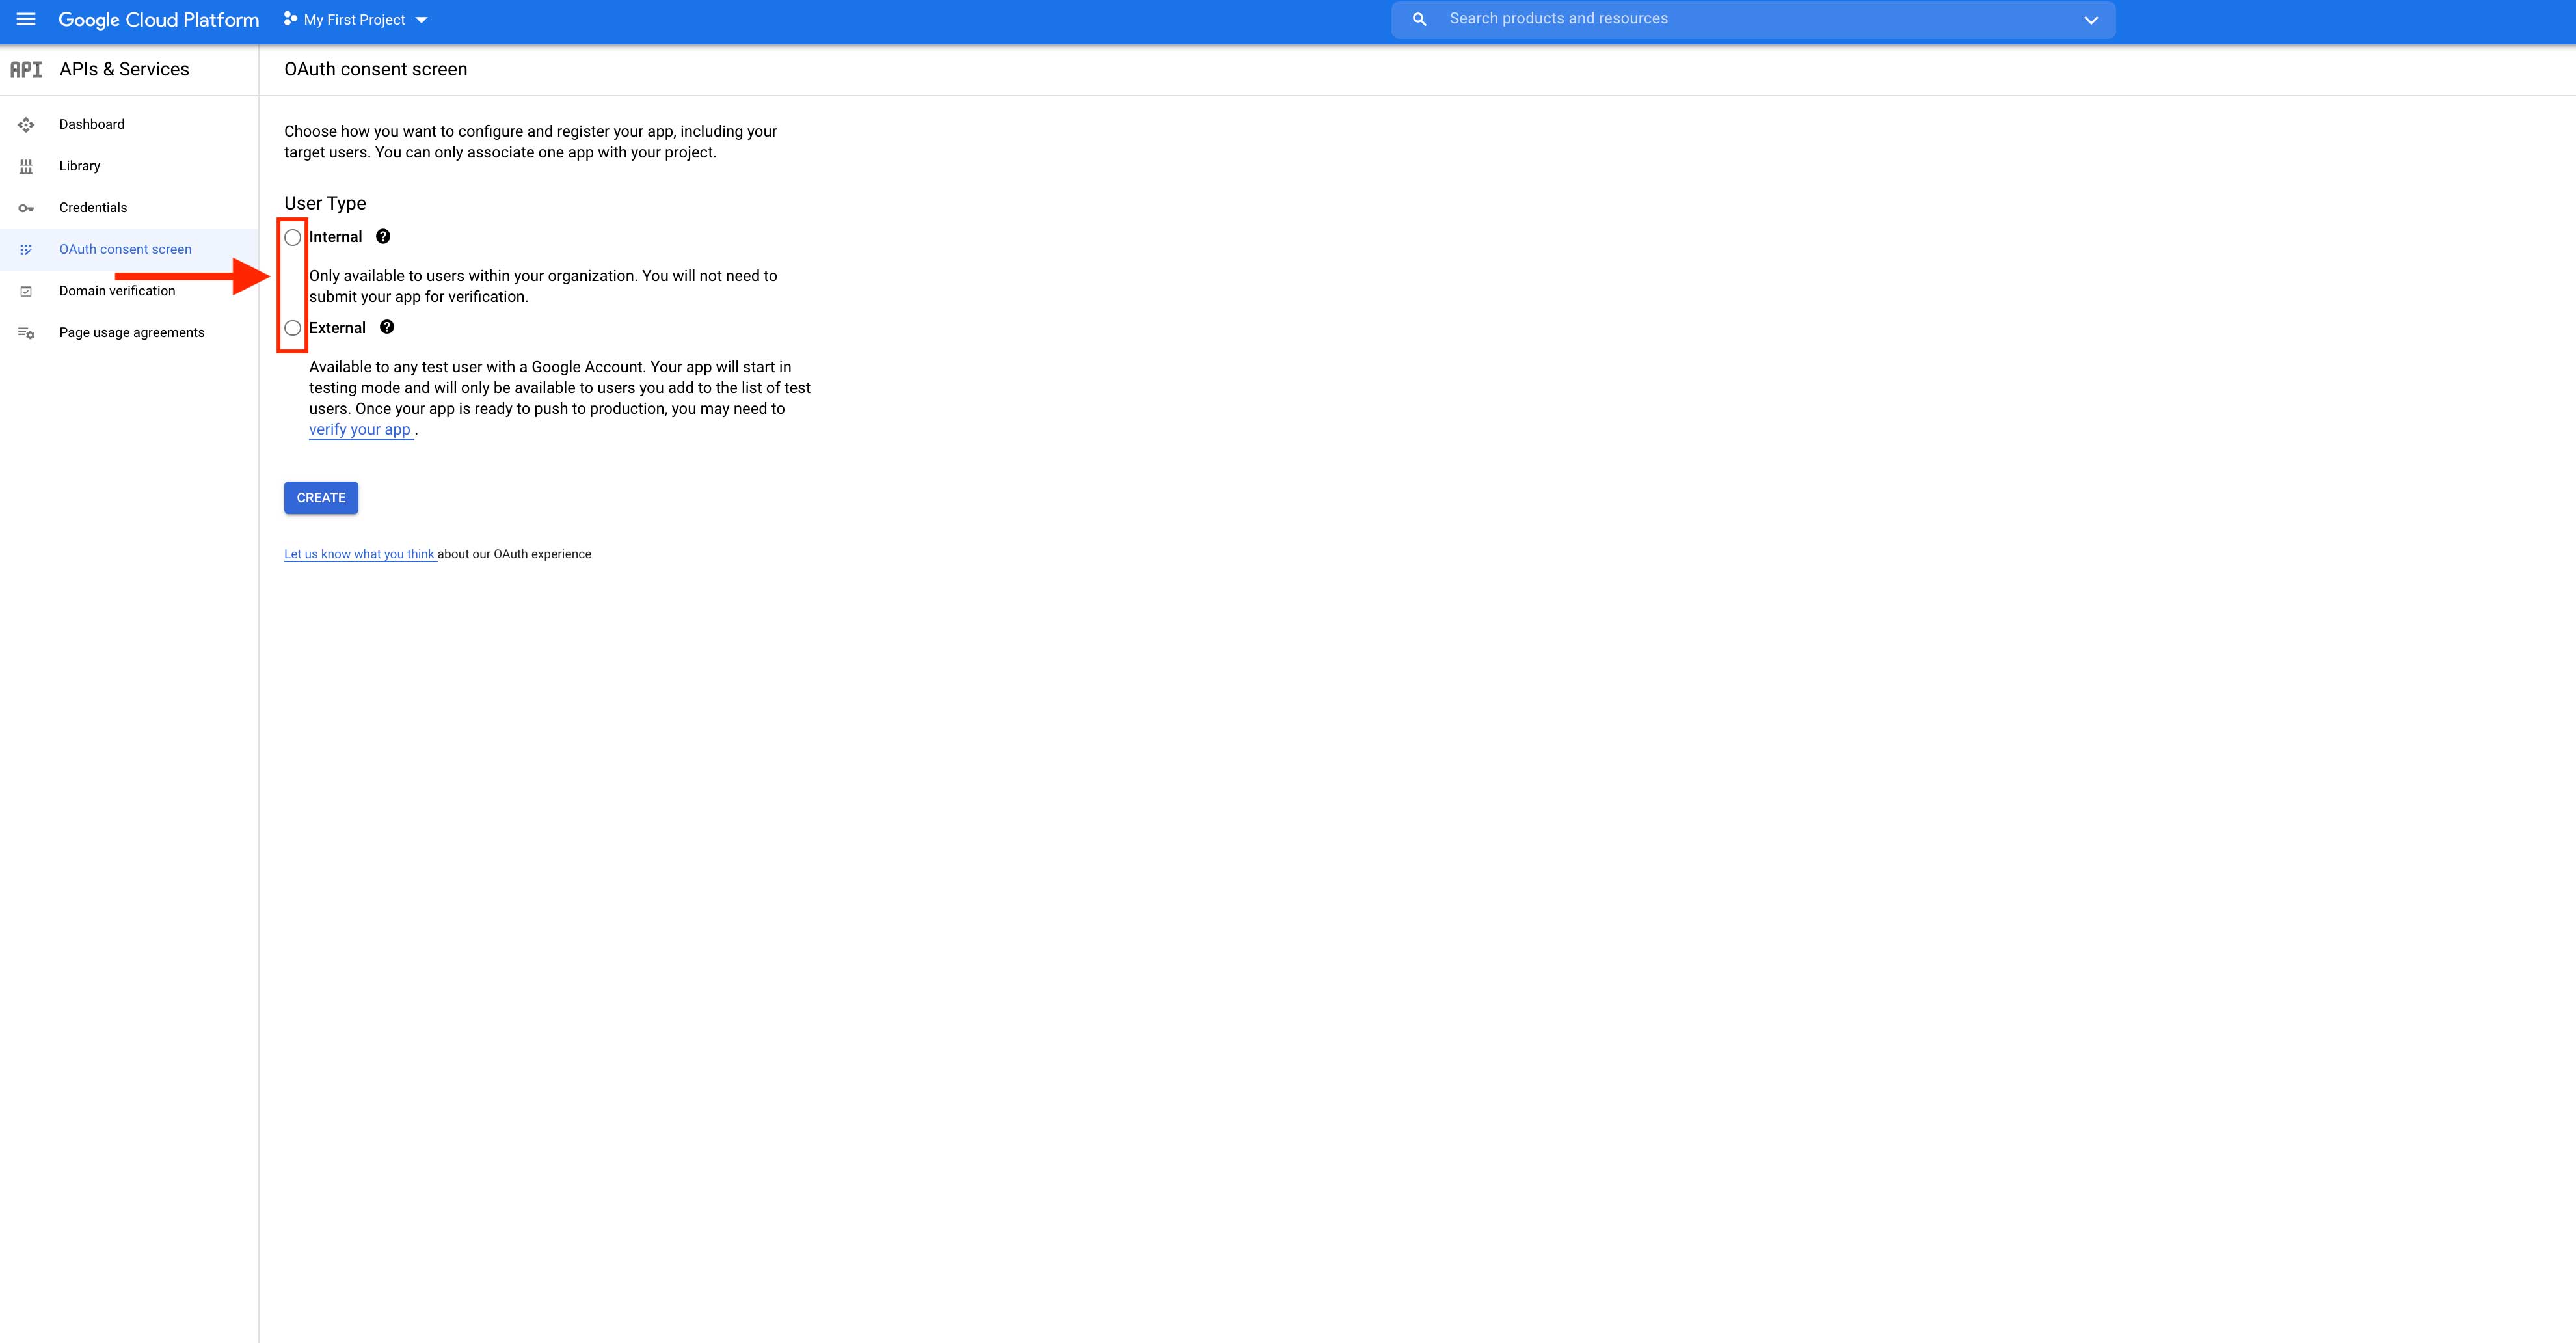
Step 14 : Select User Type from the options, and then click Create.
Note: Projects associated with a Google Cloud Organization can configure Internal users to limit authorization requests to members of the organization whereas Projects configured with a user type of External are available to any user with a Google Account.
The following steps are to be followed when user type External is selected:
- Enter App name and User support email (email which your users can use to contact you).
- Scroll down to the bottom of the same page and enter the required email address under Developer Contact Information, then click on Save and Continue.
- Next, you will be redirected to the Scopes screen. Scroll down and click on Save and Continue
- On the Test Users screen, click on Save and Continue.
- Once done, you can review the OAuth Consent screen summary.
The following steps are to be followed when user type Internal is selected:
- Enter the Application Name and select User support email. Next, enter the Authorized Domain and Developer Email address. In the Authorized Domains field, enter the URL - appypie.com. Once done, click on Save and Continue.
- On the Scopes screen, click on Save And Continue.
- Once done, you can review the summary.
Step 15 : Once you’ve configured the user type, then click on Credentials in the side menu.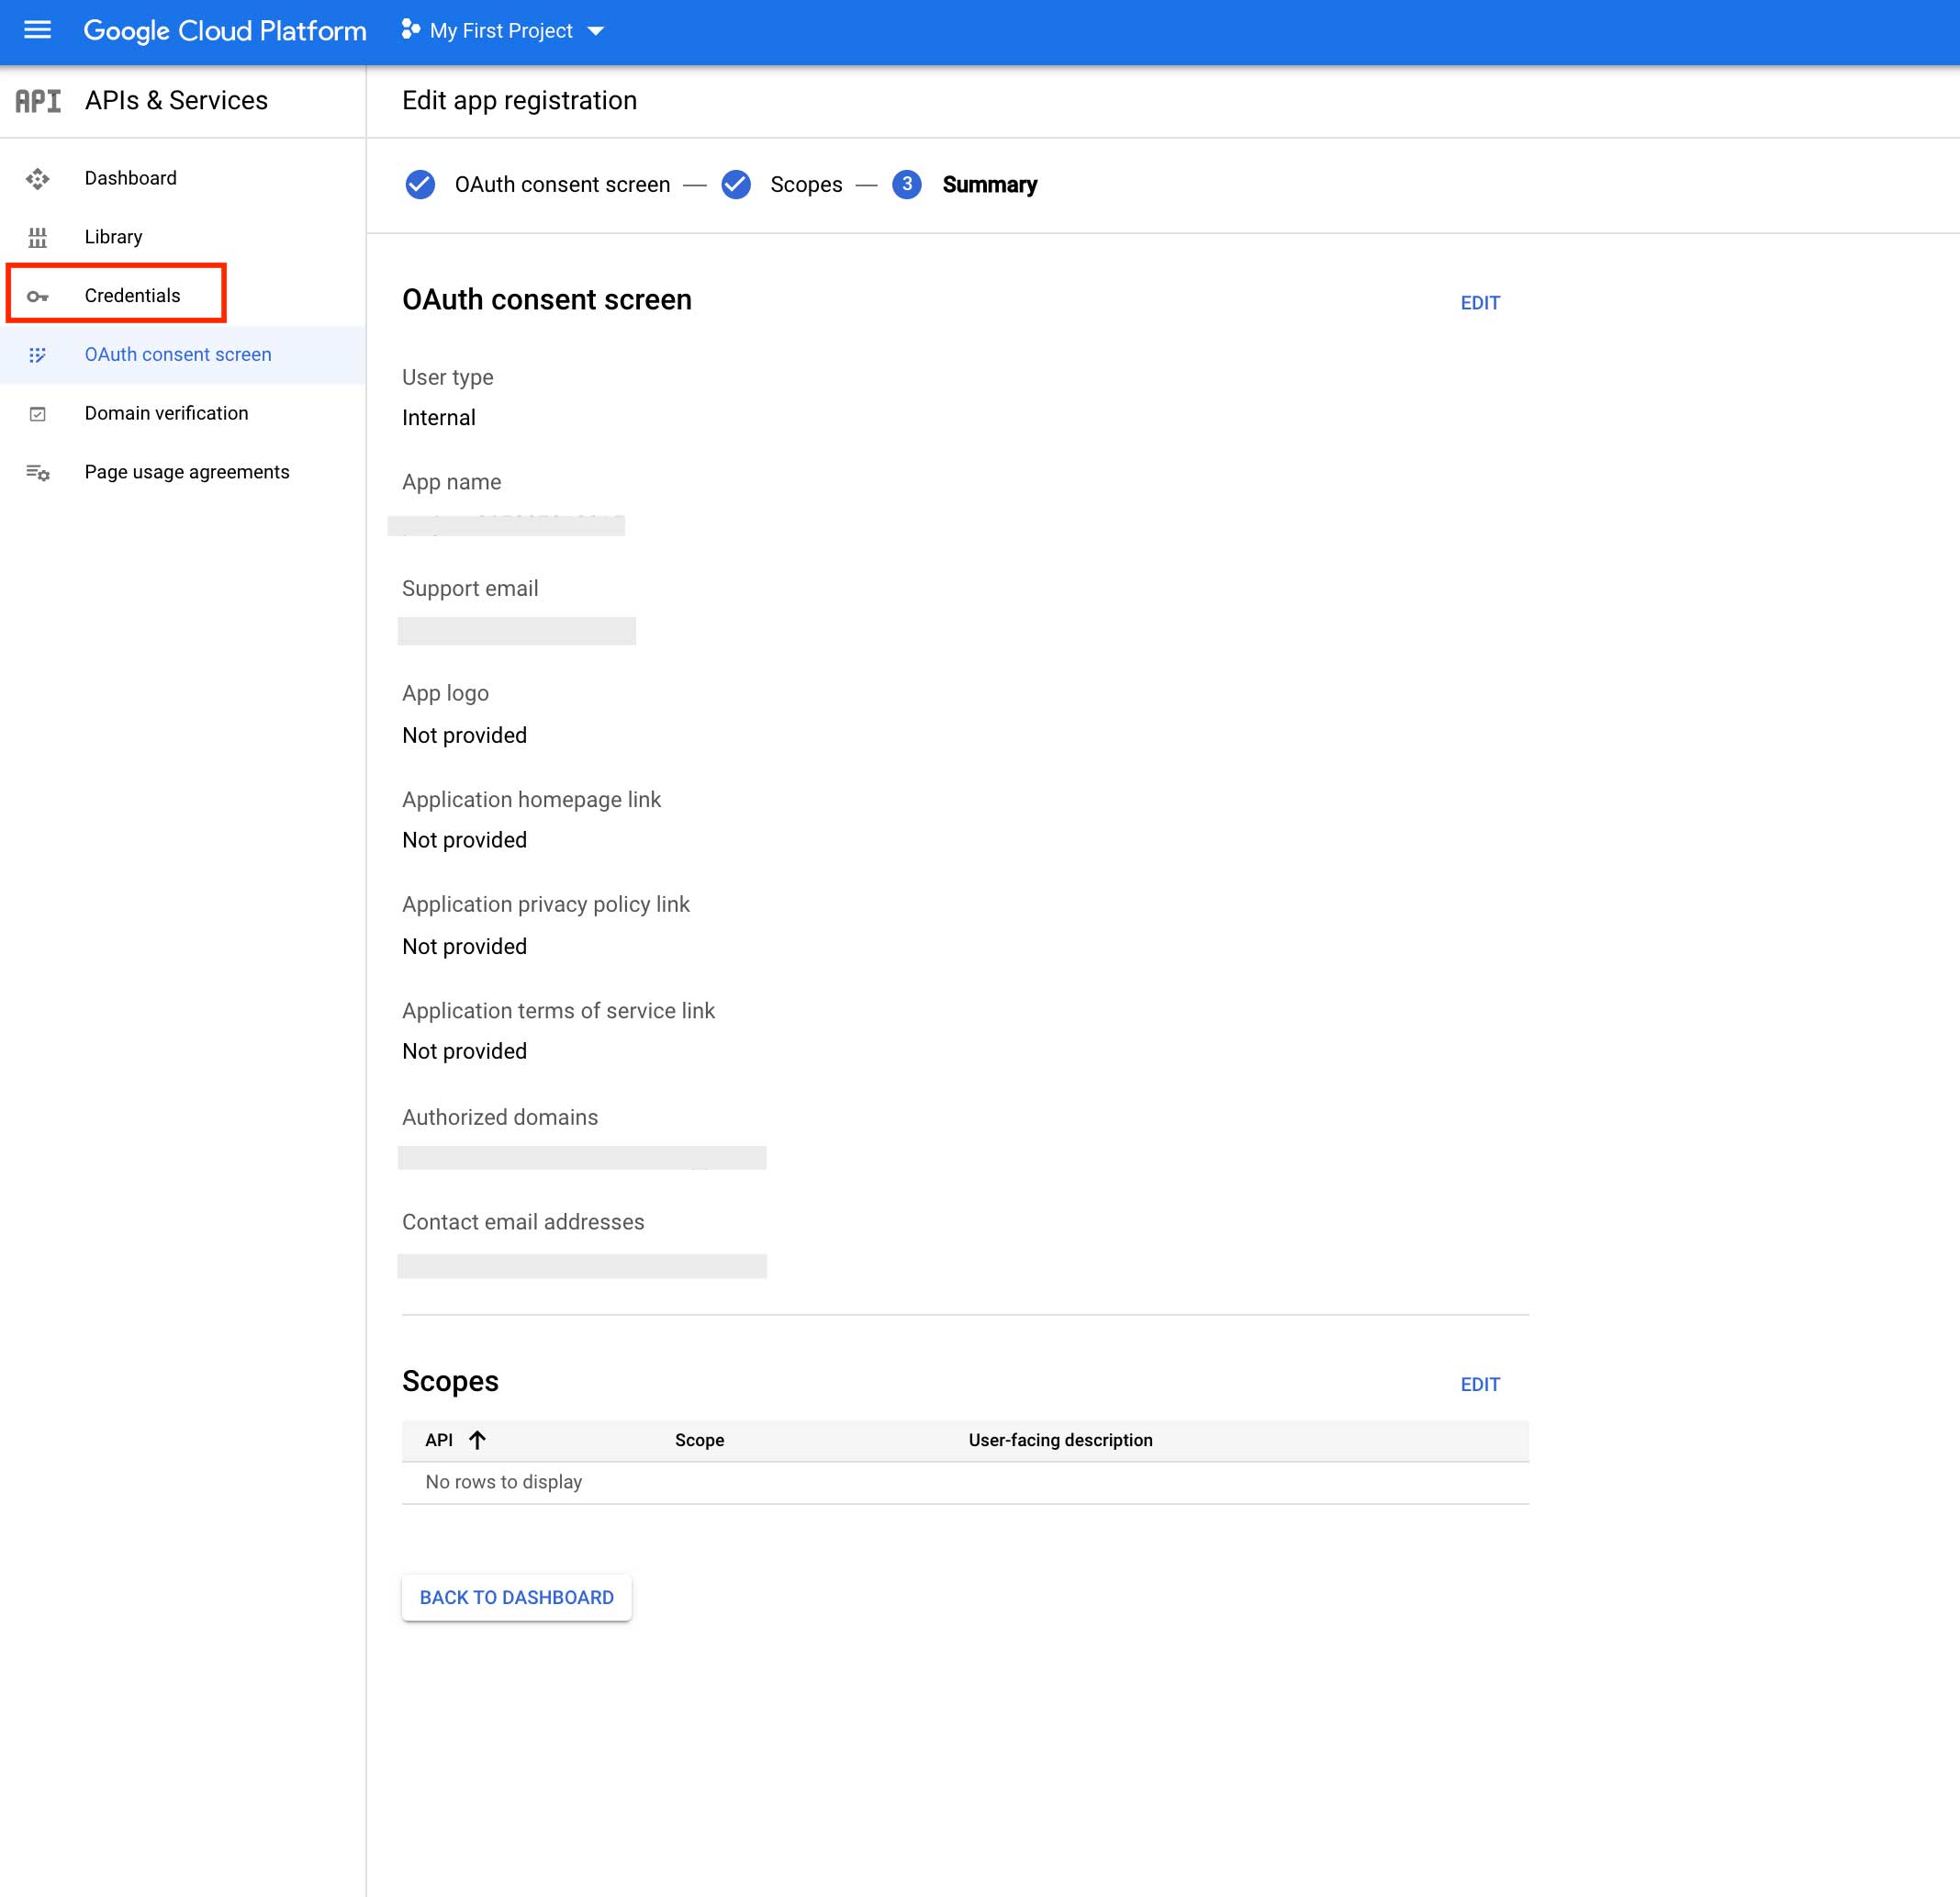
Step 16 : On the Credentials page, click on Create Credentials.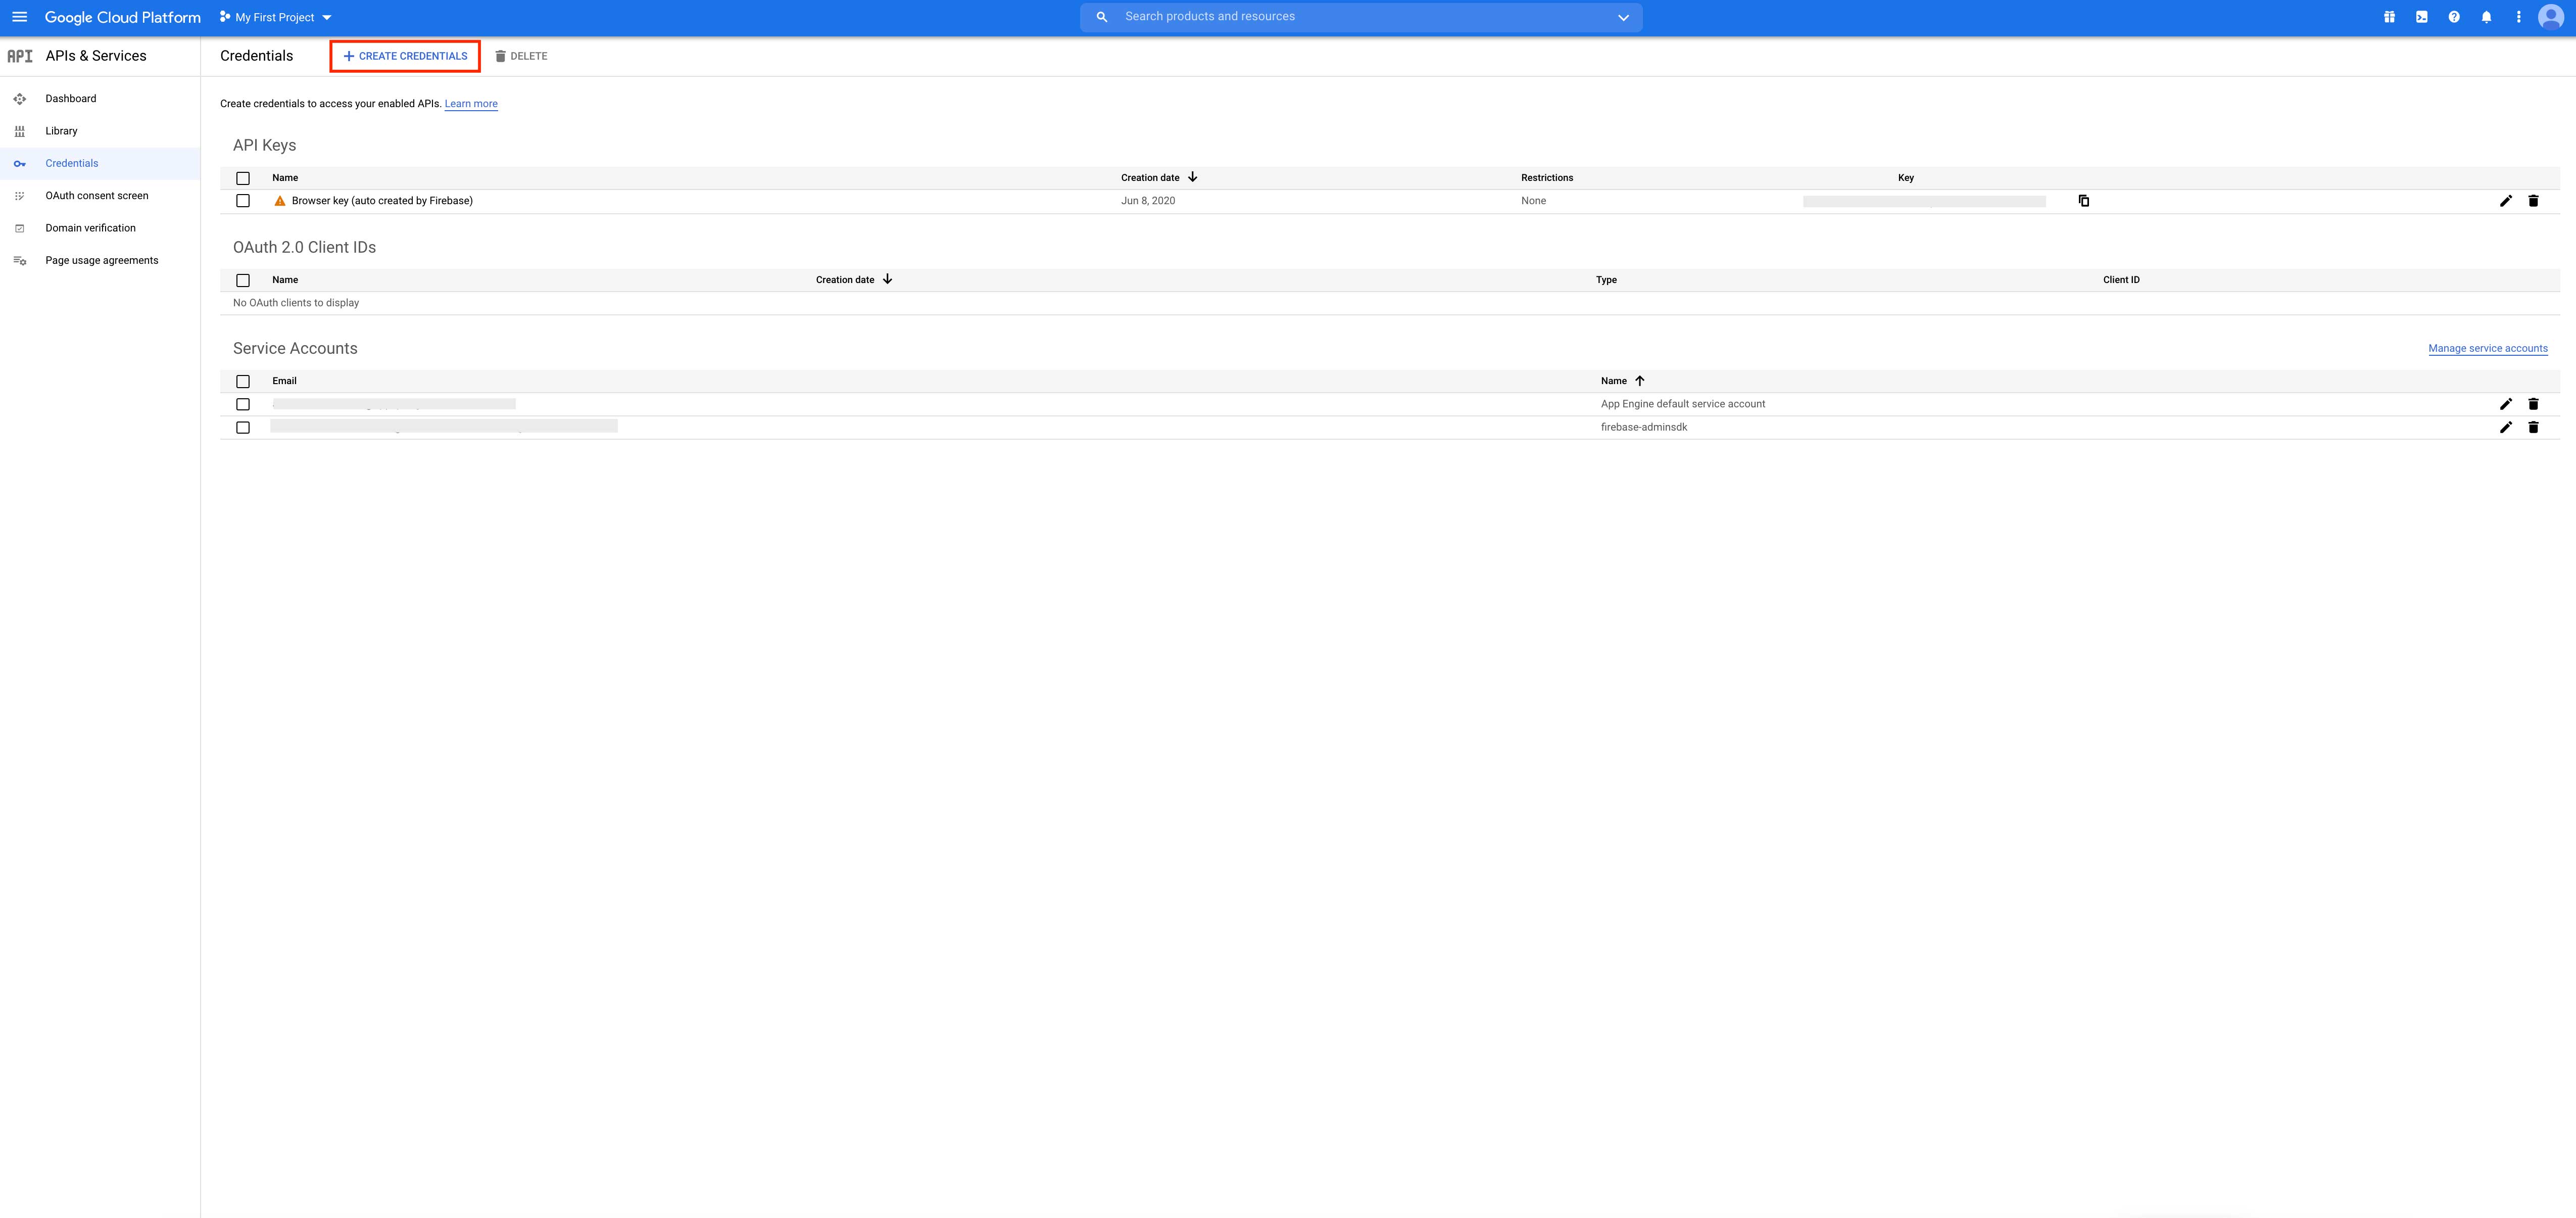 Step 17 : Select OAuth Client ID from the dropdown.
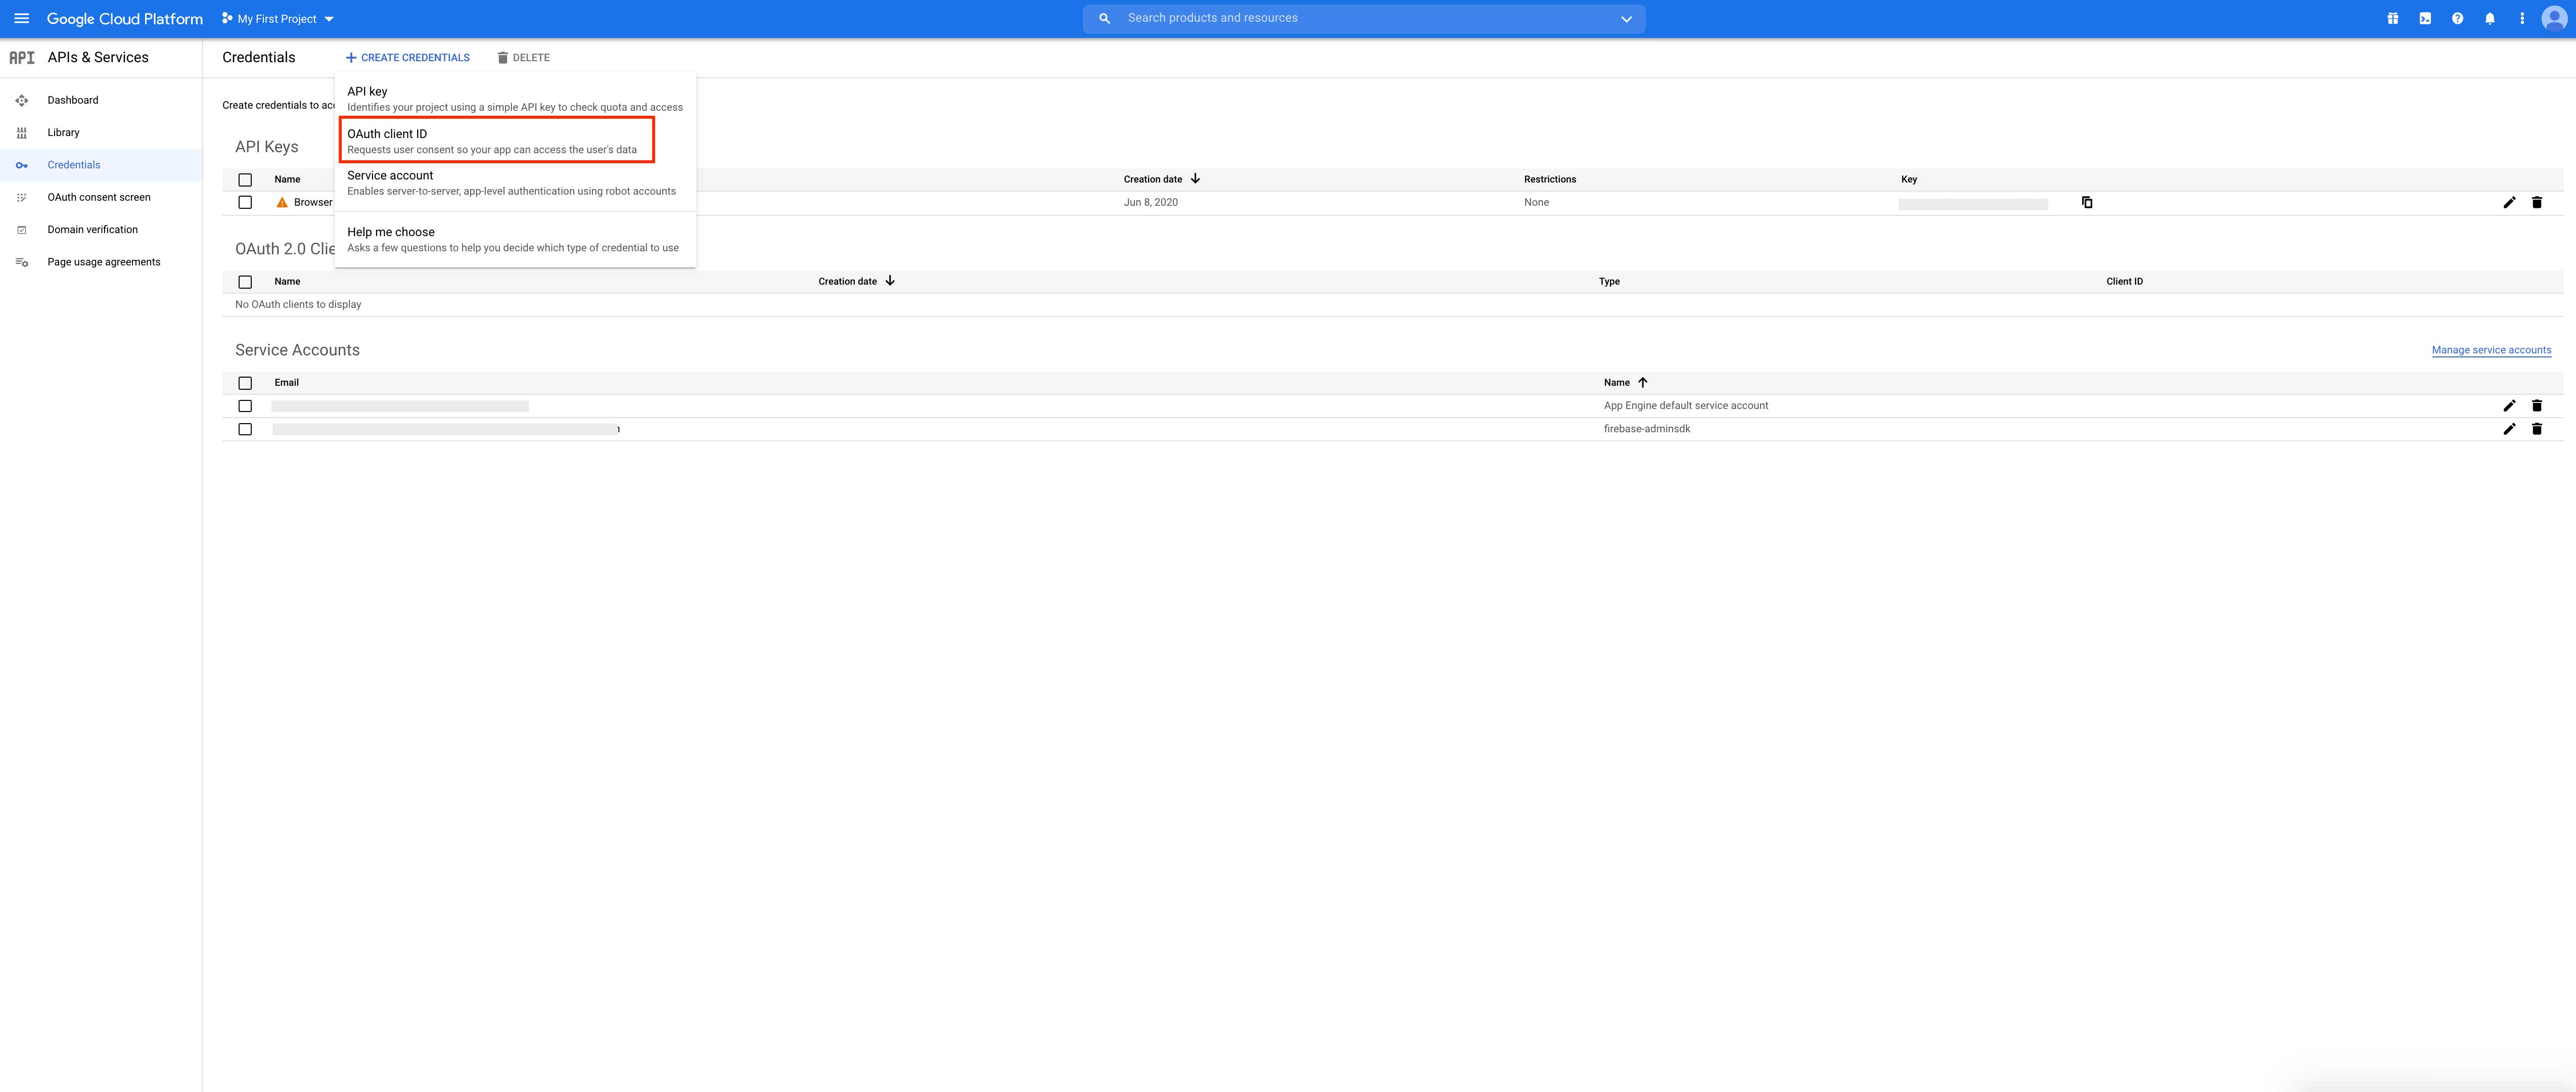
Step 18 : Click the Application Type dropdown menu.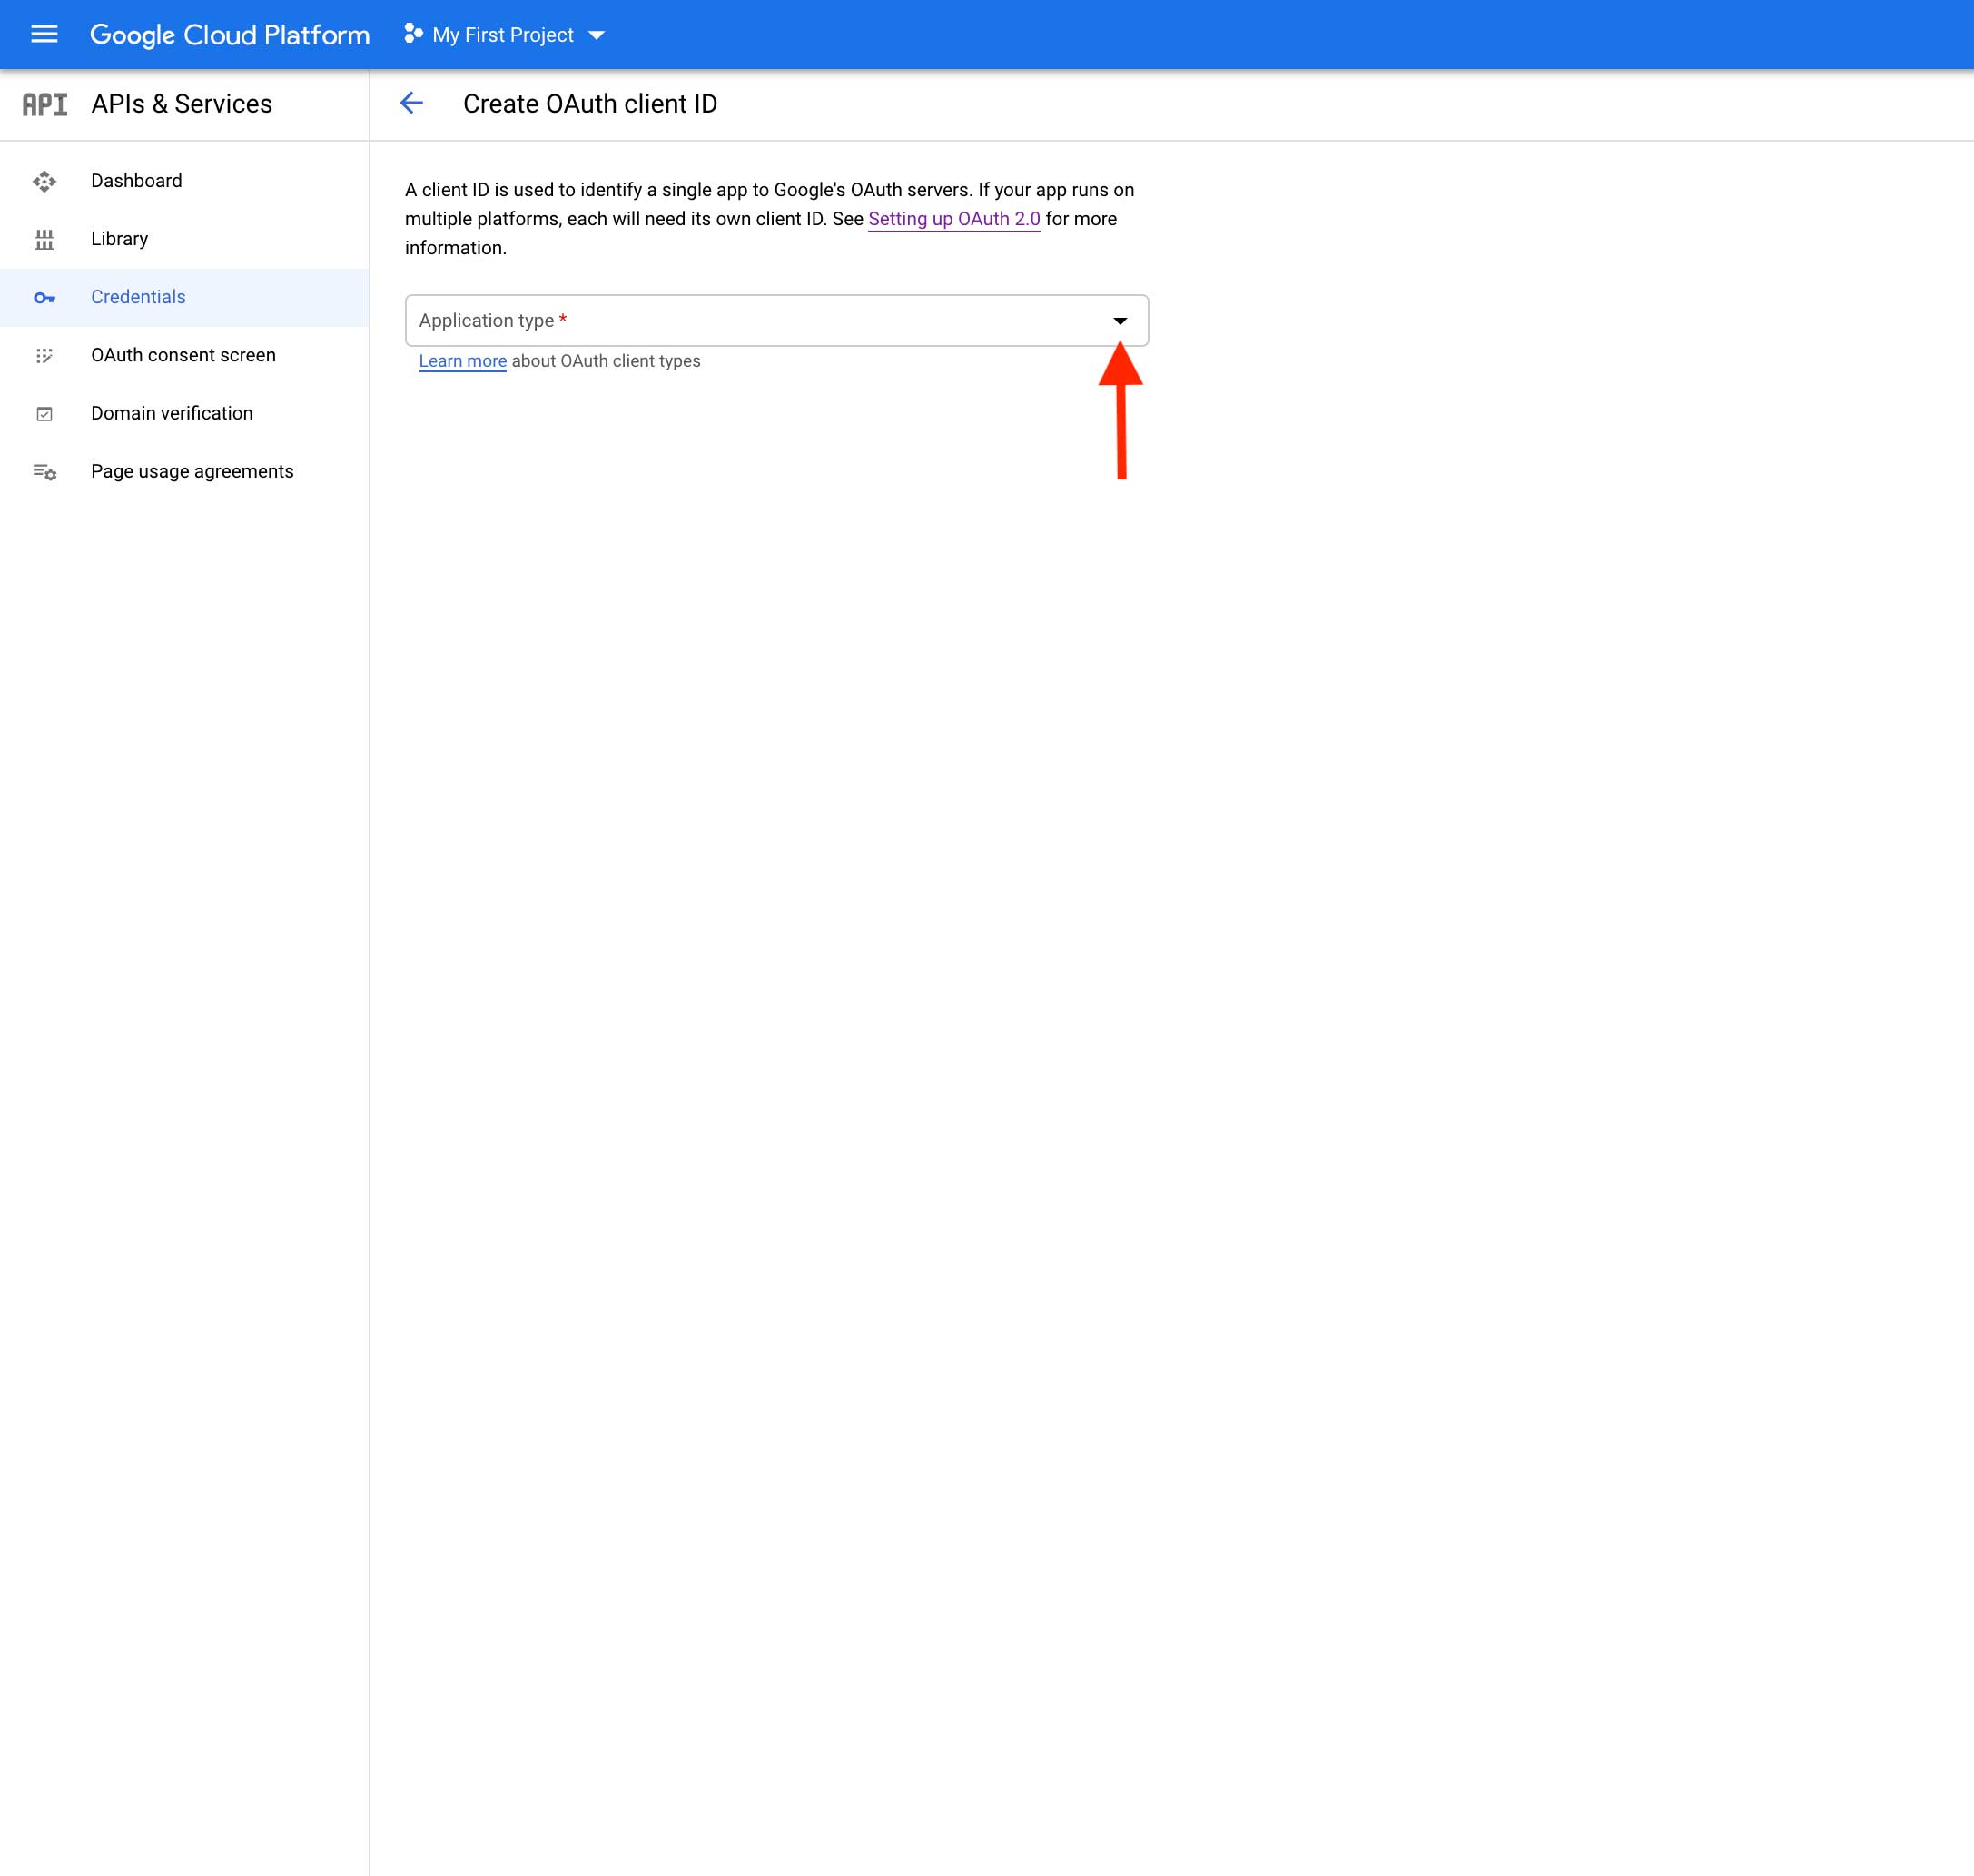
Step 19 : Click on web application 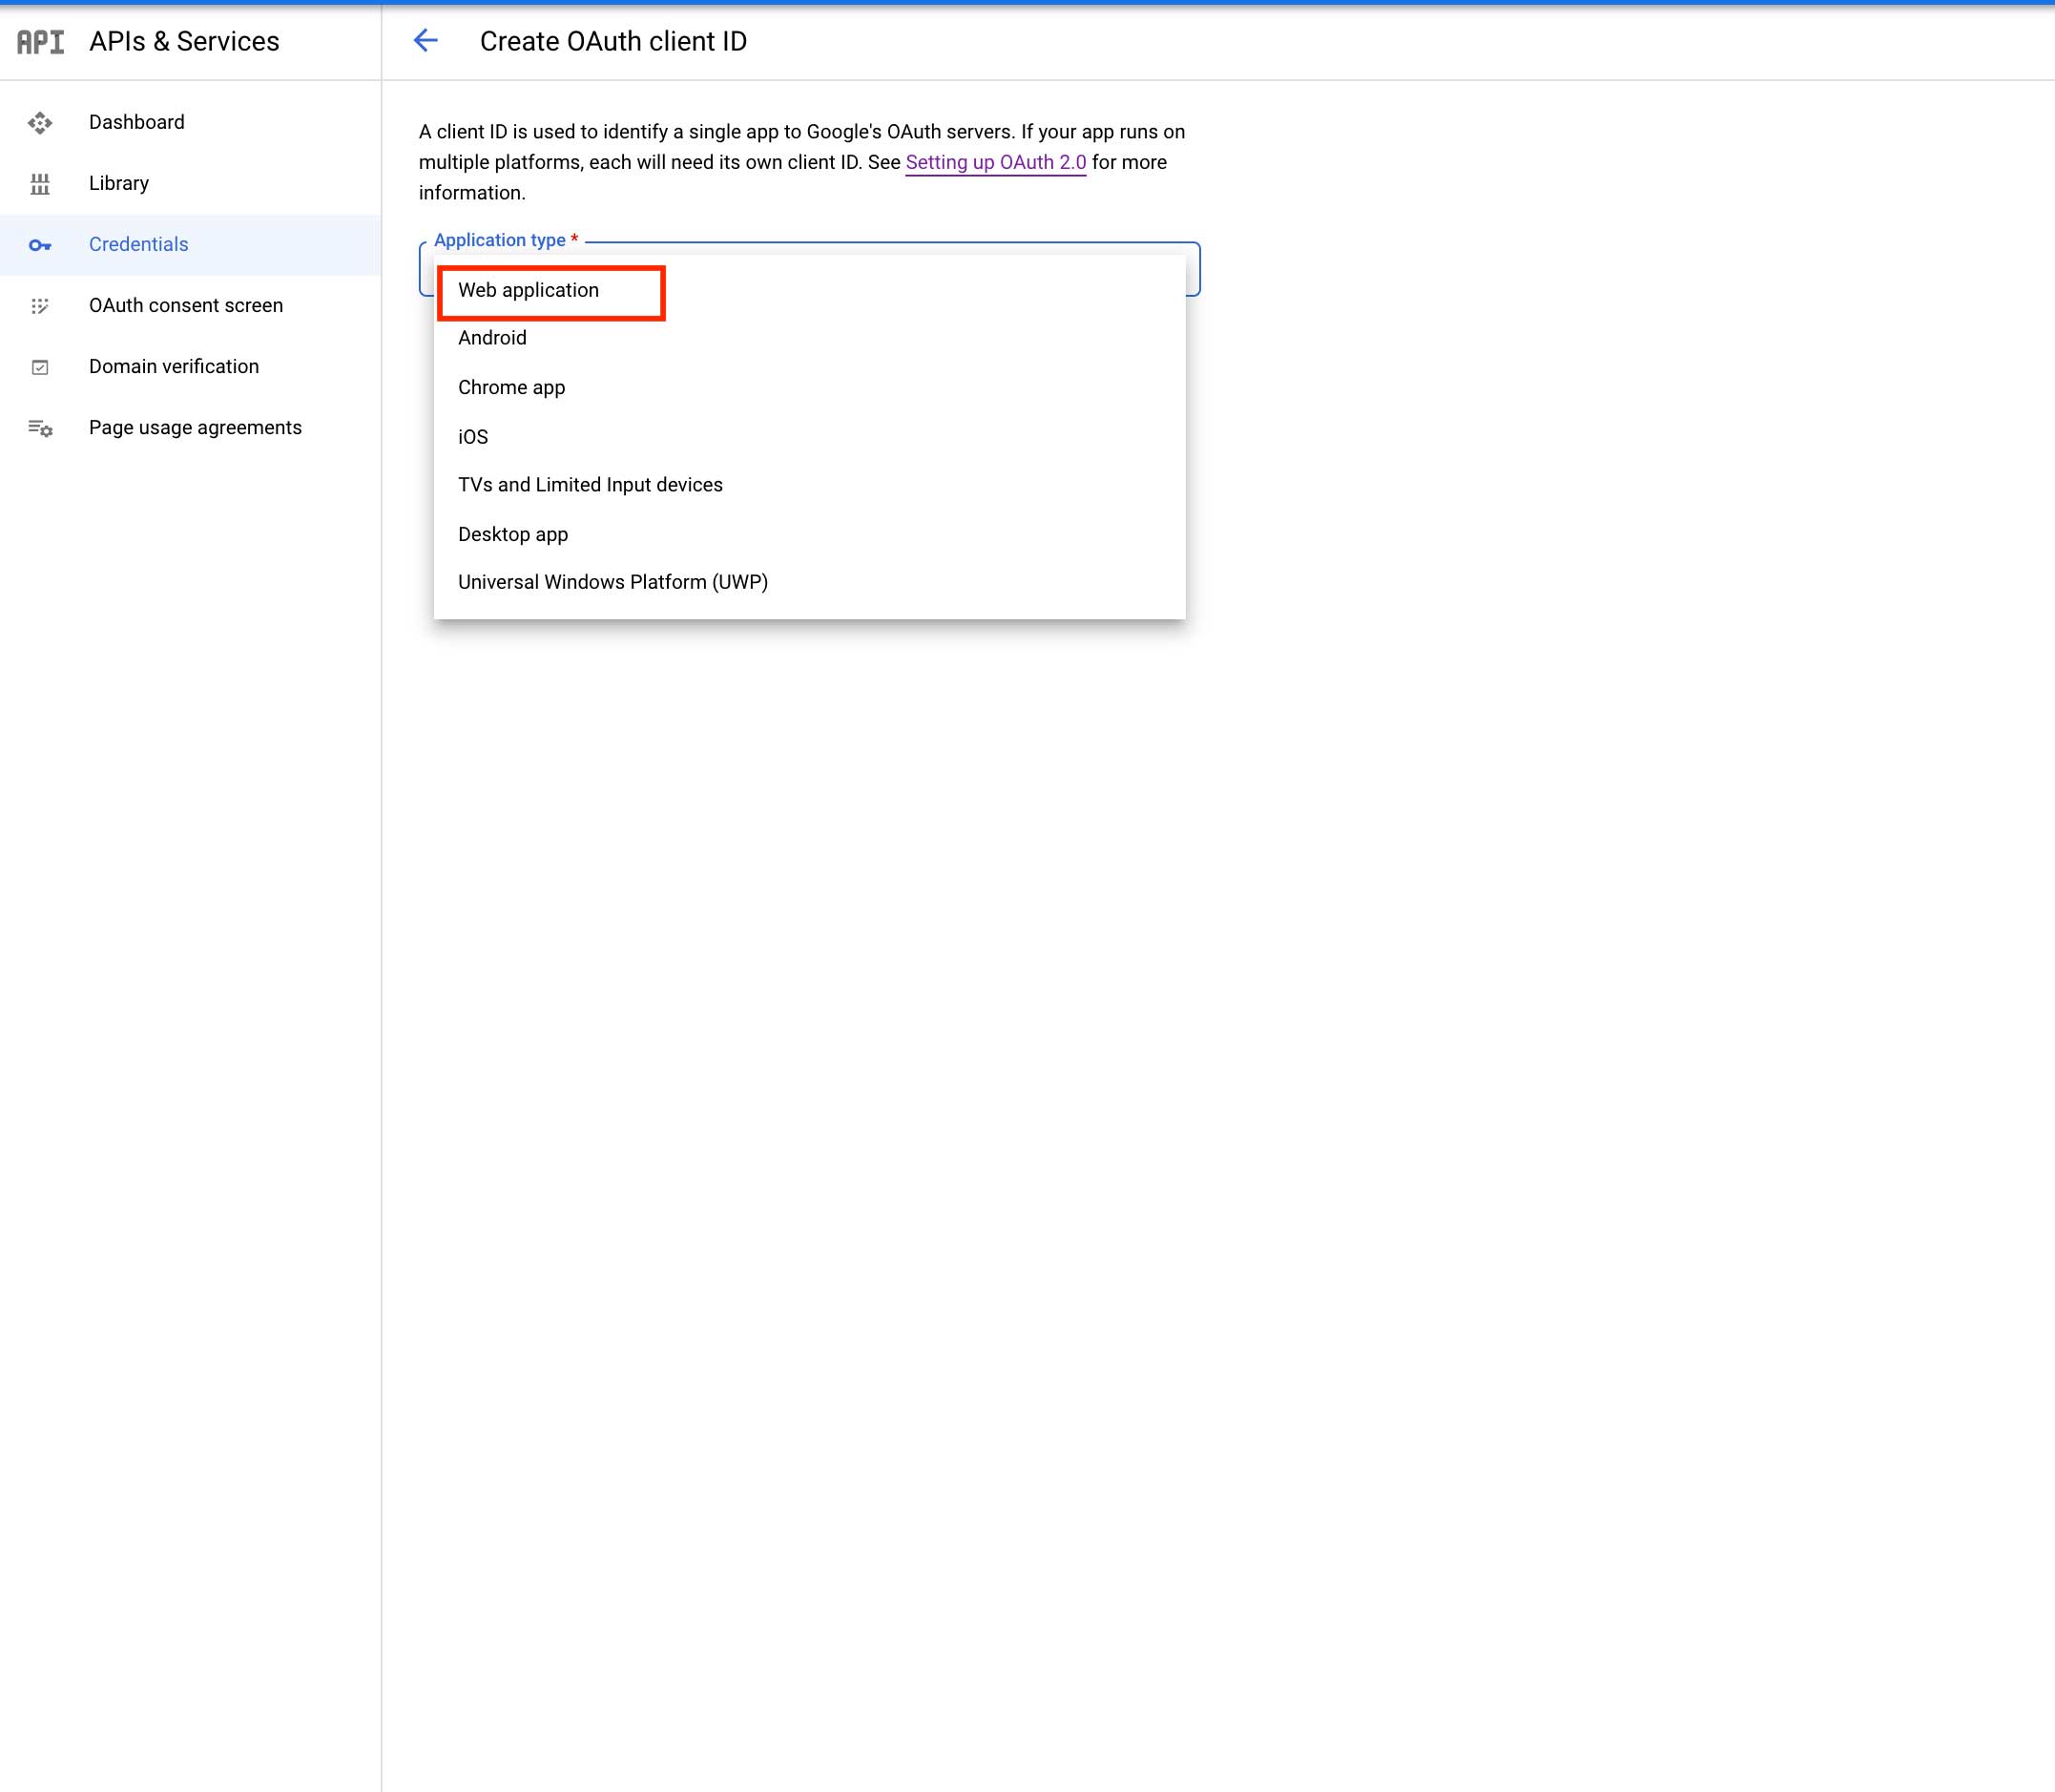
Step 20 : Click on Add URI 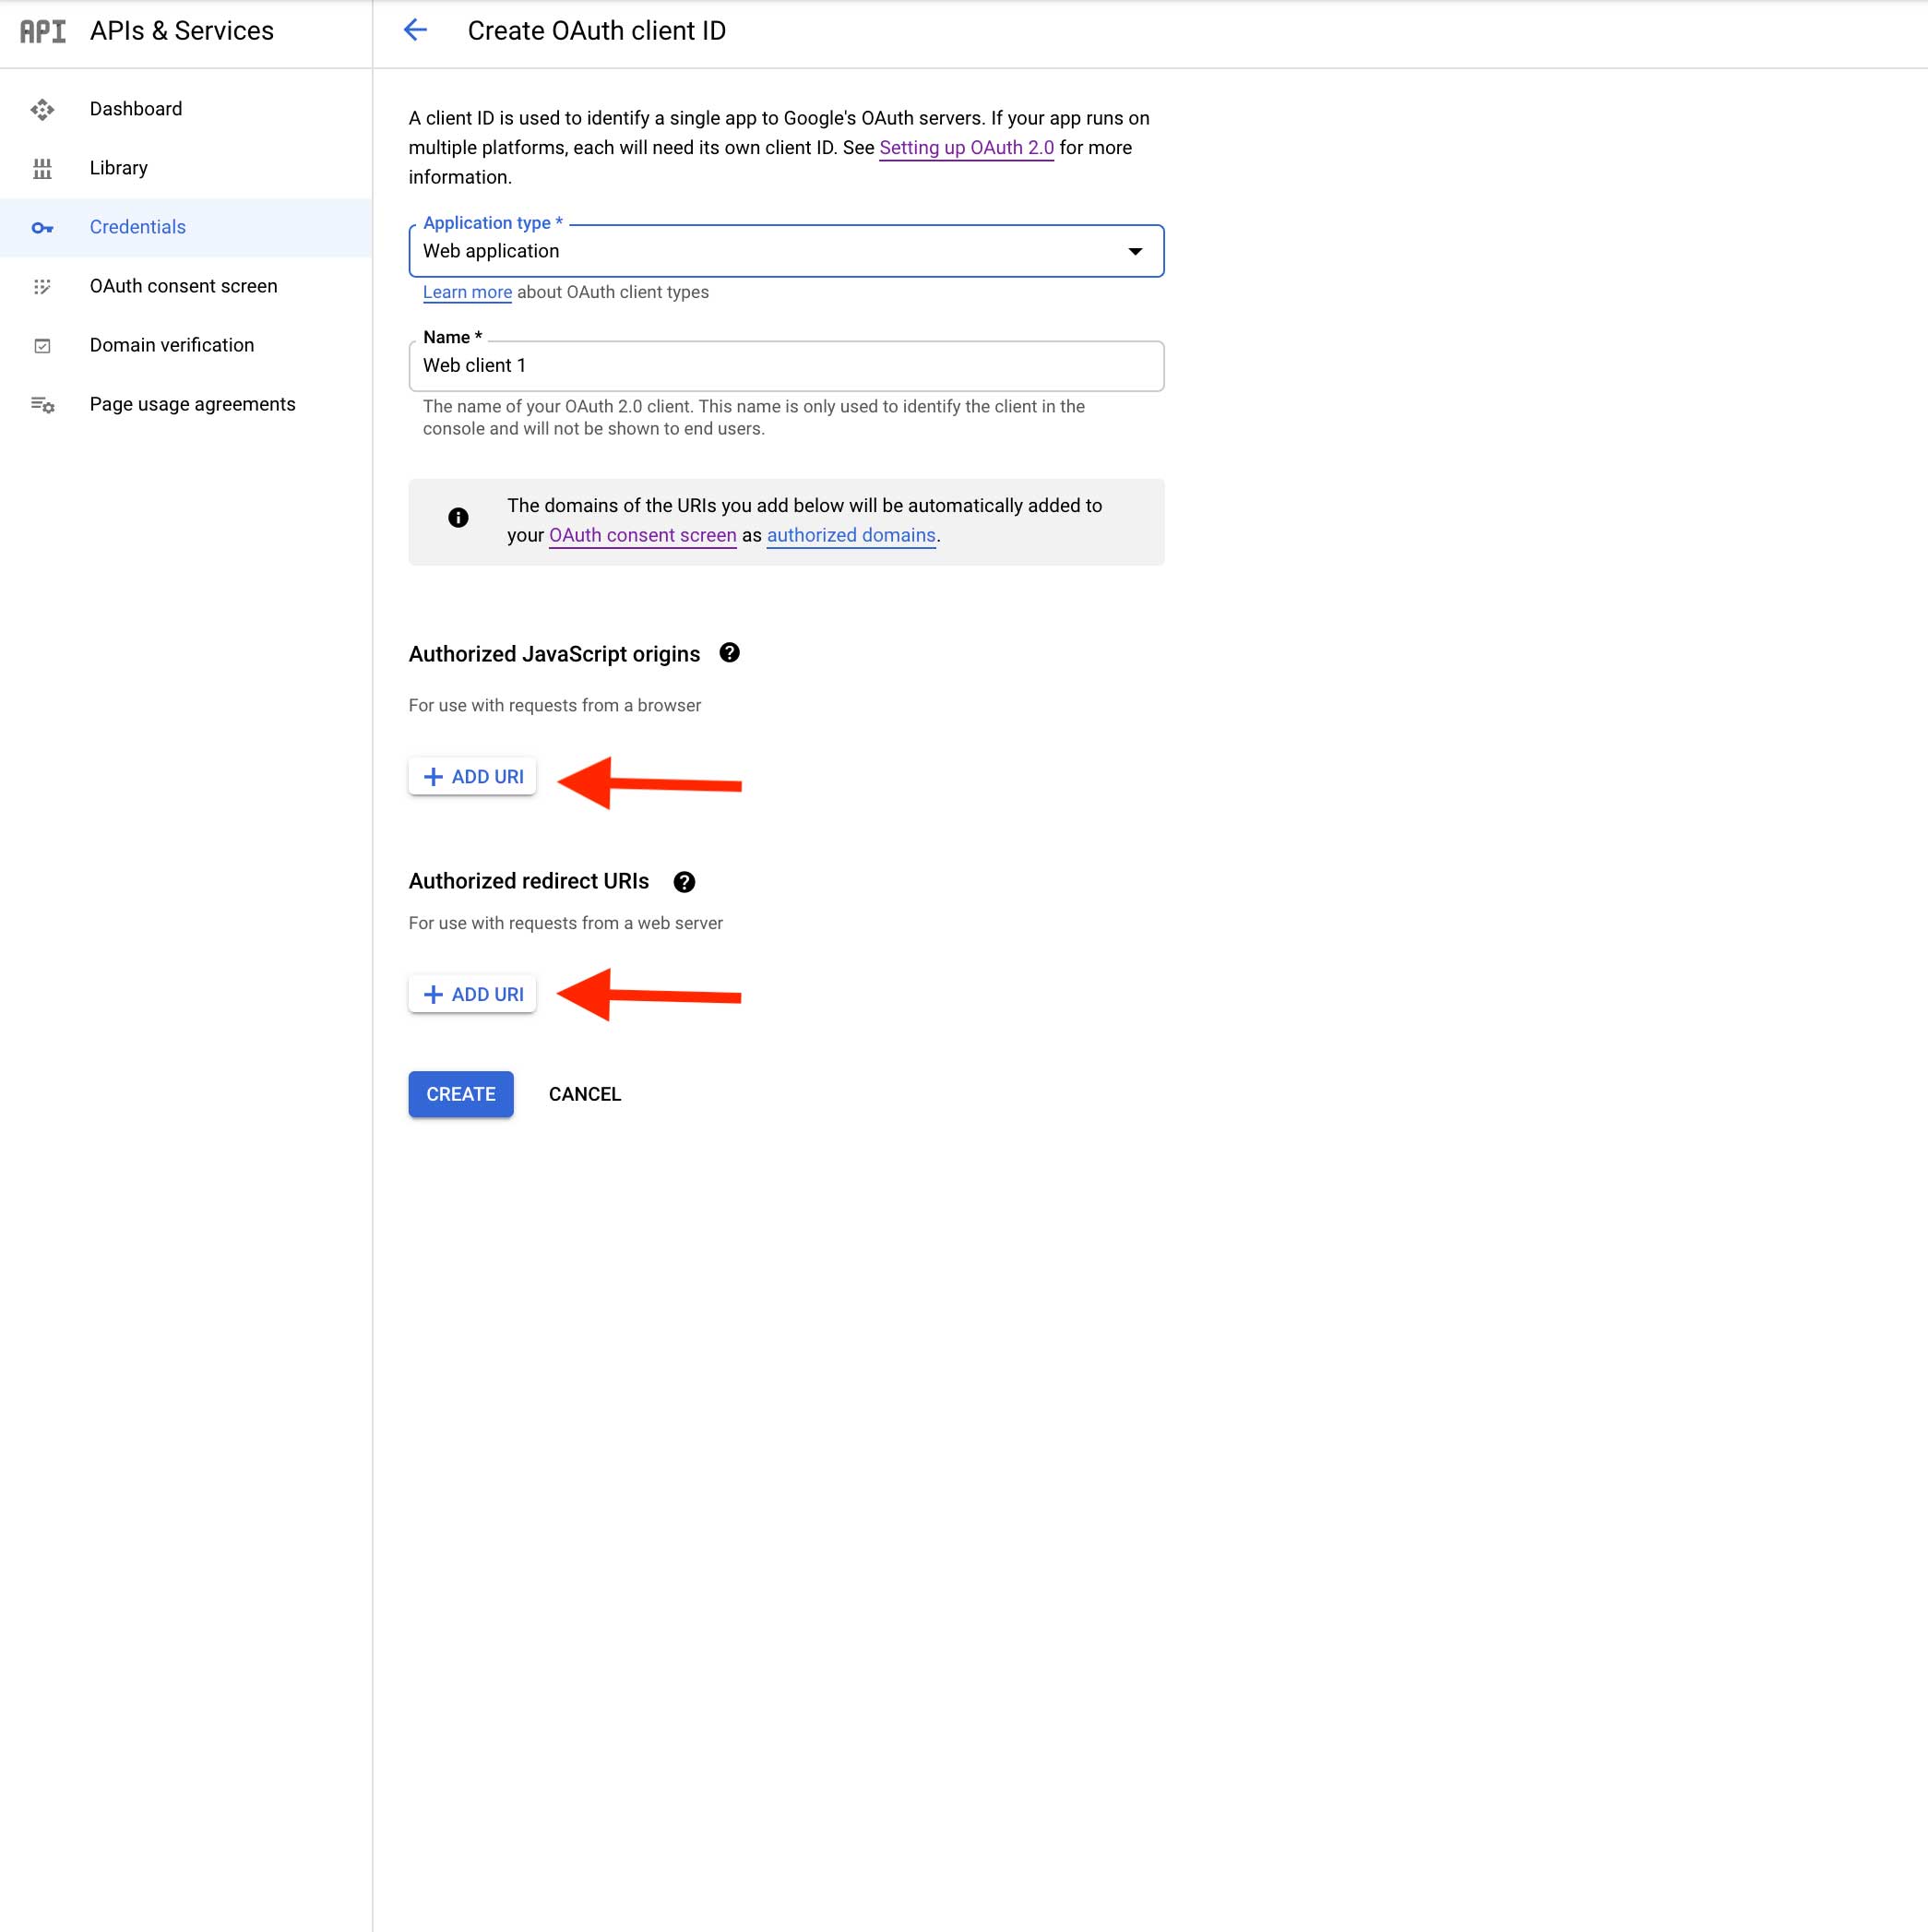
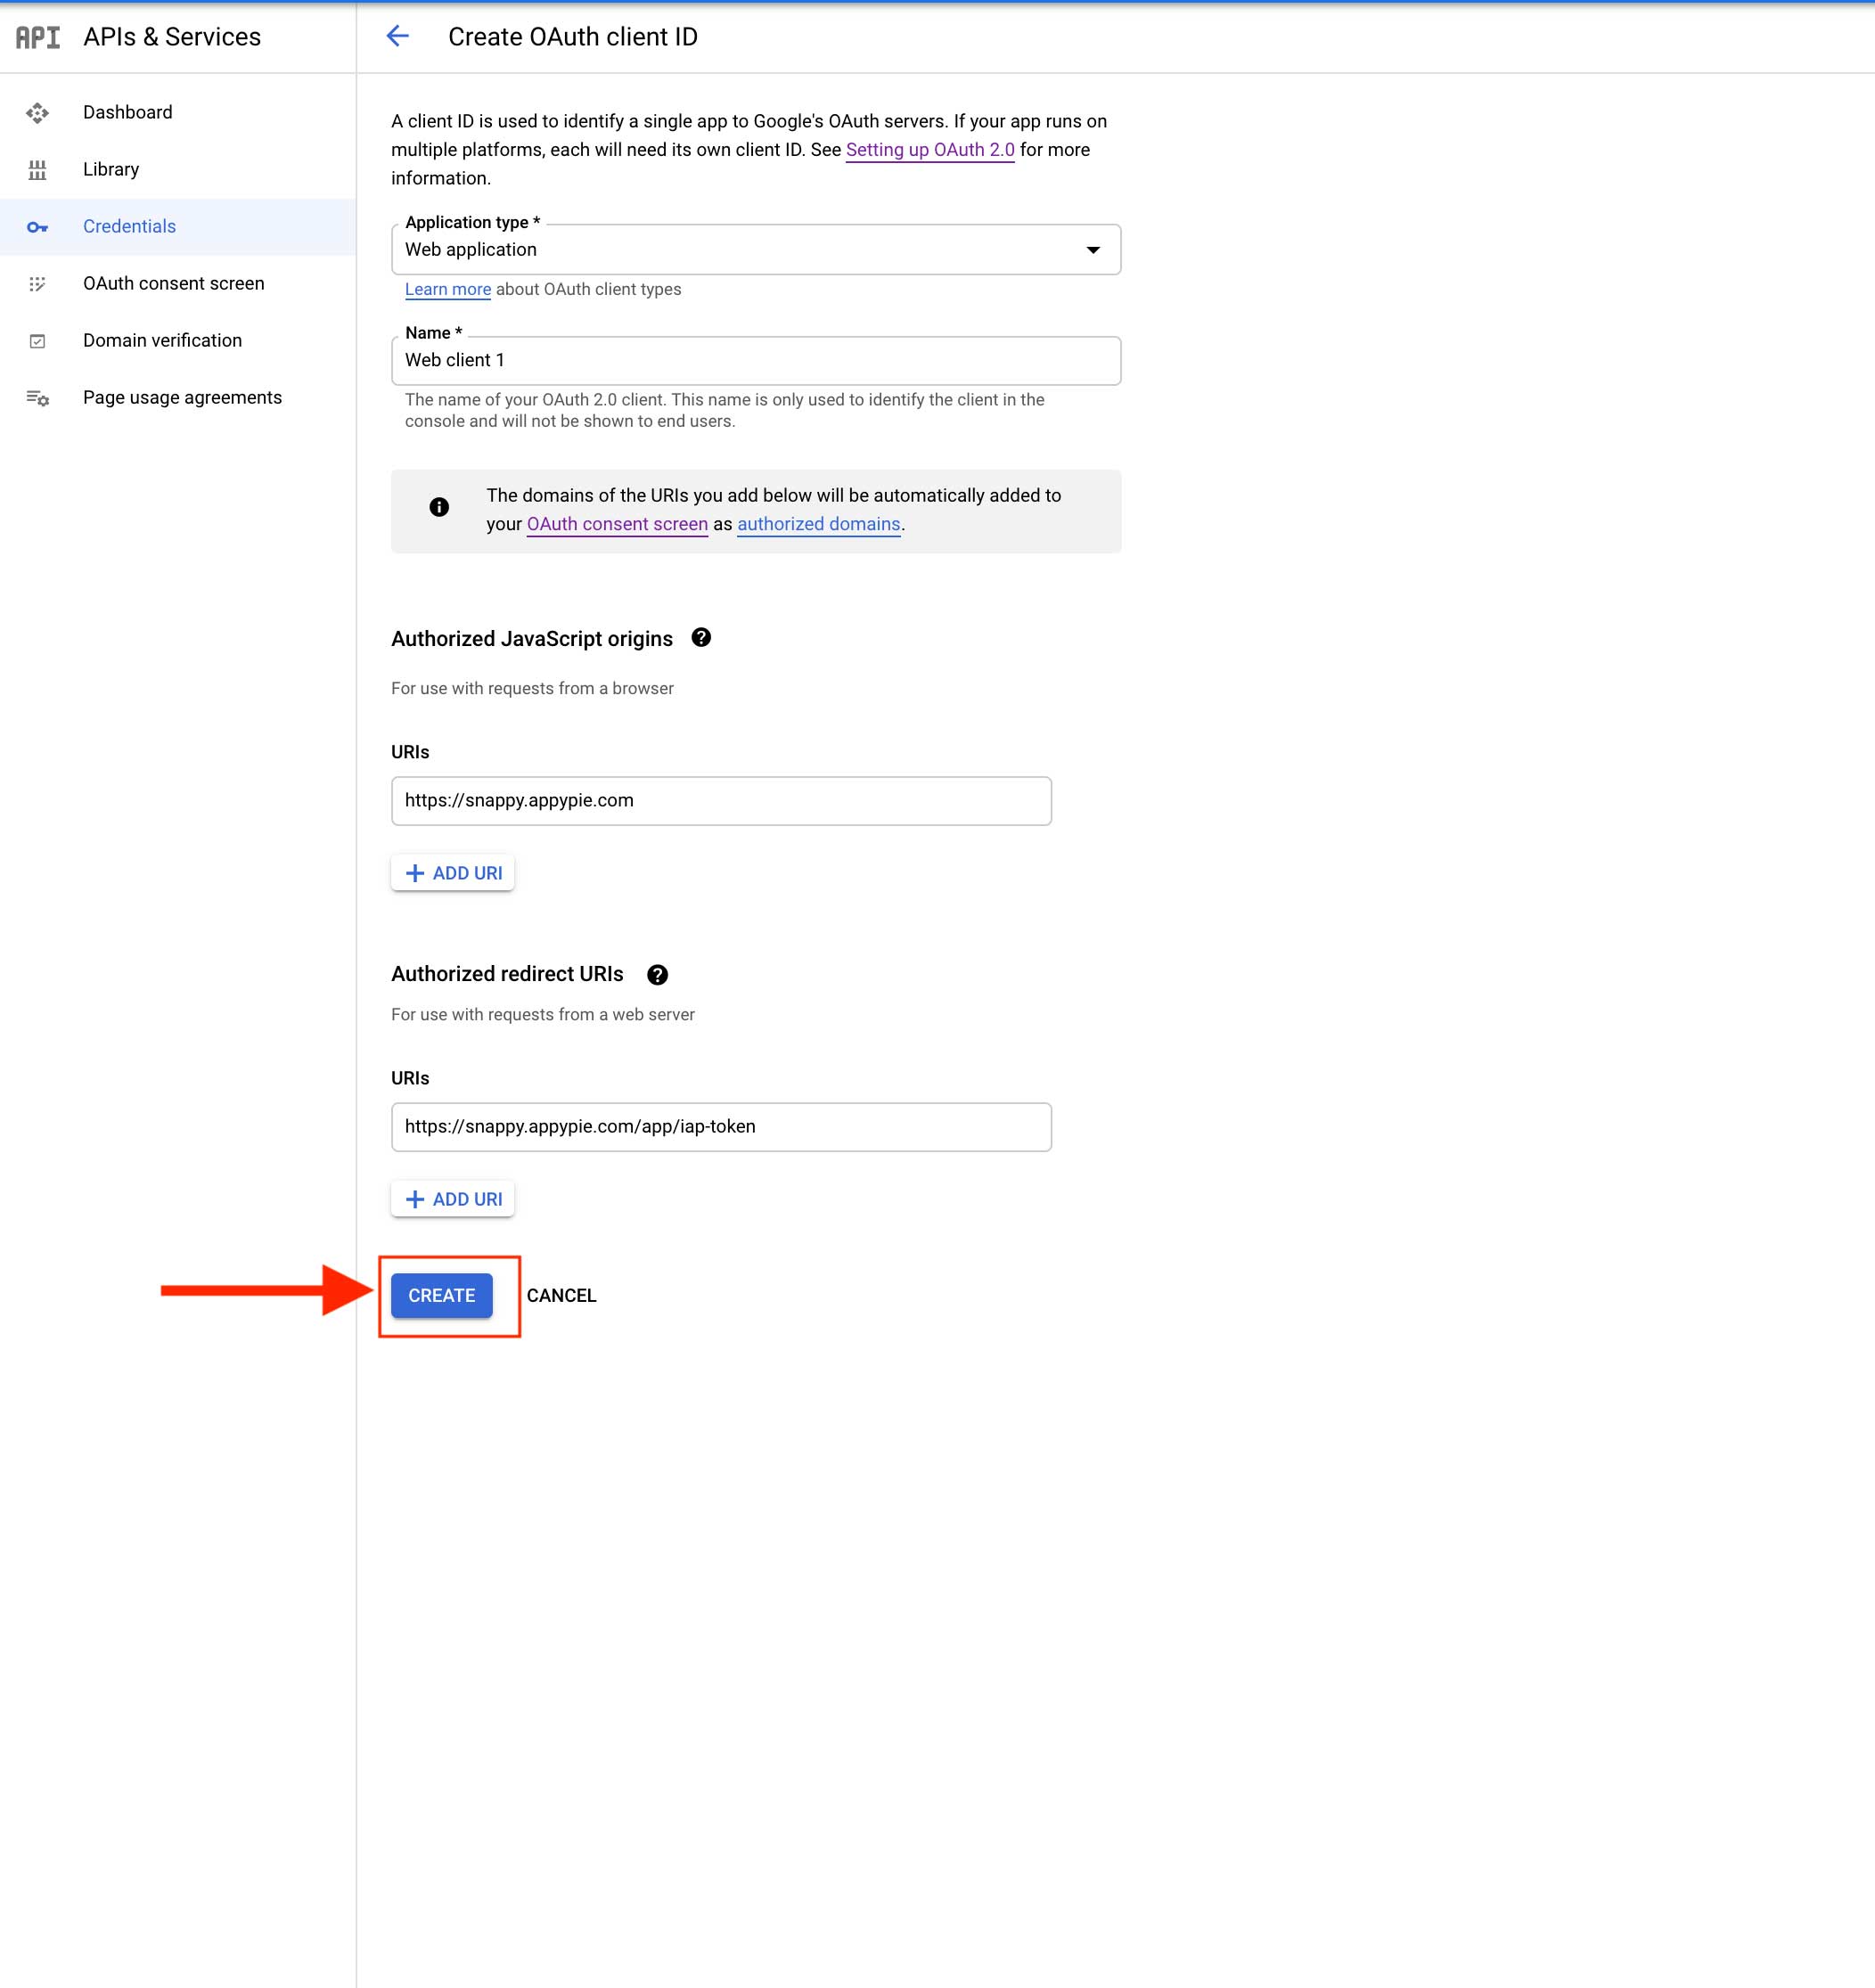
Step 21 : Provide Authorized JavaScript Origins and Authorized Redirect URLs.In the Authorized JavaScript origins field, enter the URL - https://snappy.appypie.com and in Authorized redirect URLs field ,enter the URL - https://snappy.appypie.com/app/iap-token . Once done, click on Create to continue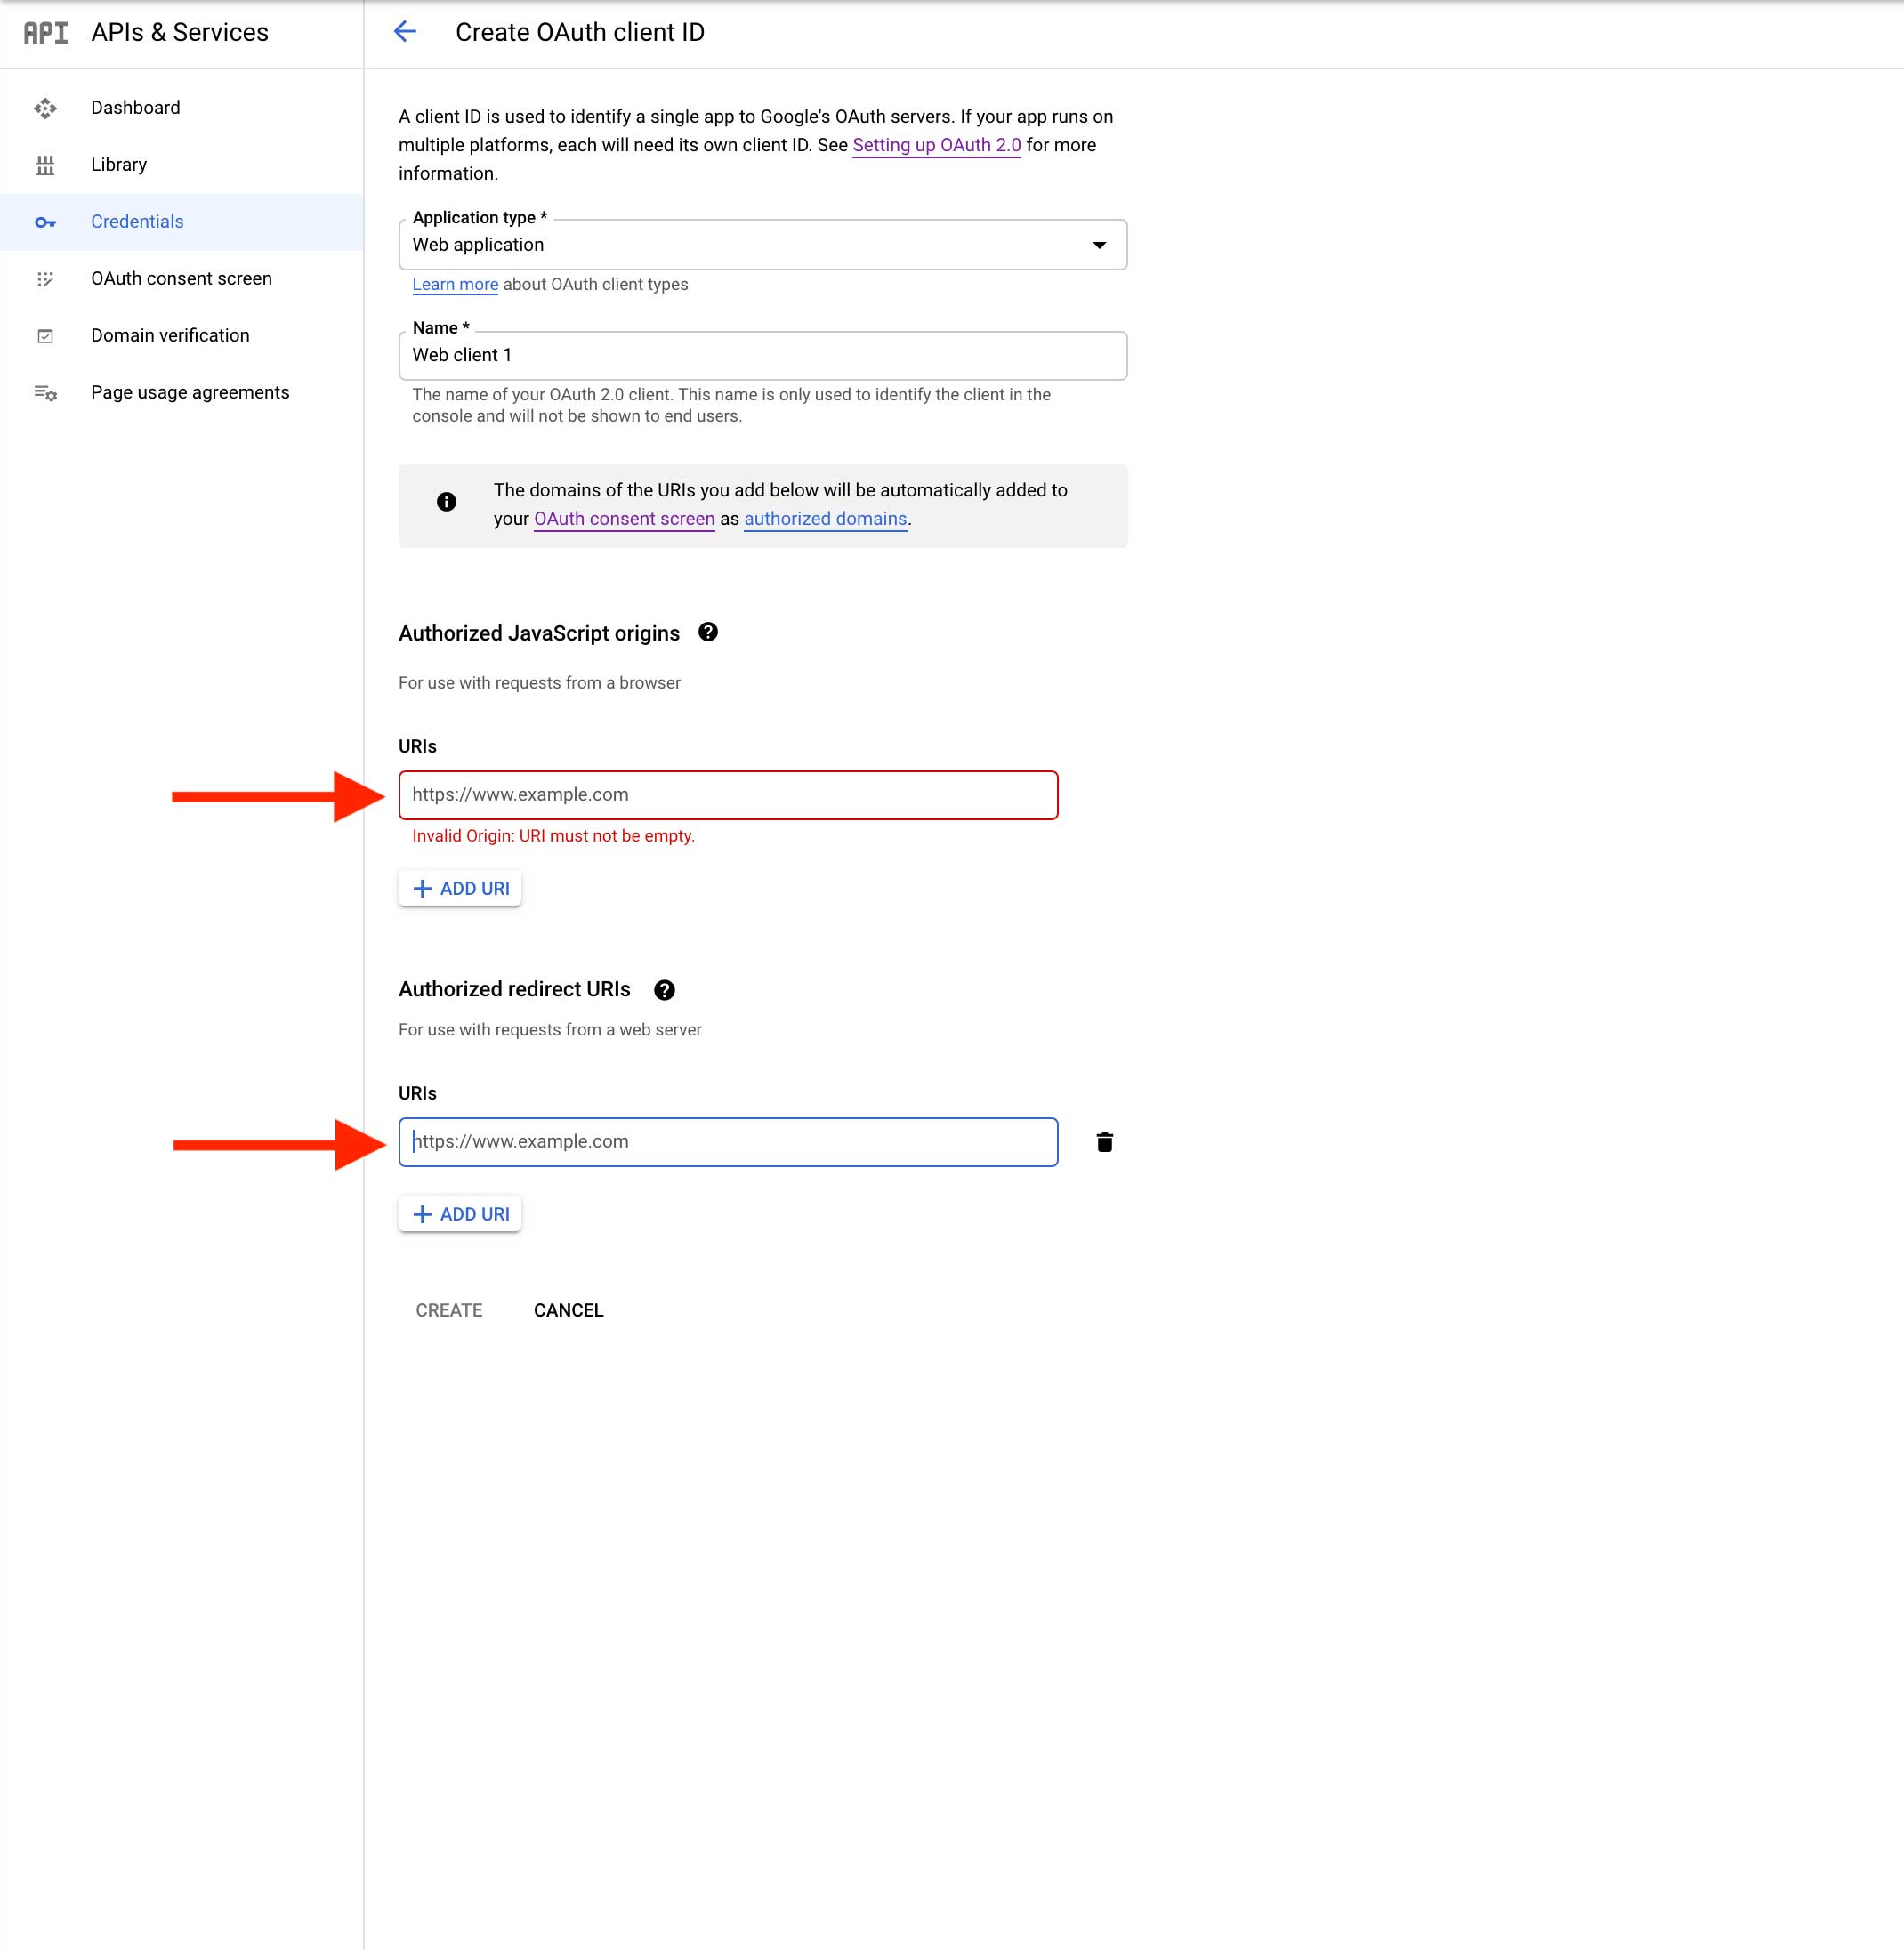
Step 22 : Once you’ve provided the required information, click on Create.
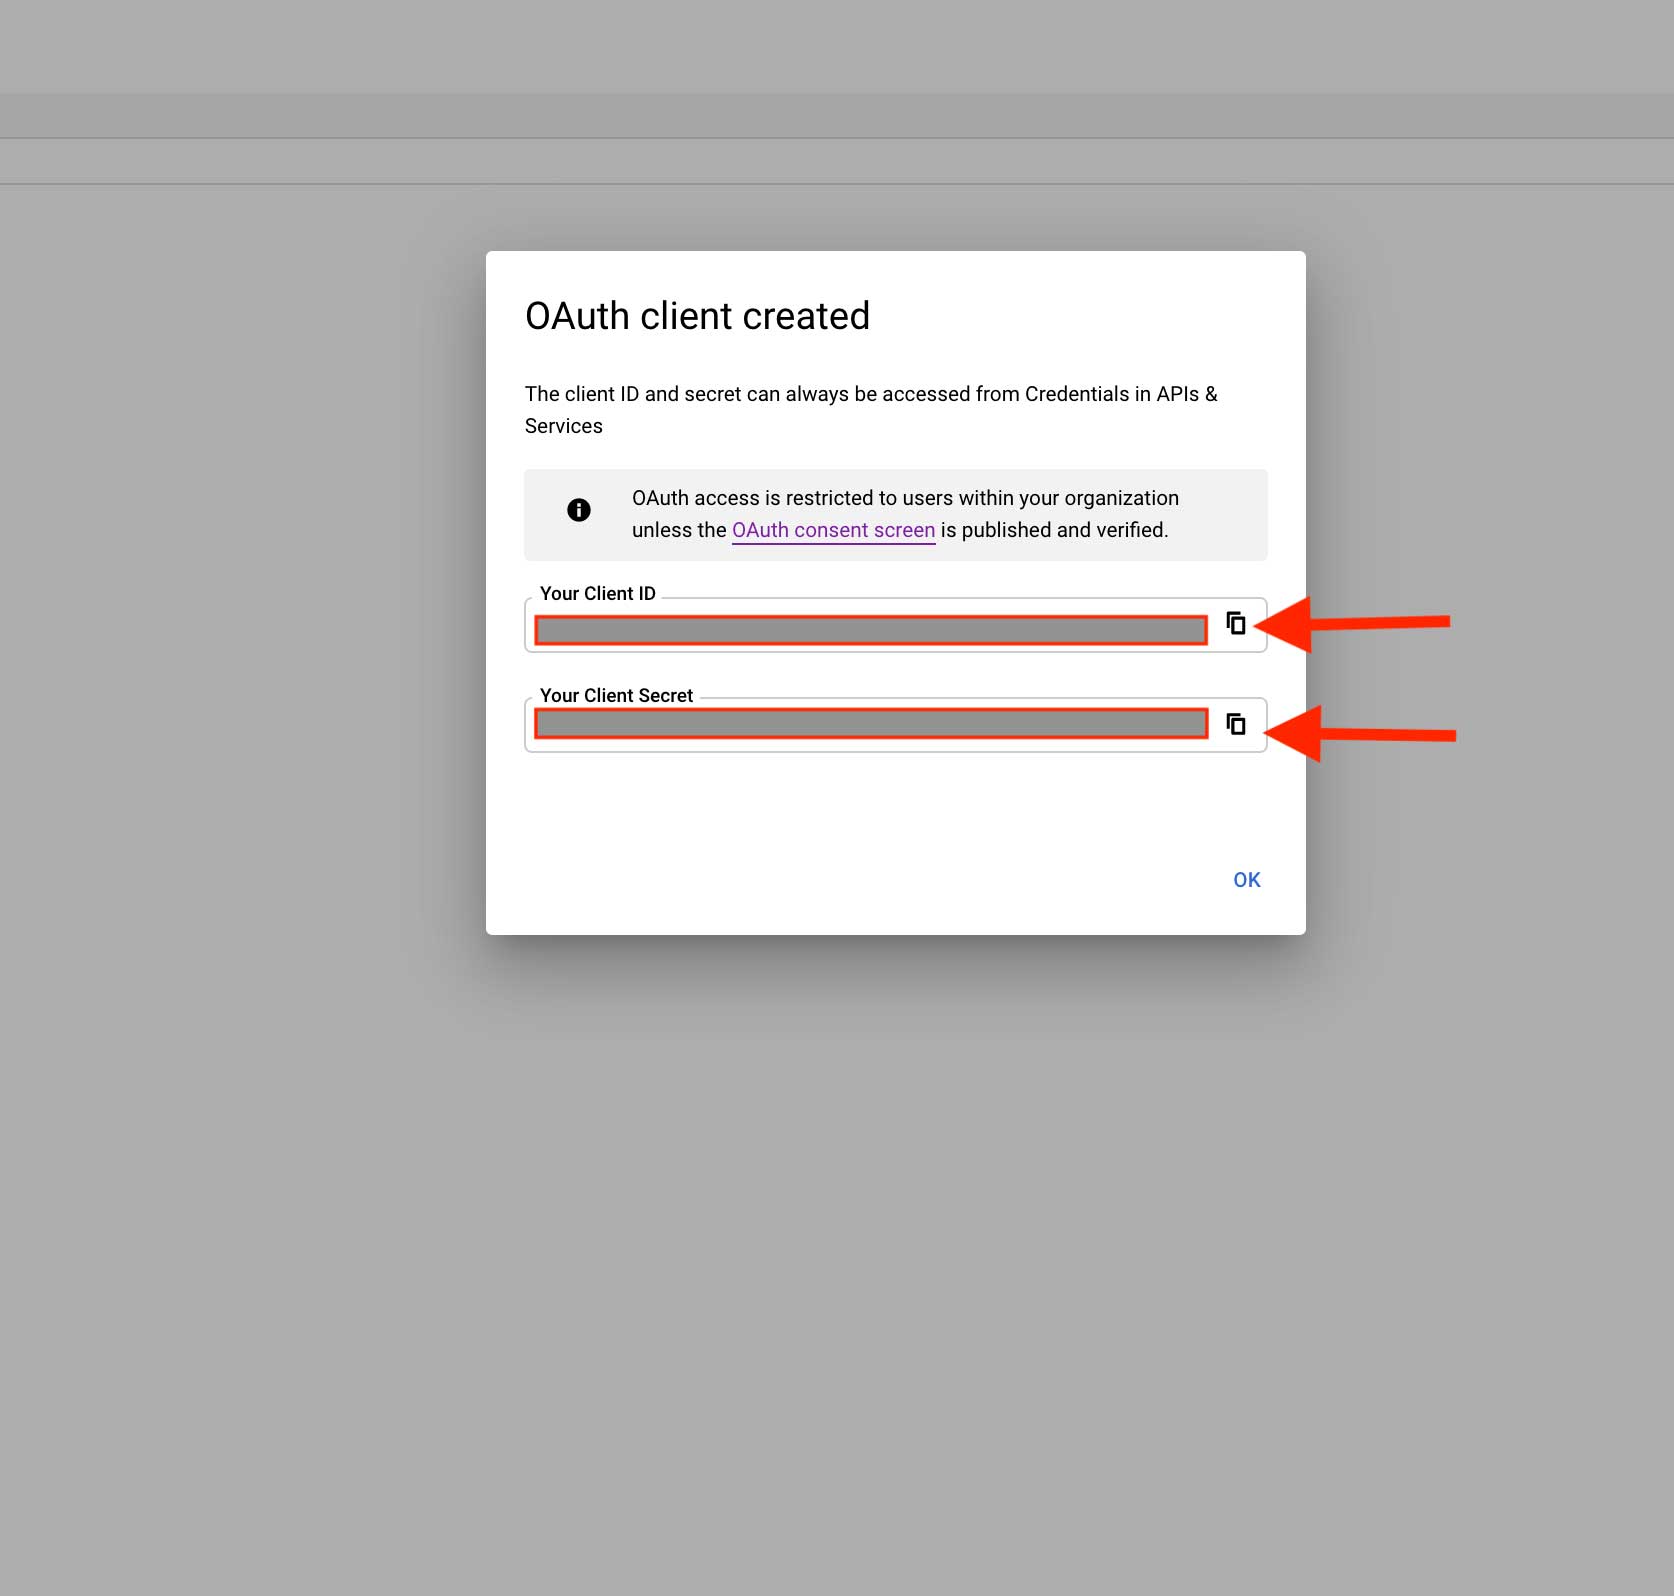
Step 23 : Once done, your OAuth client will be created. Now, copy your client ID from the dialog.
Note: You can also access and copy your Client ID from the Credentials page in APIs & Services.
 Step 24 : Paste the copied key in the respective fields on the creator software.
Now to link your Google Cloud project :
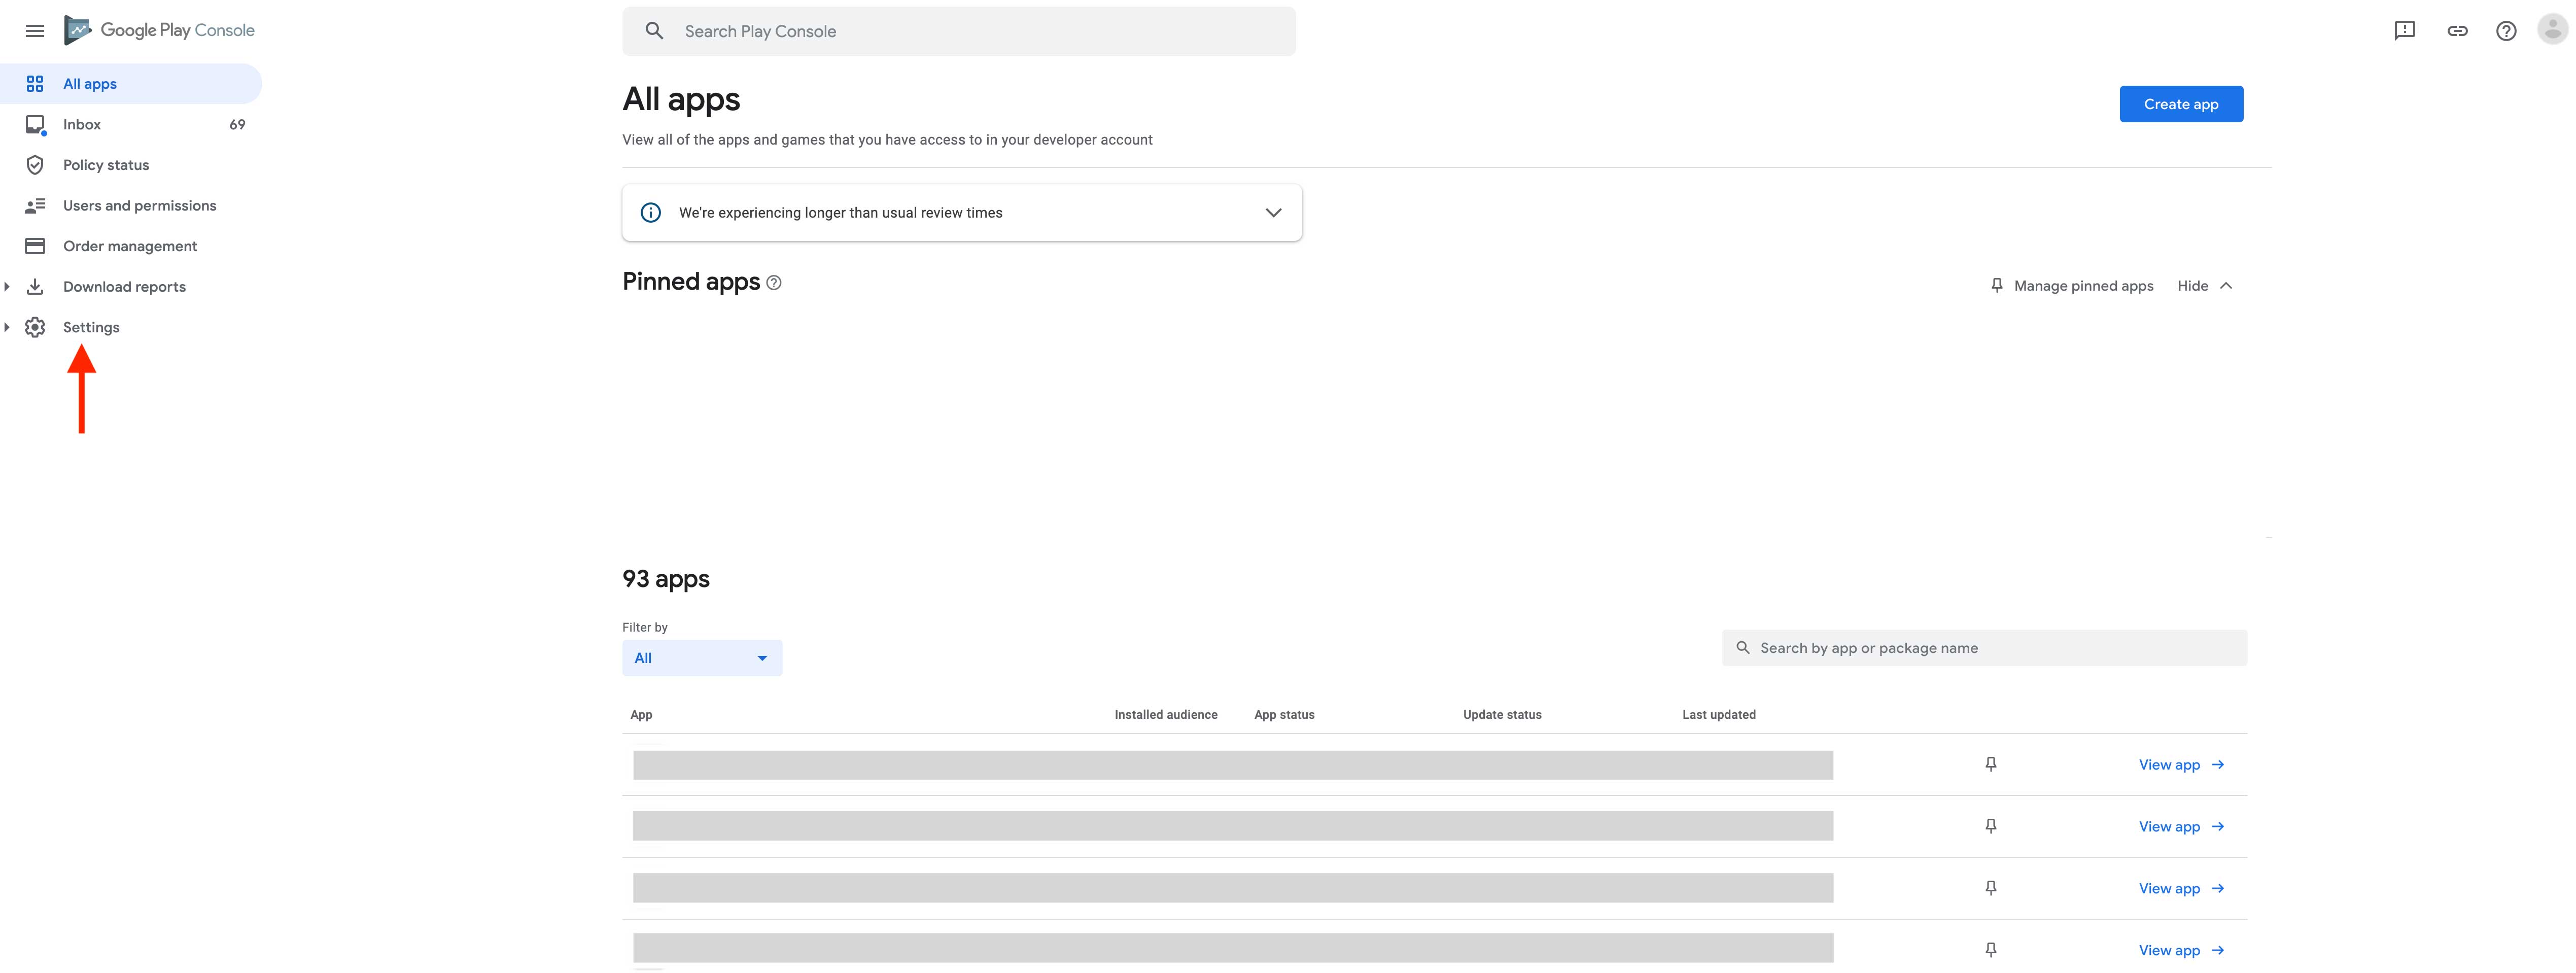
Step 25 : Go to Google Play Console
Step 26 : If you have a Google Developer account, login, else Signup.
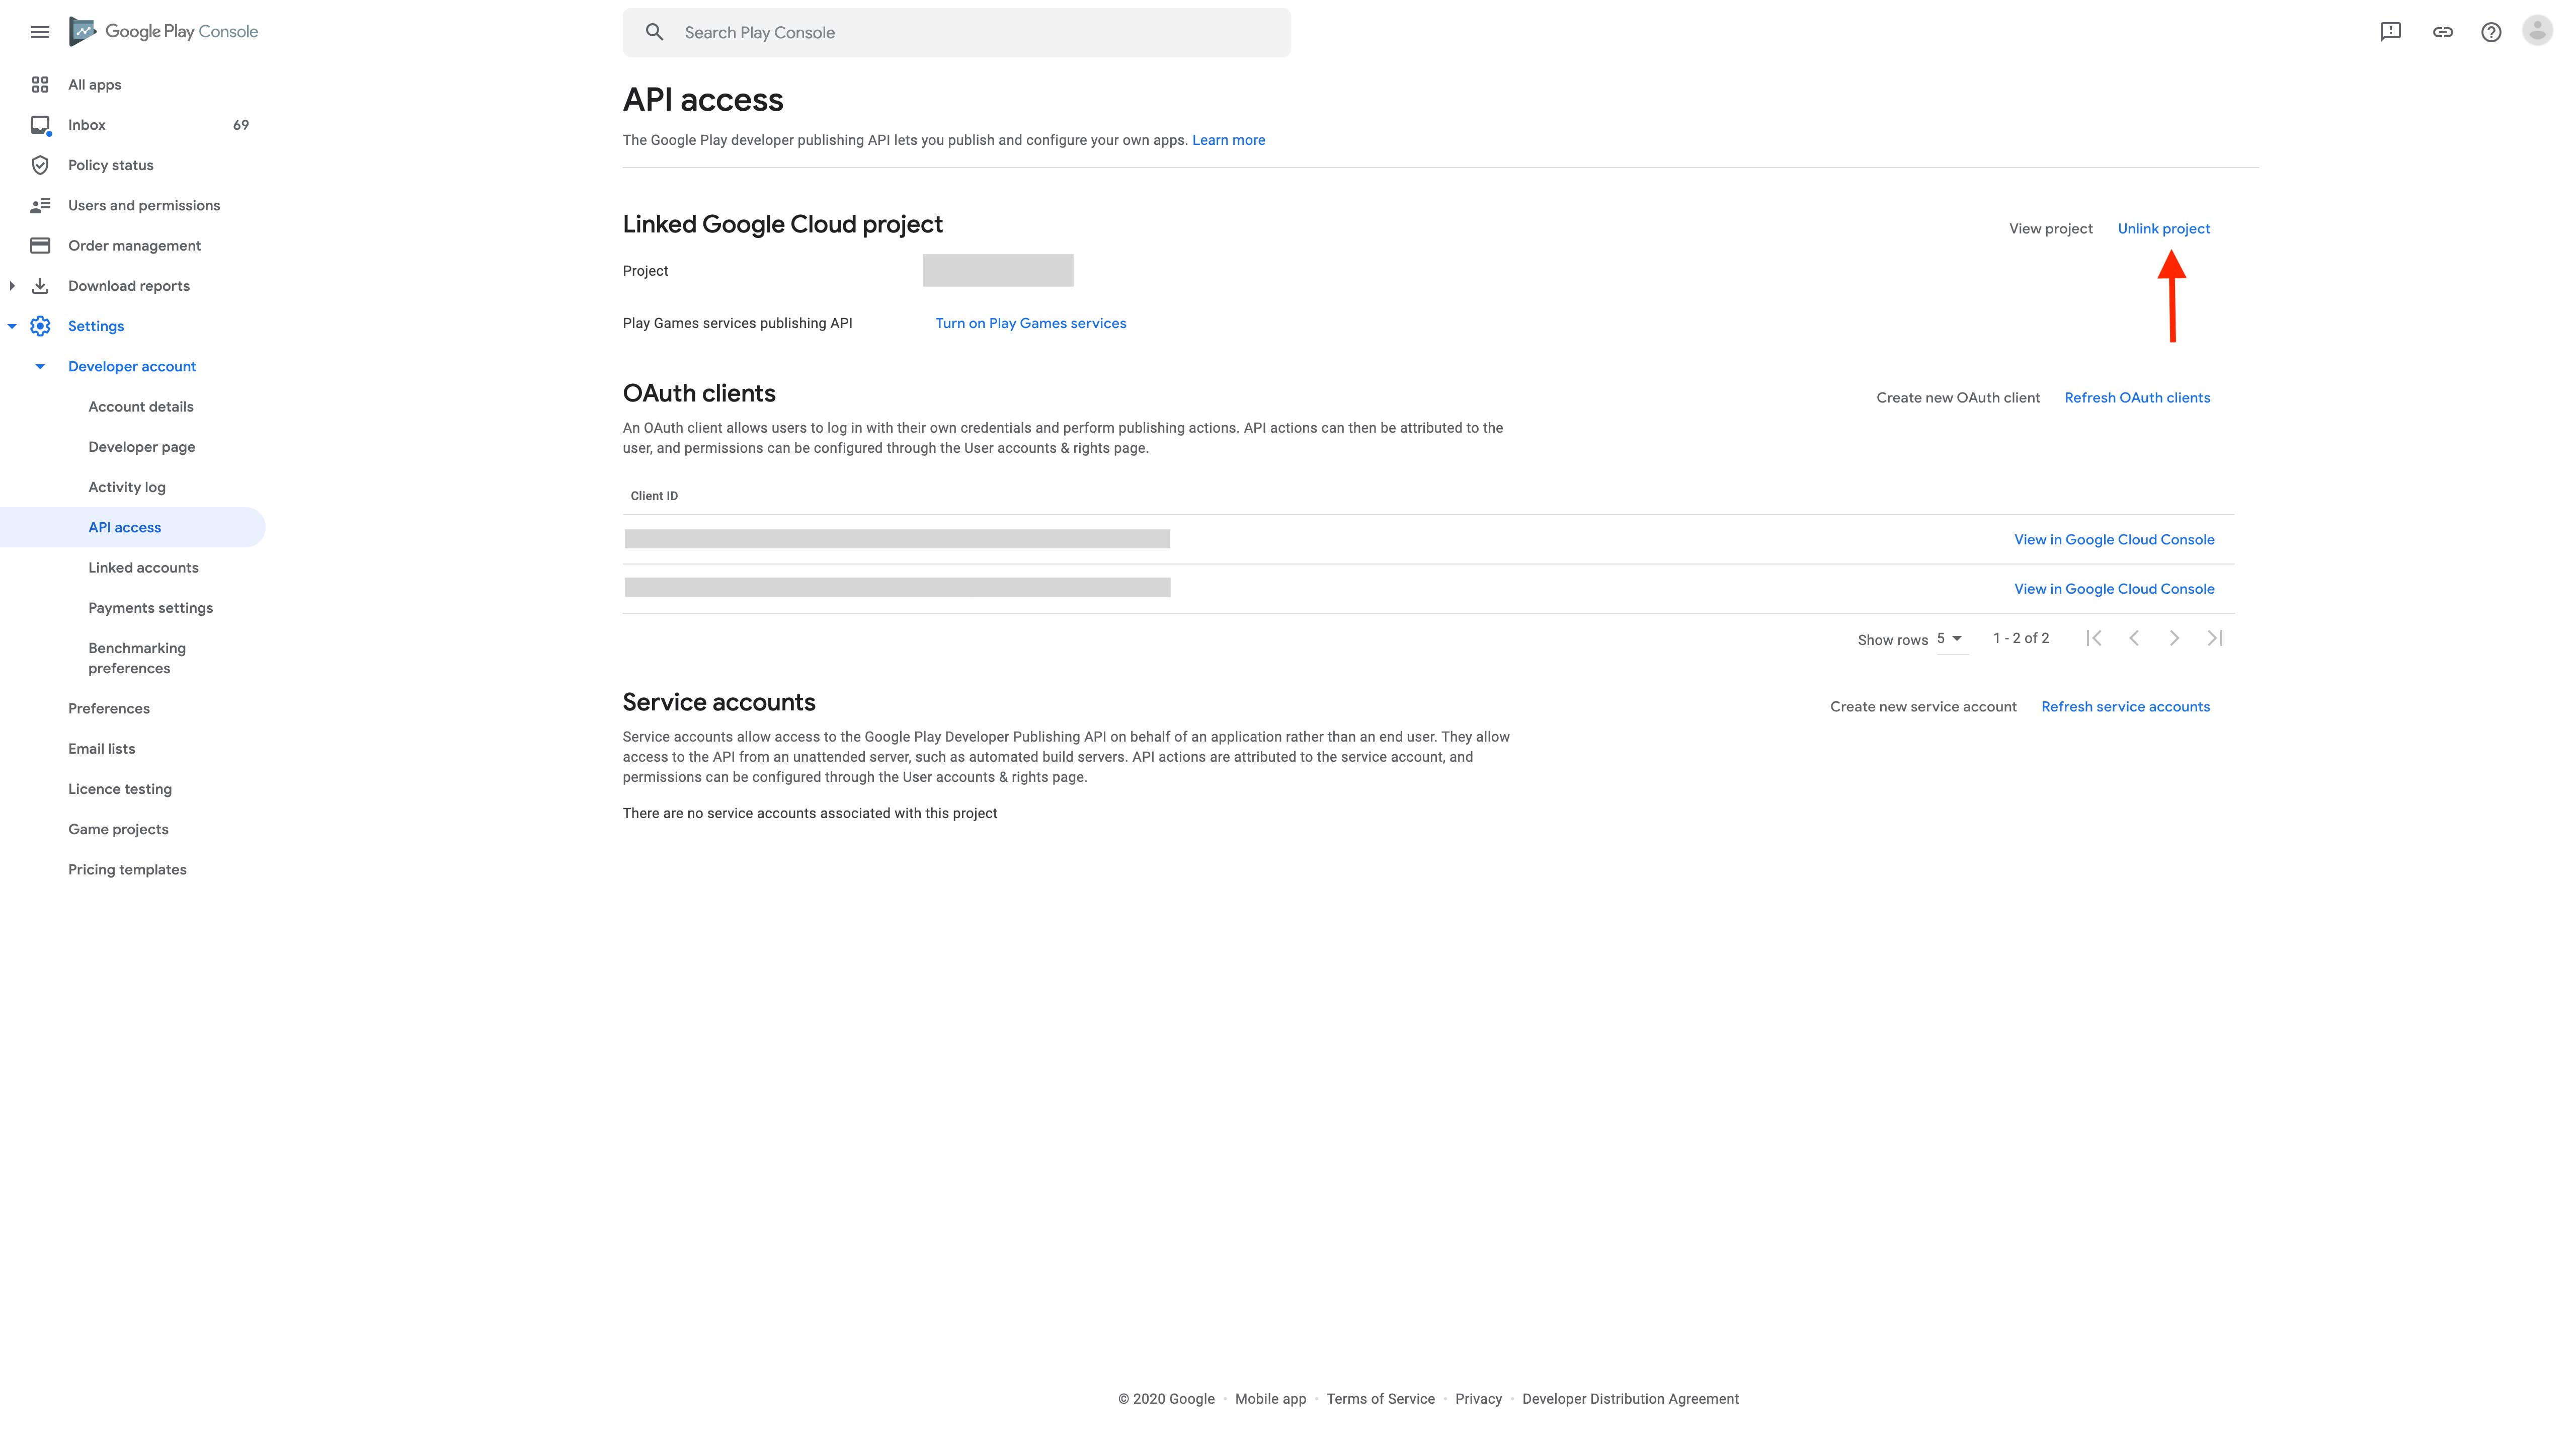
Step 27 : Click on Settings.
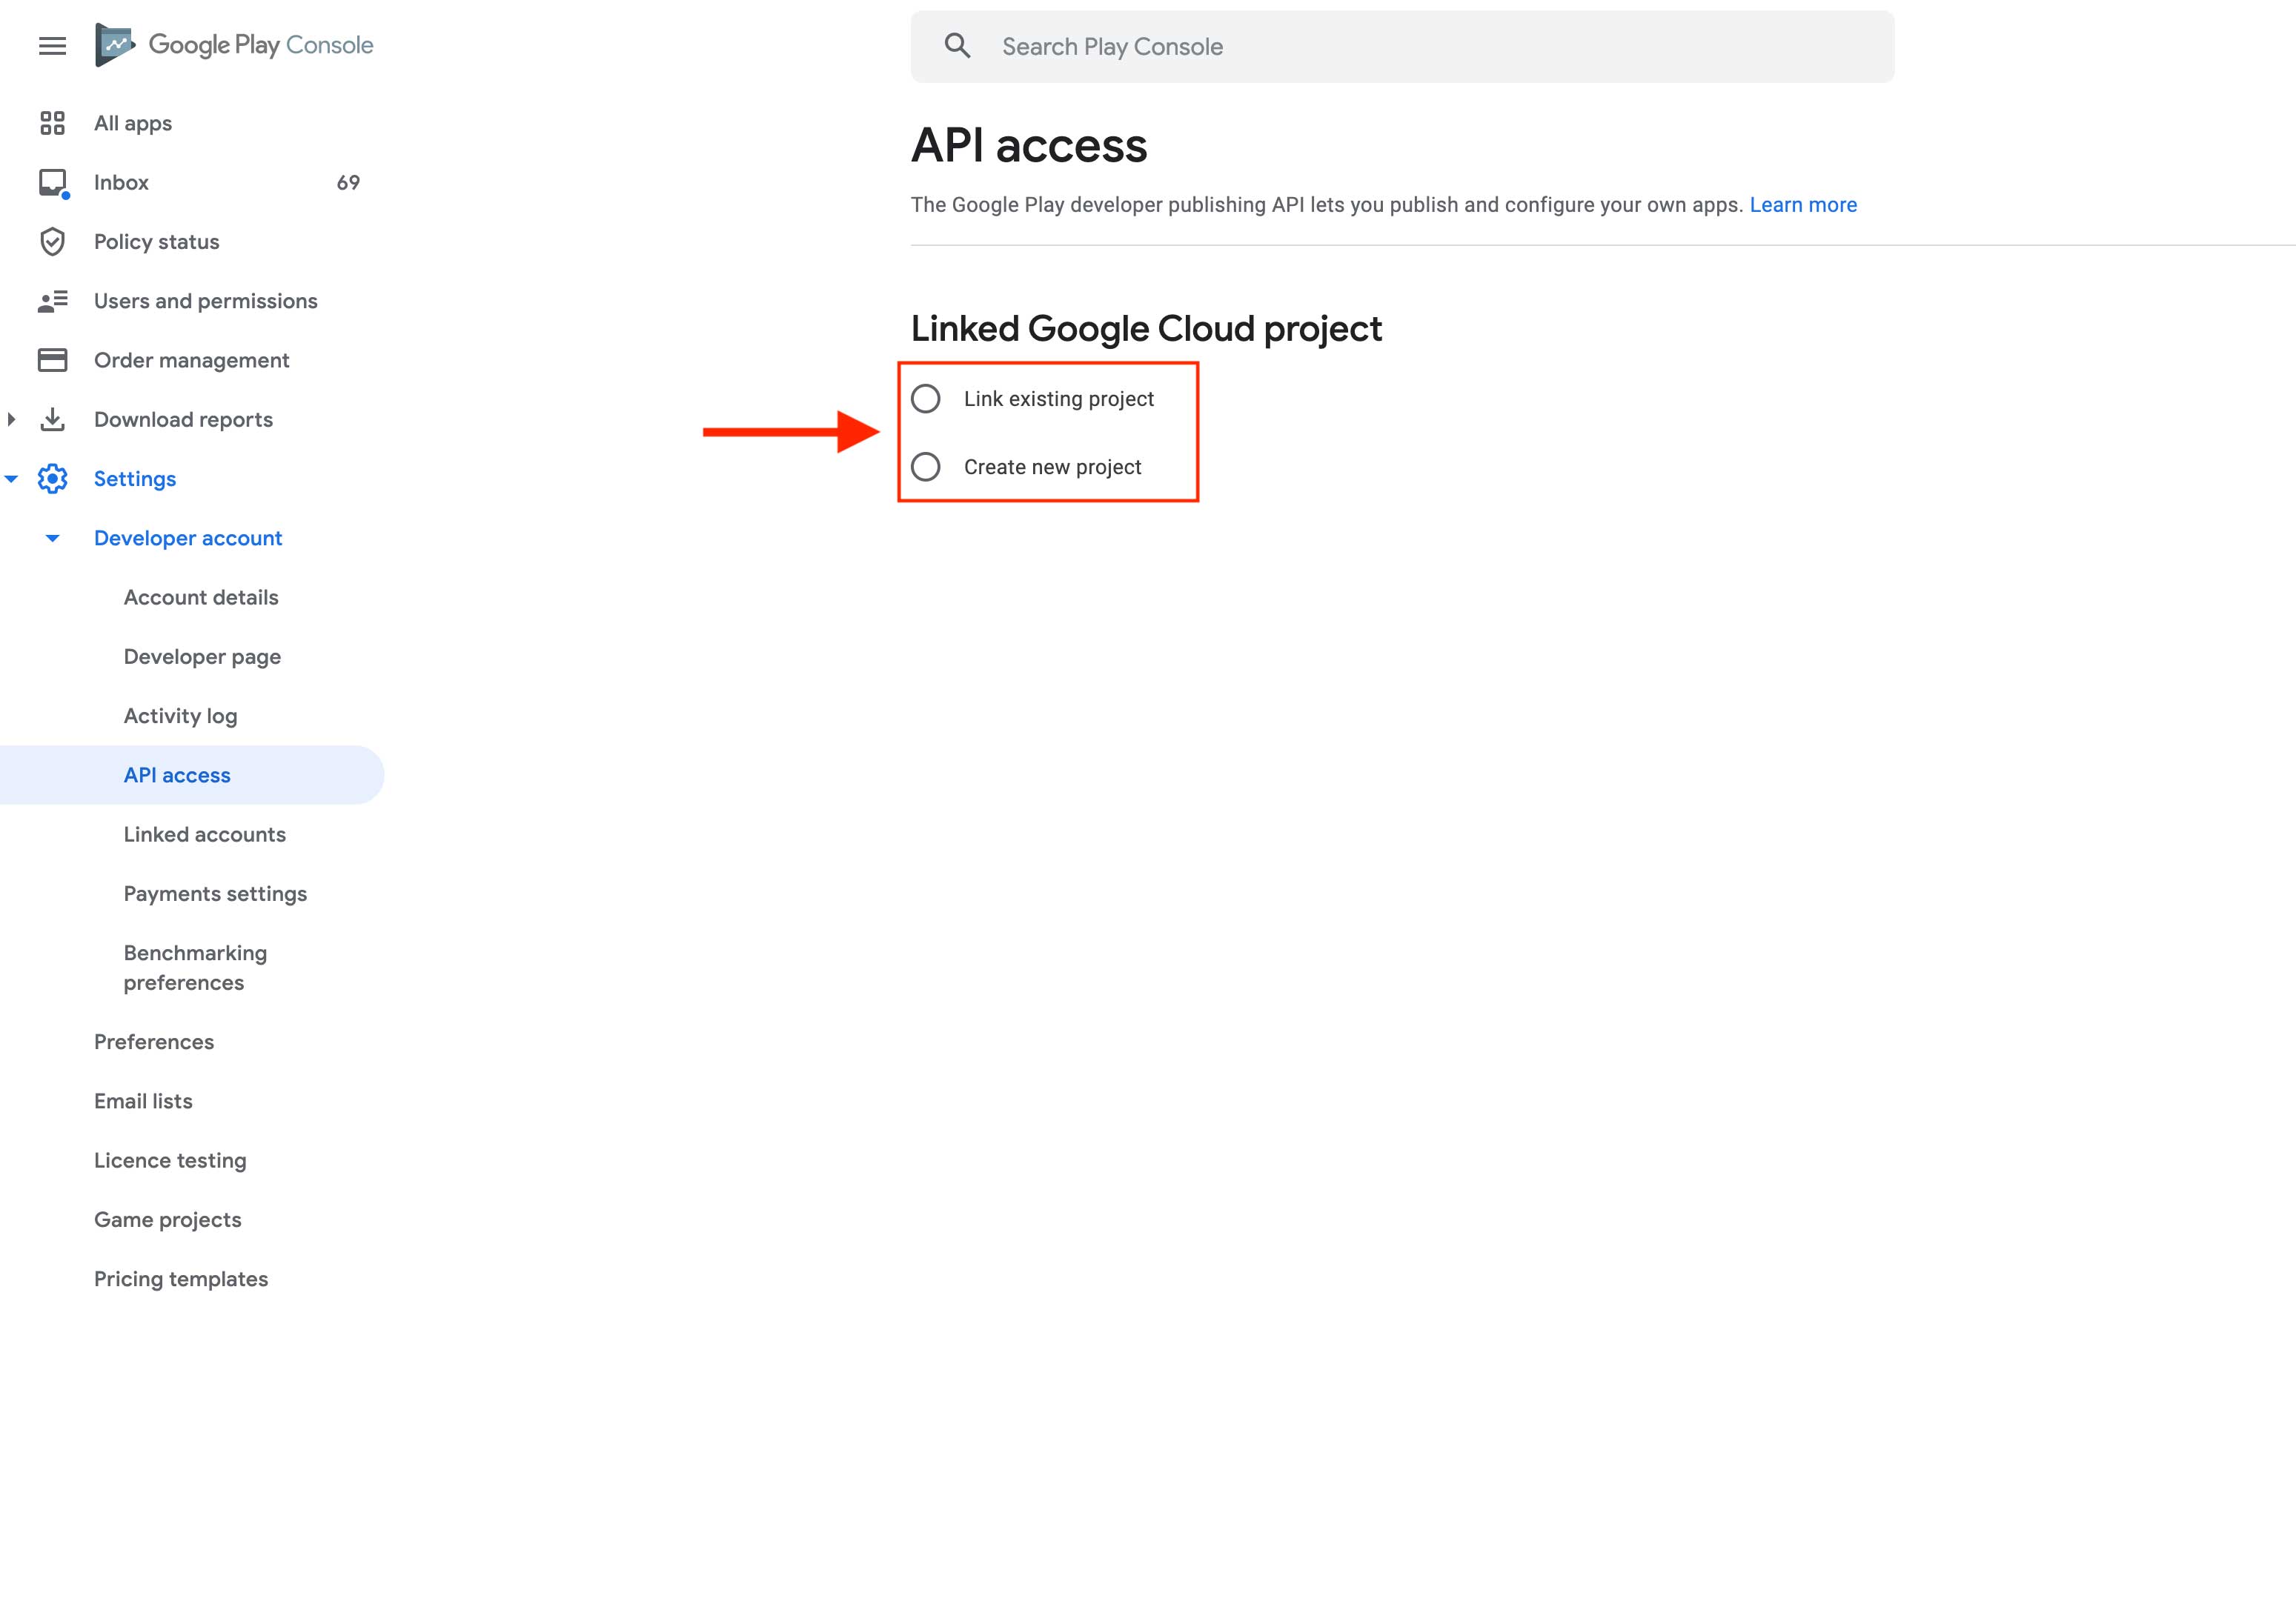
Step 28 : Click on API Access under Developer Account.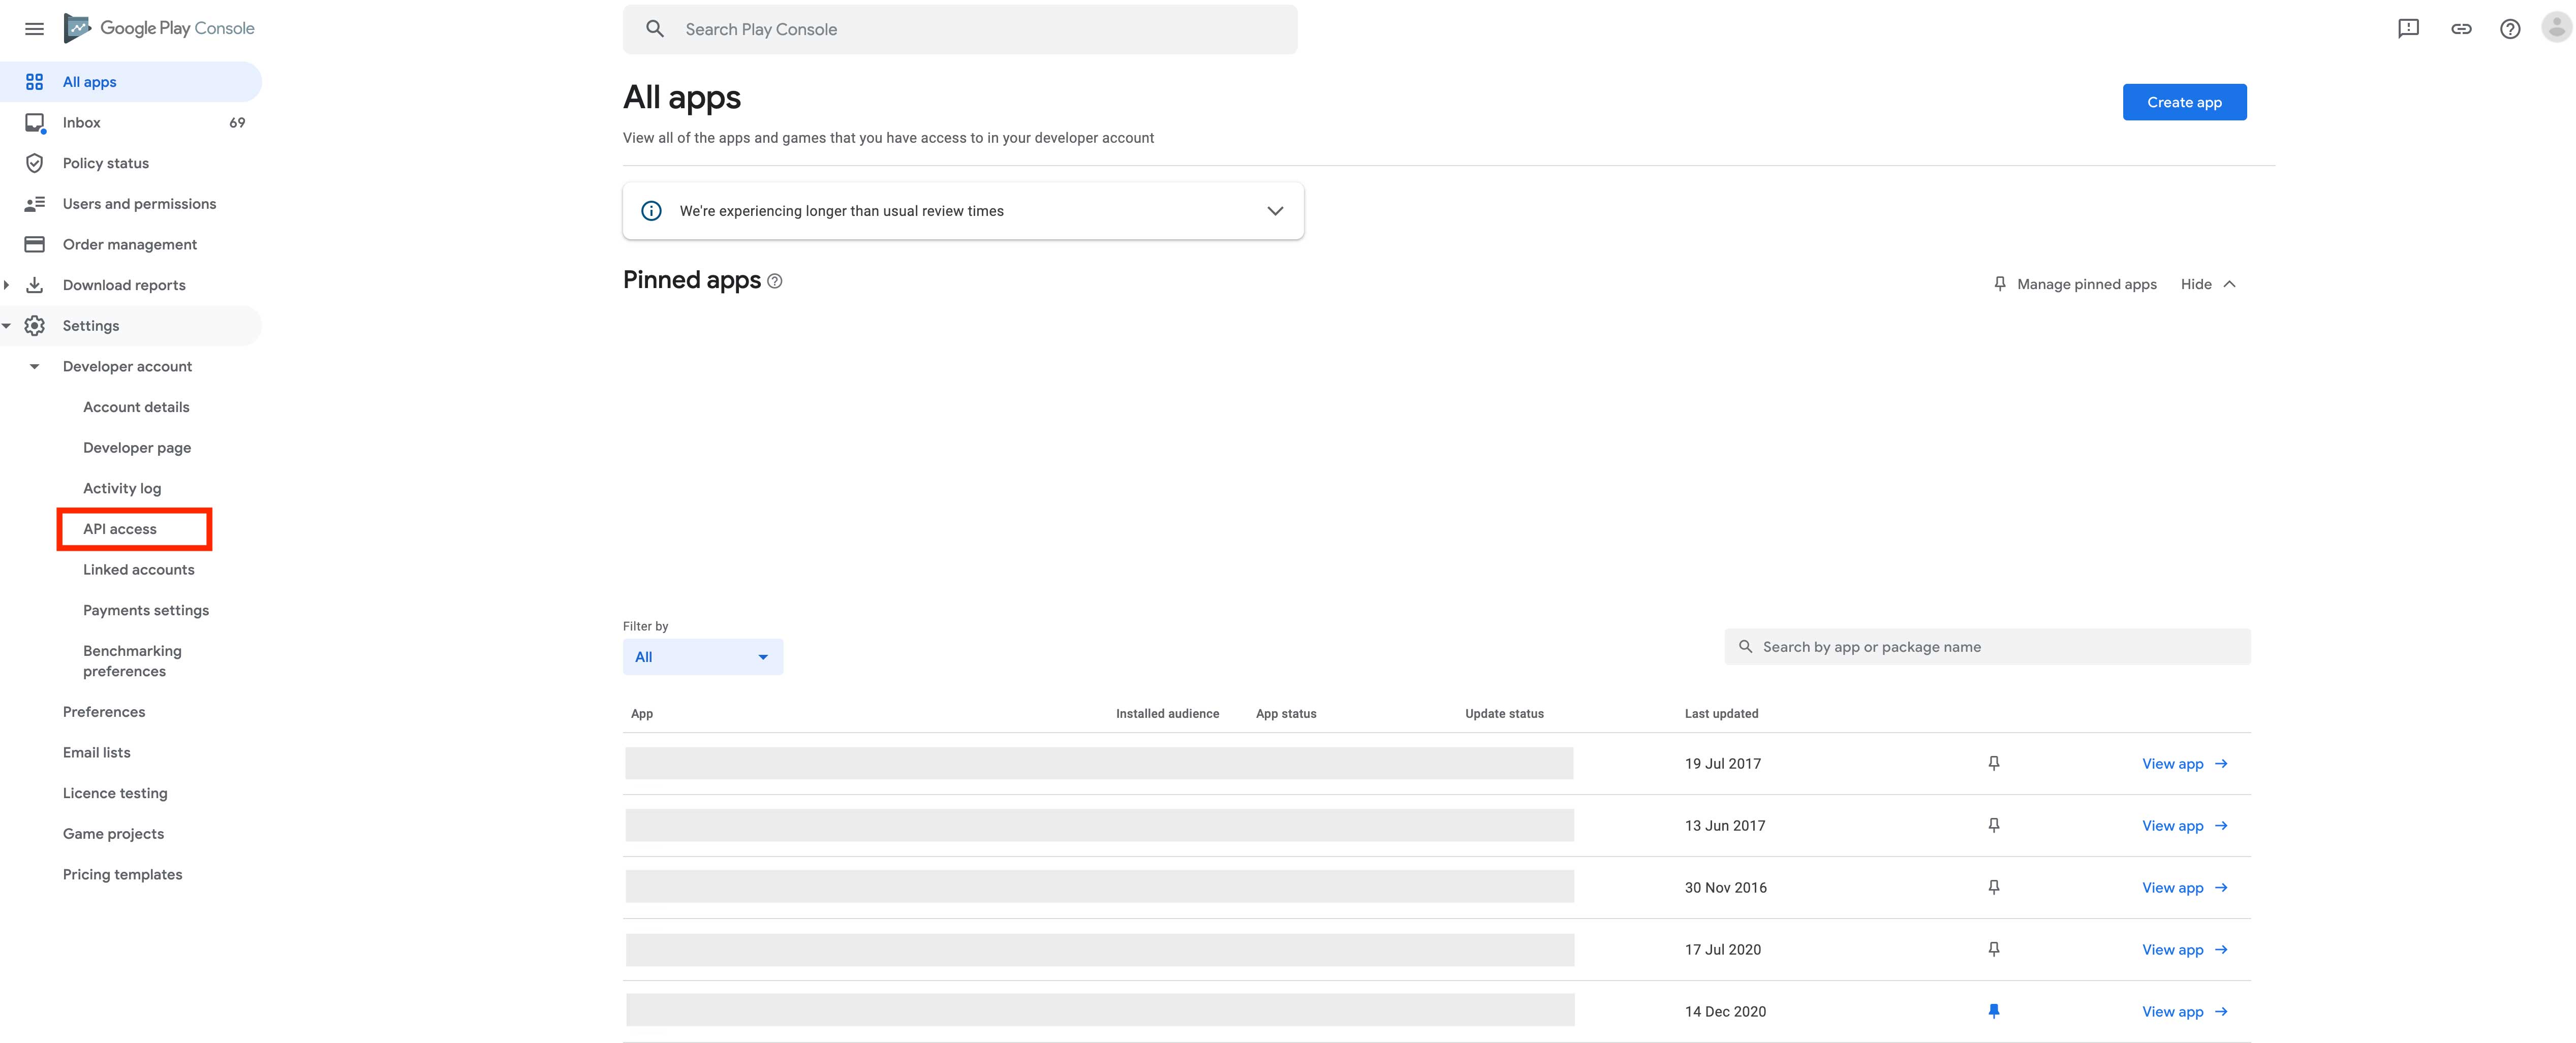
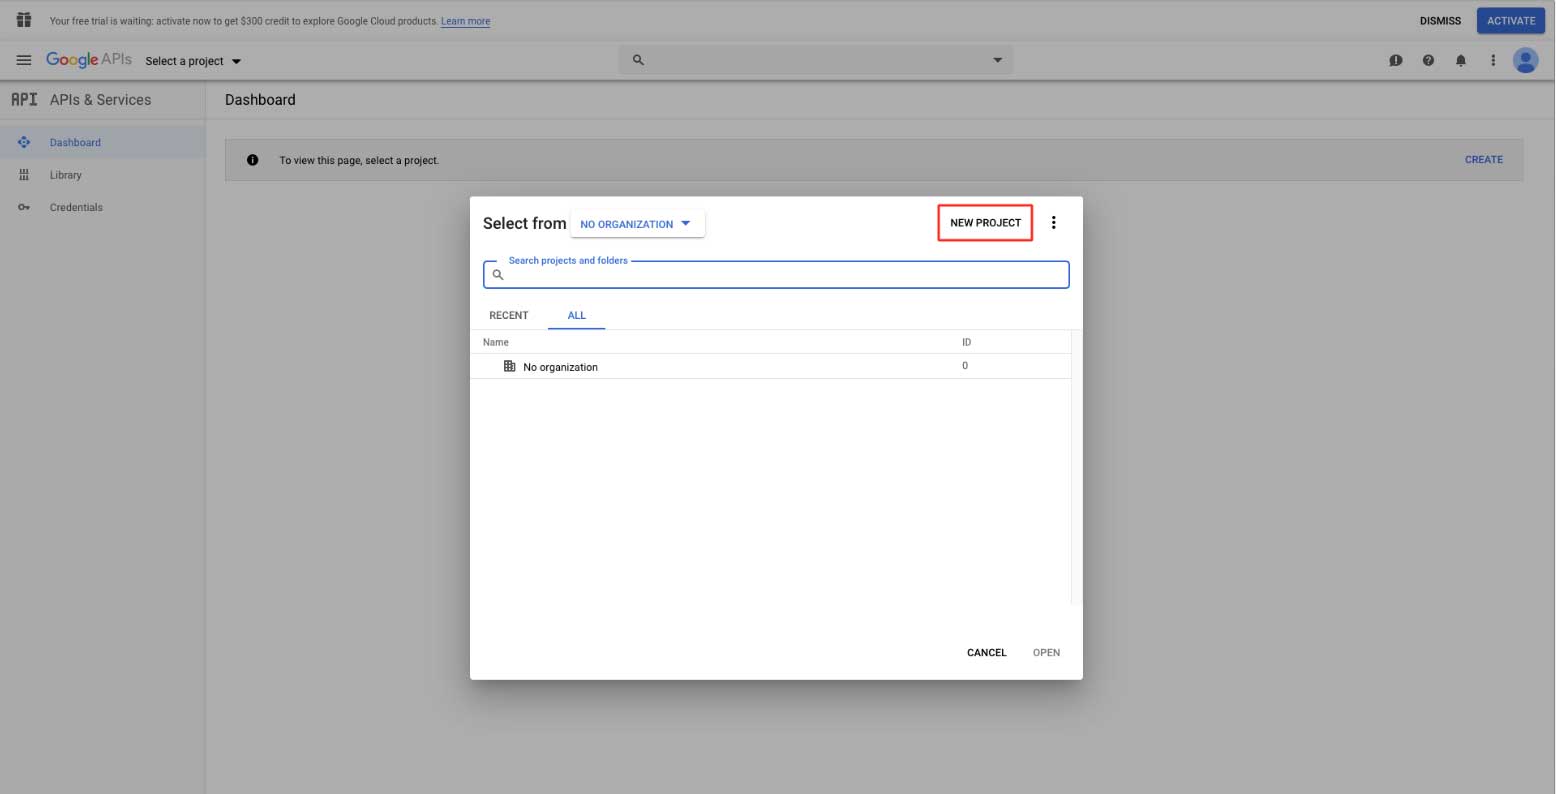
Step 29 : Select Link existing project or create new project.
Step 30 : Click on the Project dropdown menu.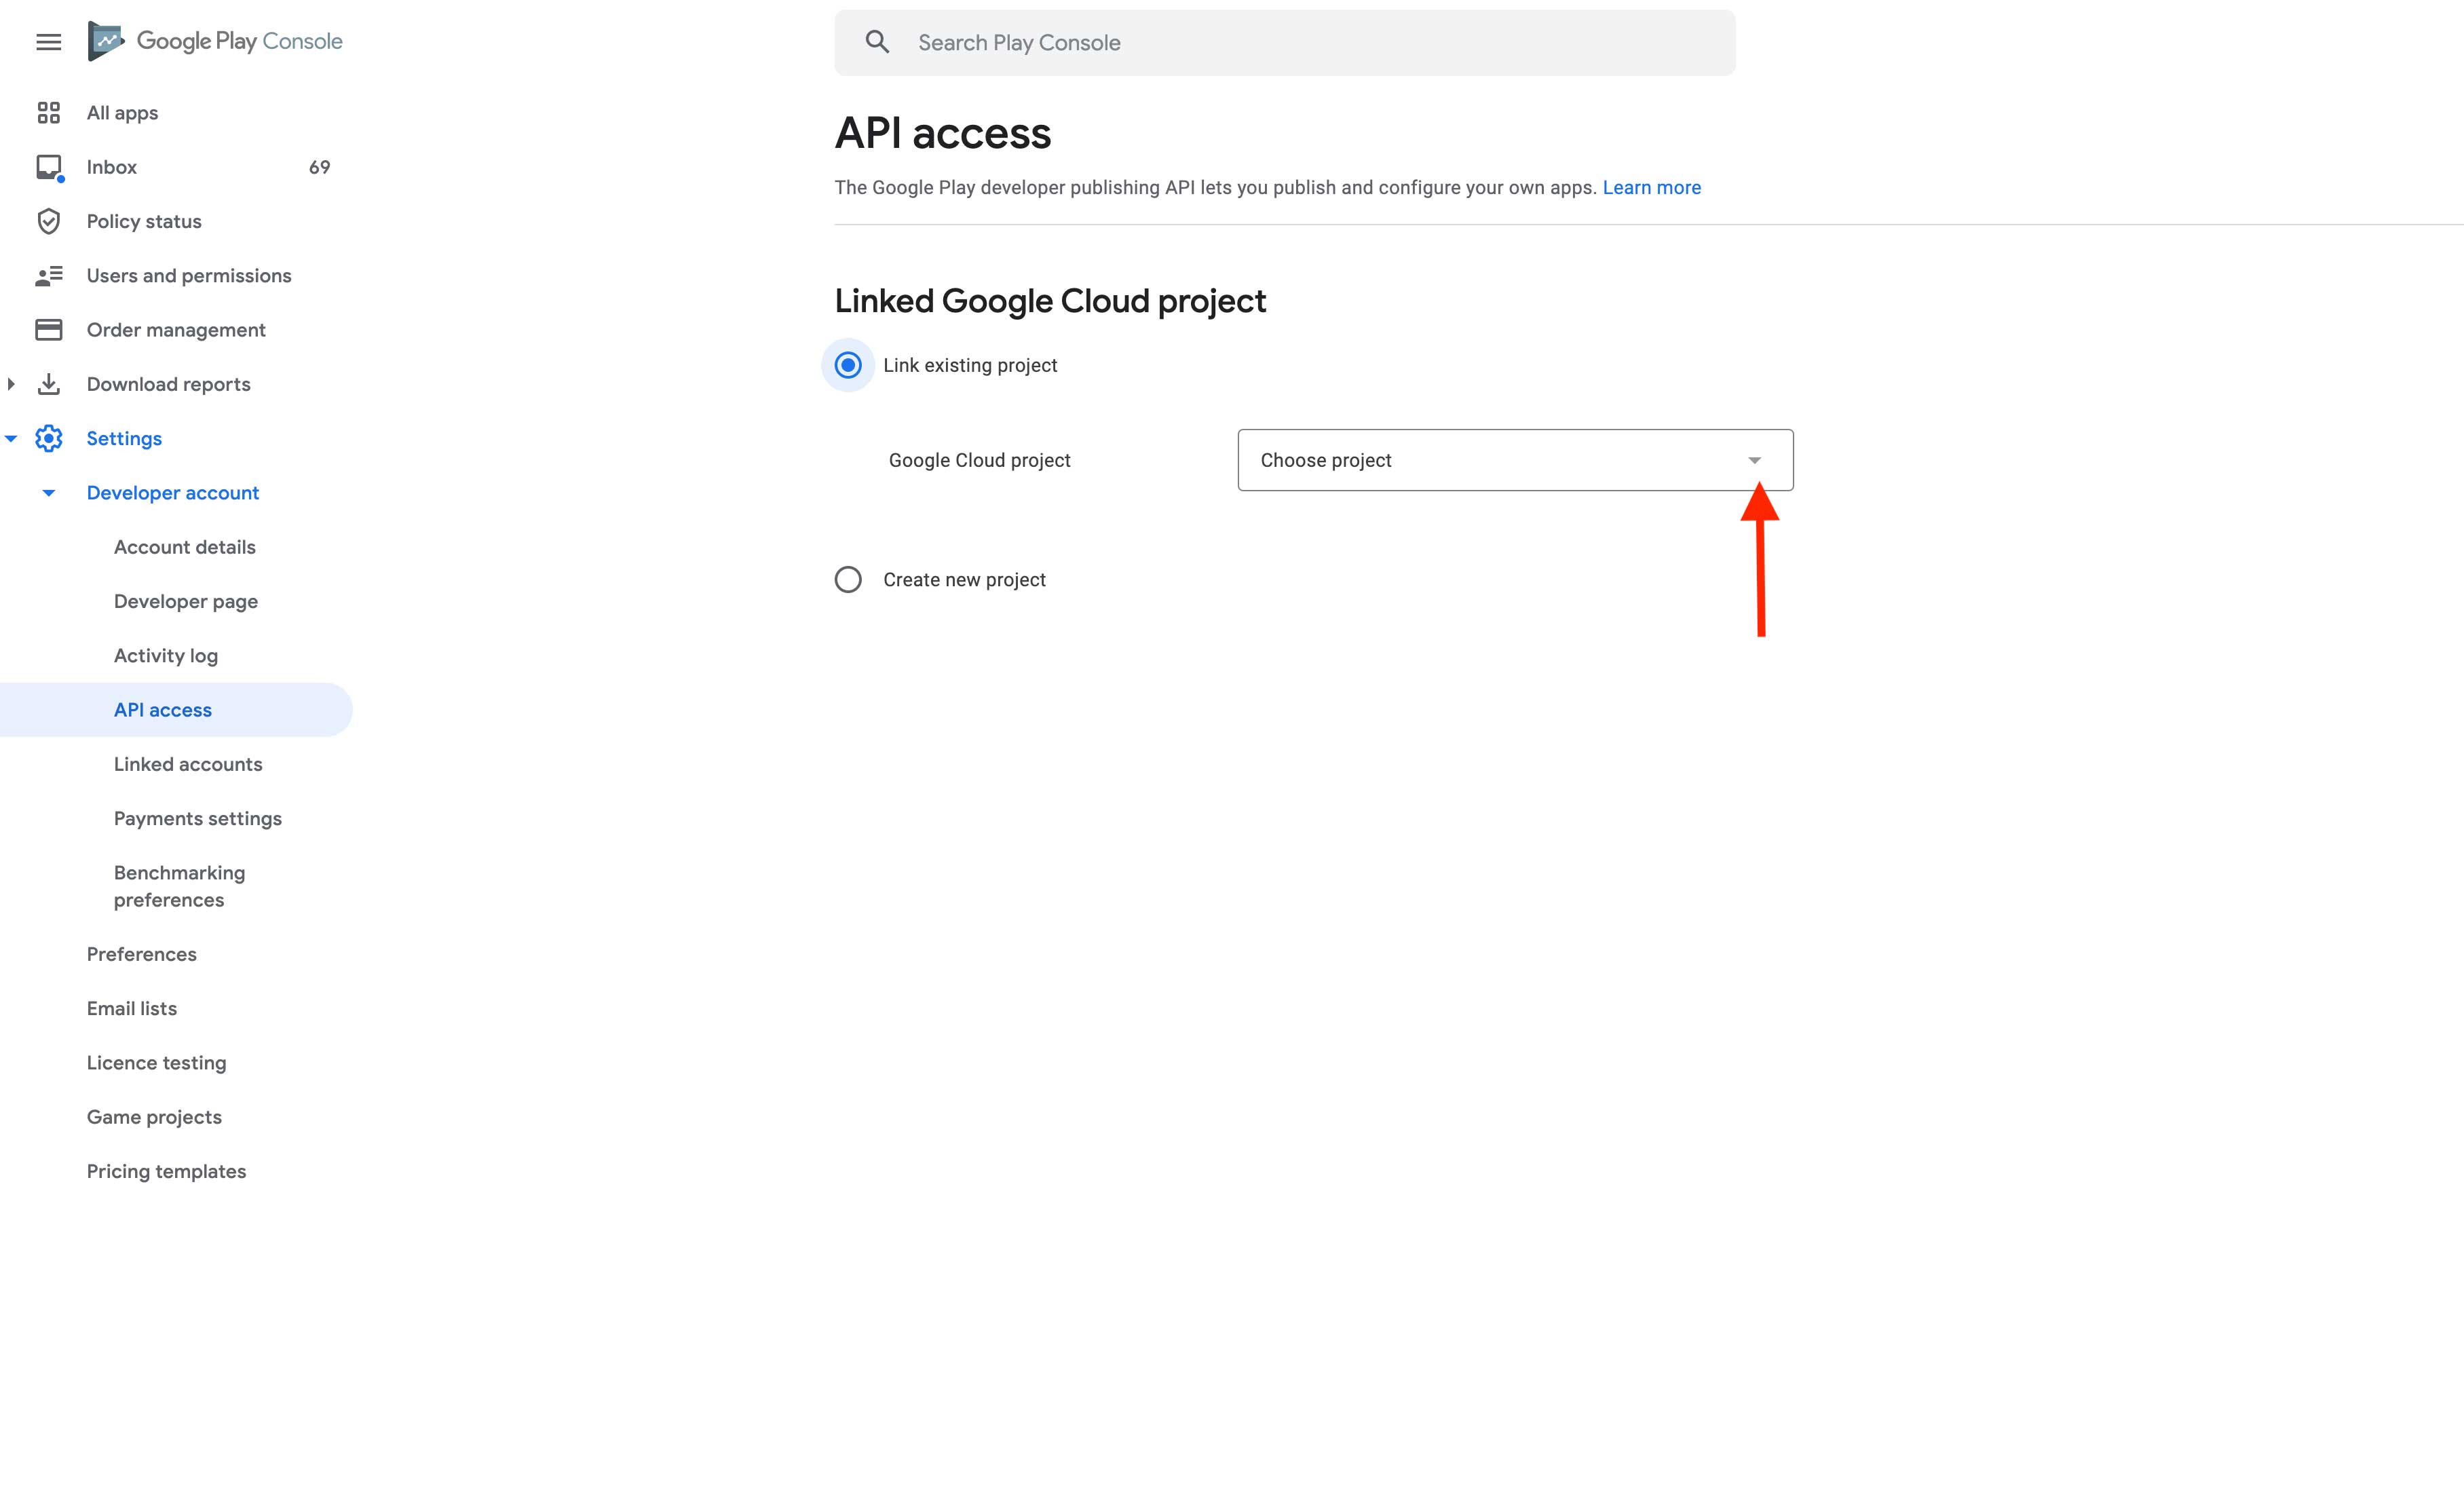
Step 31 : Select the project to be linked.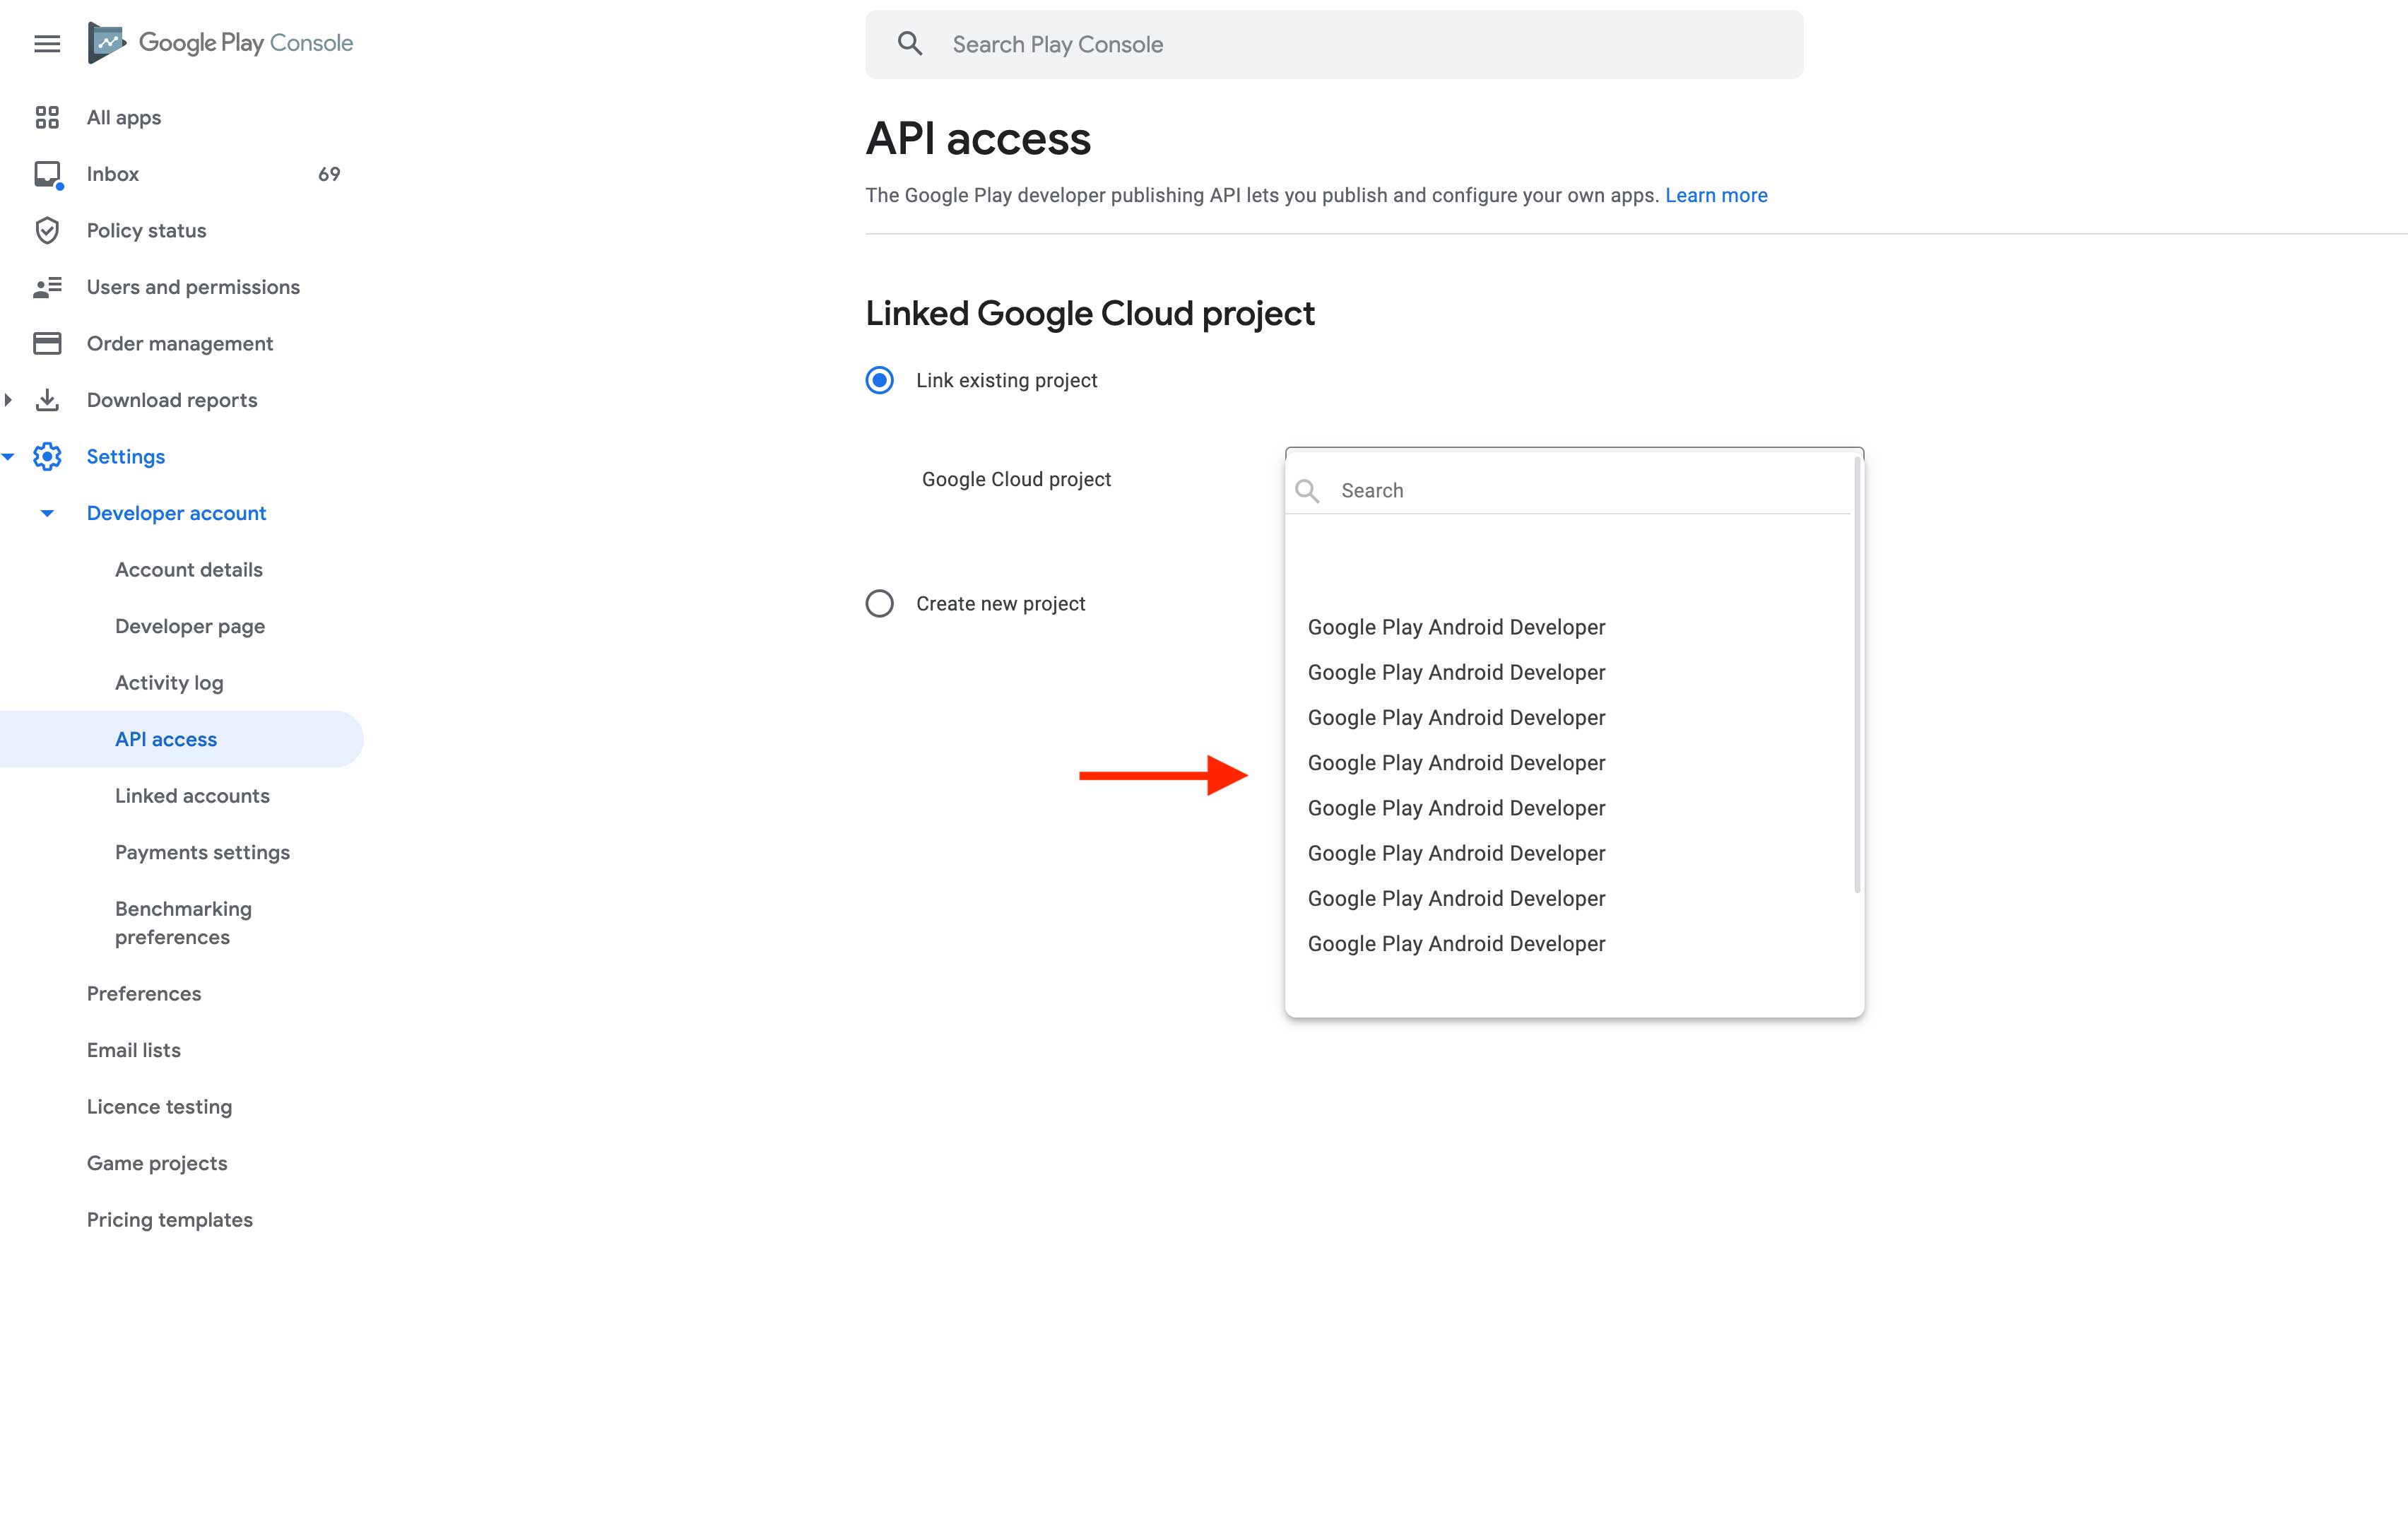
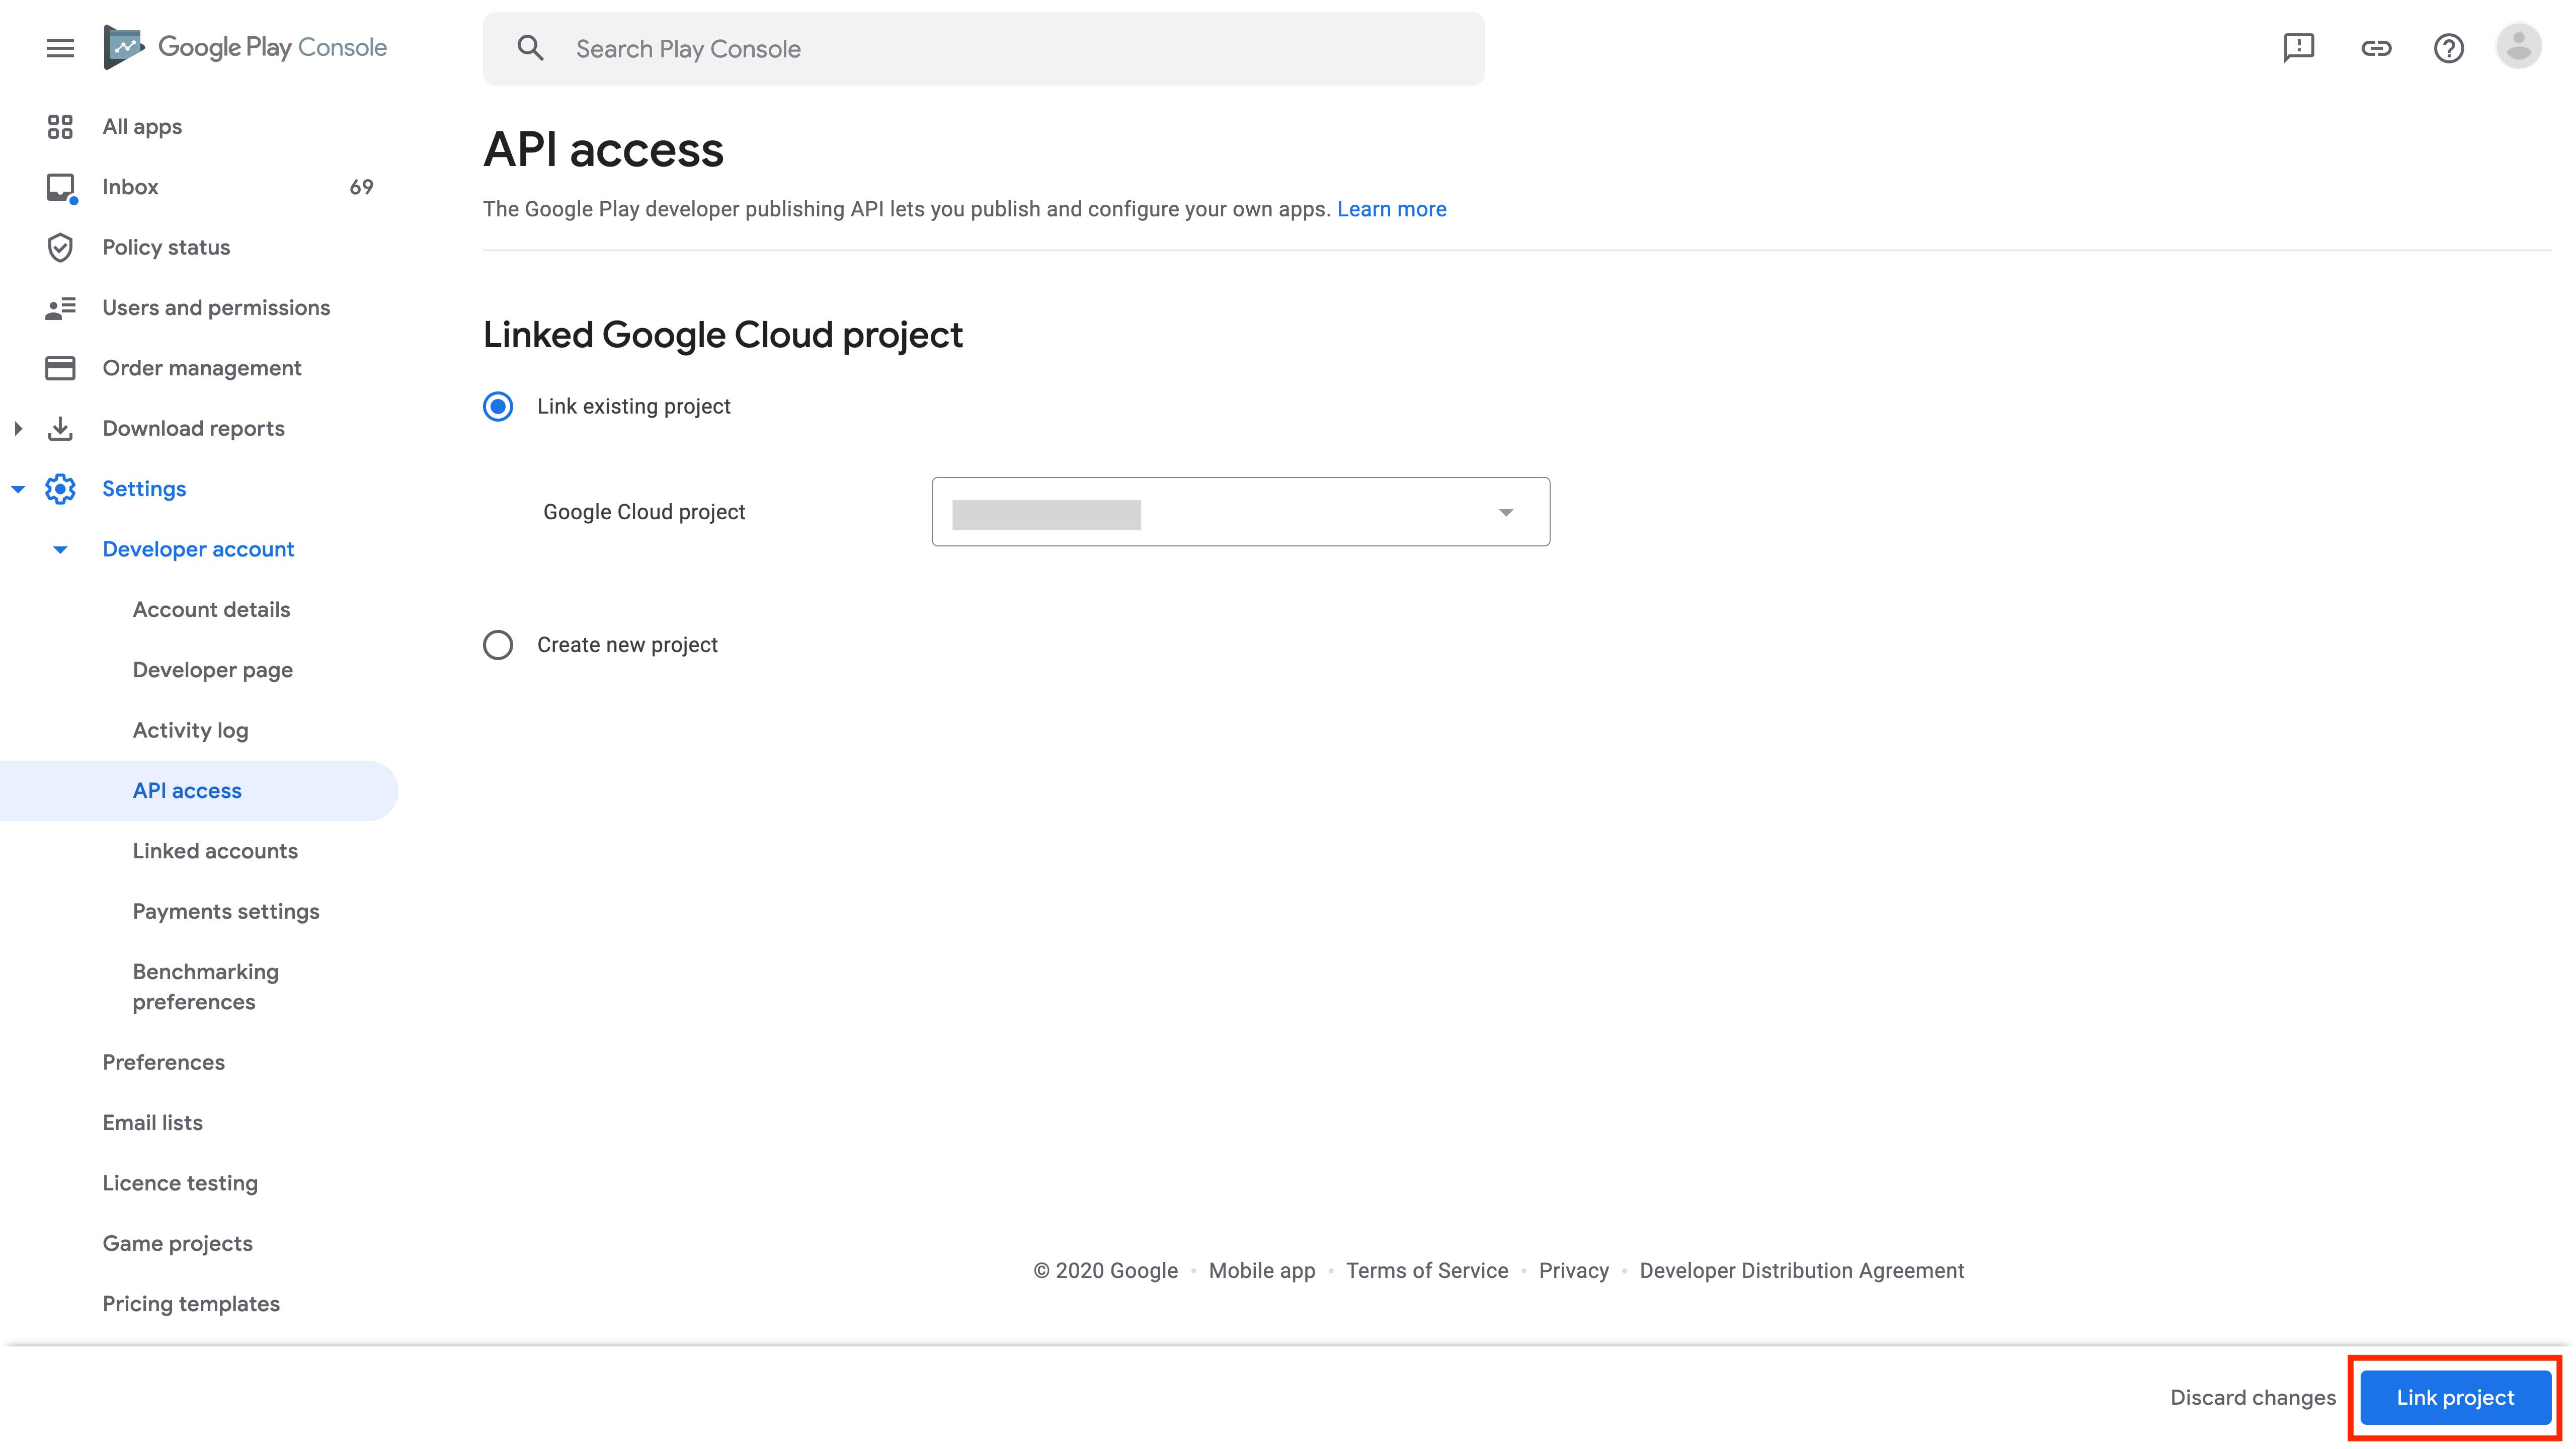
Step 32 : Once you have selected the project, click on Link Project.
Step 33 : Here you will see the project has been linked. You can also unlink the project.